A Lattice Screen to Hide My Gardening Supplies and Grow Clematis

Back in August, the Garden Bloggers’ Design Workshop at Gardening Gone Wild focused on Trellises and Screens. I didn’t get around to contributing at that time, but one thing that Nan wrote in the wrap-up compelled me to add something to the conversation.

~

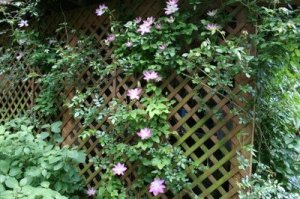
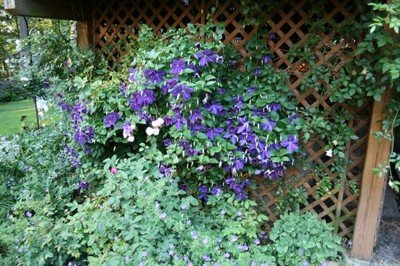
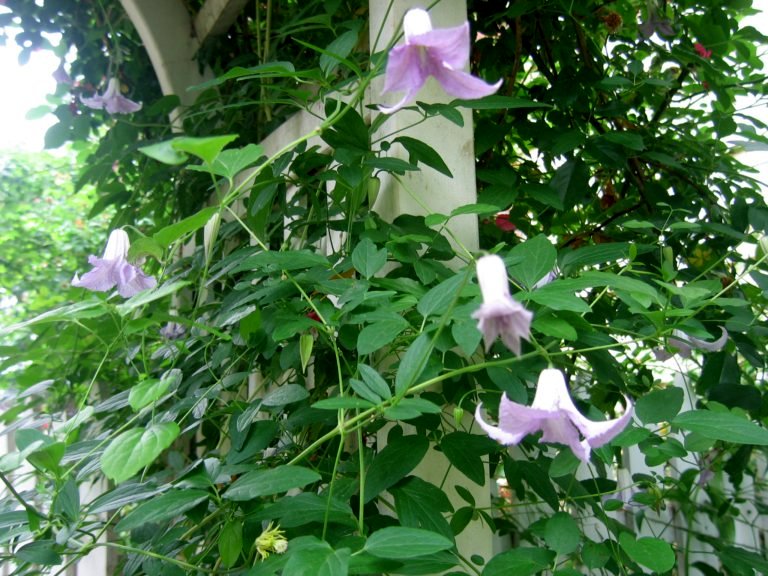
Nan writes: “One issue brought up in a comment but not addressed by many posts was about trellises that work well for clematis…I’ve never had much luck with purchased supports for clematis…” Well, in hopes of providing some encouragement, here are two pictures of the lattice screens beneath my deck (that hide my gardening supplies and tools) with some very happy clematis. The pink one is Aseo and the purple one is Jackmanii.
~
*****
~
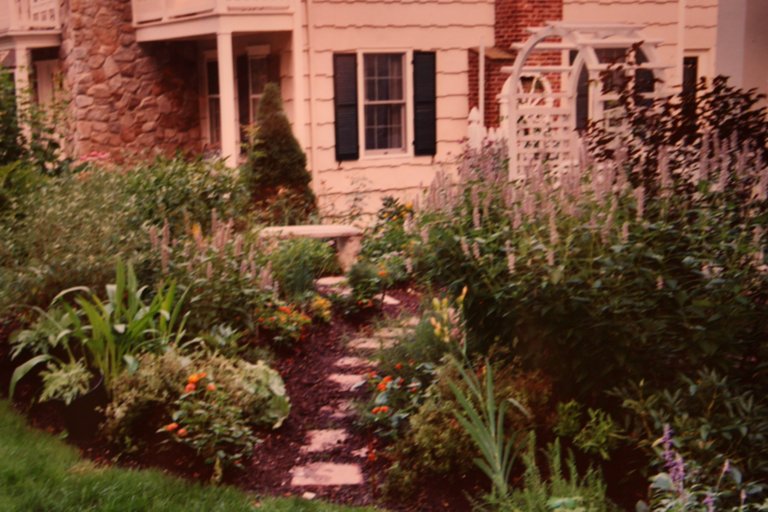
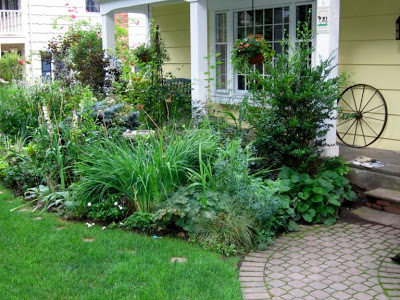
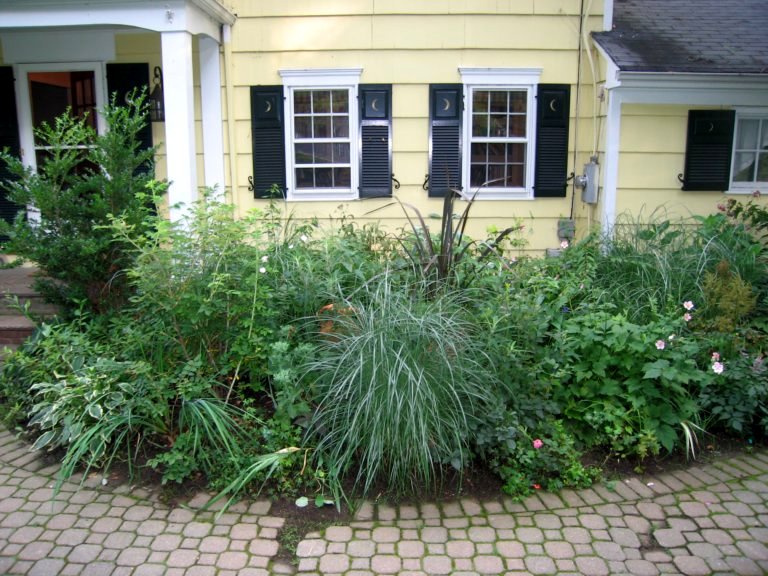
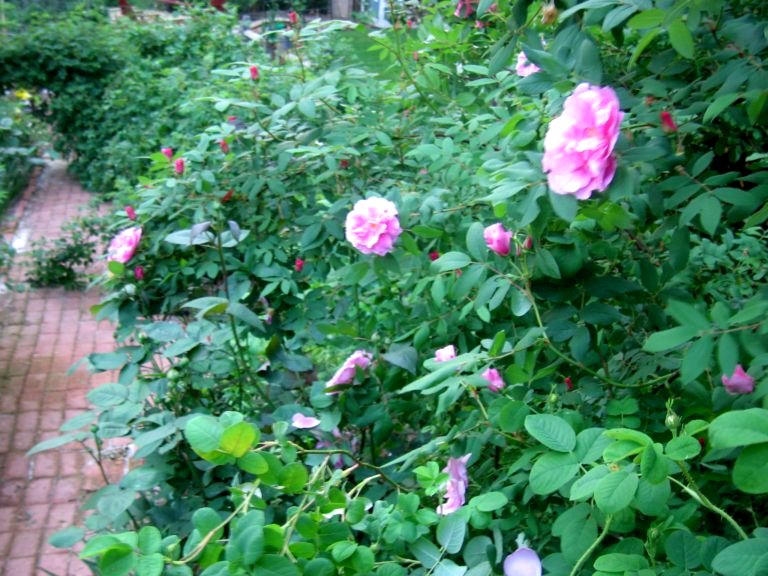
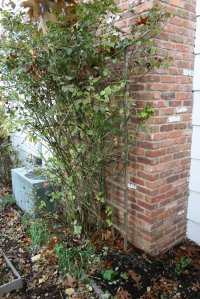
In addition to those beneath my deck, I have trellises and screens in two other parts of my garden: (i) in the Cutting Garden next to the chimney (pictured below) which provides a place to grow the vigorous rose Complicata and (ii) on the deck in containers to provide privacy from the next door neighbors on which I grow annual vines (this year, I grew Moon flowers).

Garden Bloggers’ Design Workshop: Stone in the Garden

I love stone in the garden. It is the perfect complement to all of my plants. As a part of this month’s Garden Bloggers’ Design Workshop over at Gardening Gone Wild, here is a brief post about how I have slowly replaced man-made materials with stone throughout my garden.
~
1. The Bluestone Paths, Stairs, and Walls. If you garden on a hill, a stone staircase cannot be beat for practical and aesthetic reasons. They are beautiful and maintenance free. Compared to the small staircase of railroad ties that I have in a less prominent part of the garden, the stone staircase is much more attractive and will never need to be replaced.

~
As I wrote in a post last month, I have just completed a four year project to redesign my Front Border. The most dramatic change was to replace the relatively unattractive and uneven man-made path of interlocking pavers with a continuation of the bluestone paths and stairs on Goldberry Hill. I am so pleased with the outcome, I only wonder why it took me so long to do it.
~
2. The Pebble Path. I love pebble paths, but it is difficult to have them when you live and garden on a slope, as I do.
~
The one path that is relatively flat is the one through the Egg Garden, where I replaced some terra cotta stepping stones with pebbles. When I look back at the posted before and after pictures, I can’t believe how much better the pebbles look.
~
When I first conceived of the path, my first choice was the grey pea gravel that you see in all of those English gardens, but my local nursery was out of stock. As an alternative, I selected yellow river stones, with which I have been very pleased.
~
3. The Dry Laid Walls of Native Stones. If you have ever visited my region of New Jersey, you will see orange rocks everywhere: on the sides of the road, on the edges of properties, and even on the edges of garden beds. Every time I try to dig a hole, they are waiting for me: small, medium, large, and even giant-sized orange rocks. And unlike those beautiful, grey rocks that can be handsomely stacked into walls, these rocks are so unshapely that it’s impossible to dry lay them more than one or two layers high, which is exactly what I did to create the walls in my Walled Garden.
~
Two end notes: First, if you want to see a garden with a lot of beautiful stone, check out fsorin’s inspiring post on Gardening Gone Wild. Second, have you ever wondered where all of the bluestone comes from? There was an interesting article last week in the New York Times about some of the local tri-state area quarries.
~

Garden Bloggers’ Design Workshop: Heirloom Gardener’s Four Year Makeover of Her Front Garden – How to Improve Boring Suburban Landscaping

April’s Garden Bloggers‘ Design Workshop on Front Yard Gardens is very timely for me seeing that my spring project was to complete the four year redesign of our front garden, which is made up of the Front Border immediately in front of the house and, standing in front of the house to the immediate left, the Egg Garden.

When we moved into our house, the front garden had the usual foundation plantings: evergreen trees and shrubs with two flowering trees for color. It was dull, static, and uninspiring. The first three pictures show the front border before I began replanting it.
.
.
.
.
.
.
.
.
.
.
.
.
.
To my neighbors’ amazement, I proceeded to take out the whole thing and replant it myself. The first year, I replanted the existing borders and created the Egg Garden. The existing borders had three problems: they did not change with the seasons–summer looked the same as fall and spring, and winter was only slightly different; some of the plants had grown so large that they covered windows and were out of proportion with the house; and the borders needed very little maintenance which meant there was little gardening to be done.
~
I started by removing the large problem plants: the huge rhododendron which was out of proportion with our two-story colonial, the two amorphous evergreen cones flanking the front door, and a weeping cherry which obscured the windows of the library. Then I took away anything that was poorly suited for the site, like the leucothea in full sun, or that did nothing for the border, like a deformed Ceris ‘Forest Pansy.’ Next, I improved the soil by adding four inches of mushroom compost. Finally, I began replanting with small trees, shrubs, perennials, annuals, vines, grasses, and bulbs. I also added a bird feeder.
~
The Egg Garden was created almost entirely from the space that was formerly occupied by the rhododendron and is bordered in the back by the fence and arbor that enclose the Cutting Garden. Small six-by-six stepping stones through the grass connected the front walkway to larger, but not large enough, twelve-by-twelve inch stepping stones through the Egg Garden to the Cutting Garden.

.
.
.
In the second year, I expanded both the Front Border and the Egg Garden, and spent time planting both more densely. I also decided to remove the bird feeder which seemed more appropriate in the backyard. In its place, I installed a tutuer on which I decided to grow the rose Lavender Lass and clematis Blue Bird and Francesca.
.
.
.
.
.
.
.
.
.
.
.
.
.
.
.
In the third year, I added a large pot and a semi circular boxwood hedge in front of the library, to give that area definition and a focal point. In the Egg Garden, I widened the path and replaced the twelve by twelve inch stepping stones with loose gravel. As always, I looked for ways to expand the floral display with more bulbs, clematis, and annuals.
.
.
.
.
.
.
.
.
.
.
.
.
.
.
.
This year, I am completing the final phase of the front border renovation. I replaced the old path of brick pavers with a wider one of irregular blue stone to compliment the other stone work in the garden. I also continue the blue stone stairs on the other side of the driveway. Previously, the steps took you from the mailbox to the driveway through Goldberry Hill. From there, you were expected walk down the driveway and then onto the entrance of the path leading to the front door. No one did this, not even me. One of the cardinal rules of my garden is that there should be paths where people walk.
~
Further on, in place of the small six by six inch stepping stones that connected the front path to the Egg Garden, there are now more appropriately sized two by two foot blue stones. Throughout, I chose irregular blue stone pieces to harmonize with the less formal plantings.
~
The borders in the front were also to be expanded to flank each side of the new stairs. I wanted continuity in plantings around the new steps and those already there, so that it would not be obvious that they were installed at two different times. I chose to use the same plants or plant types so that the steps would echo each other.
~
The project is just about complete now. I will have to see how the plants grow in before I add more to the new plantings. In the fall, I will plant more spring blooming bulbs.

Maintaining a Pebble Path and Keeping the Groundhog Out of the Cutting Garden

It was a wonderful day in the garden. The weather was warmish in the sun and there was very little wind. My husband and I worked today on the path in the Egg Garden that leads to the Cutting Garden. First, we added more pebbles–ten fifty pound bags or river stones–which is an annual necessity to maintain a good looking pebble path. Then, we replaced the temporary groundhog deterrent I had put down last year at the gate.

In the Cutting Garden, I grow some of the groundhog’s favorite foods: Queen Anne’s lace, purple cone flower, and phlox. Knowing this, when I created the Cutting Garden, I dug around the border of the fence about two feet deep to install a chicken wire barrier which the groundhog couldn’t get through. You can see some of this chicken wire sticking up out of the earth in the picture above.

However, one spot was left without the barrier: the area where the gate goes into the garden. It took a few years, but the groundhog, who lives next door, discovered last year that he could dig under the gate. Looking for some immediate protection, I simply pegged a piece of chicken wire on the ground under the gate extending one foot on each side. I suppose he found enough food elsewhere that he didn’t take the effort to dig underneath this barrier, but it had two problems: it was not attractive and it easily caught on the gate or your foot as you passed through.

Our project today was to replace the temporary chicken wire with three rows of six by six inch terracotta blocks that we were using for stepping stones in other places in the garden. While digging the space for the new barrier, I discovered more terracotta blocks and chicken wire that I must have buried in an earlier attempt. We placed the new blocks level with the fence (almost touching) over all the existing material for extra protection.

I don’t know why it took me so long to do this. Everything looks a lot neater now and I will no longer have to worry about tripping as I leave and enter the garden.
~
For a picture of the groundhog barrier around my vegetables, click here:
http://heirloomgardener.blogspot.com/2007/12/raised-vegetable-beds.html
~
For a prior post on the path to the Cutting Garden, click here:
http://heirloomgardener.blogspot.com/2008/01/egg-garden-path-makeover-replacing.html
~
For a prior post on keeping deer out of the backyard, click here:
http://heirloomgardener.blogspot.com/2007/12/keeping-deer-out-of-backyard-deer-fence.html

Front Border in Summer & Plan for the New Path

To help me plan for this coming gardening season, I am going through some of my pictures from last year. Here are some of the Front Border from last summer. The Front Border is a mixed border.

One of this year’s projects will be to fix the path that runs from the driveway to the front door. The path has two problems. The first is that some of the stones that make up the path have started to sink and the path is becoming hazardous to visitors. This is a relatively minor problem compared to the second. The second problem is that the path is in the wrong place. From the street, you walk down the steps through Goldberry Hill. At the bottom of the steps, you want to walk directly across the driveway, across the grass, and to the front door. This is where the path should be. Instead of this route, the path requires you to make a right turn down the driveway about twenty feet and then a sharp left turn around the light post (you can see this in the last picture).

The solution will be to create the direct path that does not exist with a continuation of the steps and stones that already exist on Goldberry Hill. You can see the steps on Goldberry Hill here: http://heirloomgardener.blogspot.com/2008/01/gardening-on-hill-goldberry-hill-in.html

Follow-up post: Heirloom Gardener’s Four Year Front Garden Makeover, including pictures of the new path


Two Perfect Flowering Plants for Arbors: Betty Corning Clematis and Dortmund Rose

My favorite of all plants to grow on an arbor is the heirloom clematis ‘Betty Corning.’ I have only two arbors in my garden–they both have Betty Corning. My hope is to install additional arbors to the Bird Garden and the Walled Garden. These too will have Betty Corning.

I love this clematis because of its scent. It has a lovely, sweet scent that hangs in the air just as you pass through the arbor. The scent is never cloying. It’s like the perfect perfume that you catch a hint of as someone passes by you.

Betty Corning is also very easy to grow. It is classed in the viticella group which means at the beginning of the spring as the buds swell you cut down last years growth to the first two to three buds. I fertilize my clematis liberally with fish and/or seaweed emulsion during the growing season which produces lots of strong growth and lots of bell shaped flowers. I purchased Betty Corning from Chalk Hill Clematis.

With Betty Corning grows the heirloom rose ‘Dortmund.’ This is the most asked about rose I grow. It catches everyone’s eye with its large, single red blossoms covering the arbor and itself in June. When it flowers the arbor isn’t seen nor are Dortmund’s glossy, disease resistant leaves. Dortmund is a repeat bloomer, but blooms most prolifically in the early summer and fall. Last year I didn’t get around to deadheading Dortmund, but as a result I got a bumper crop of hips to use for winter arrangements. For pictures of the hips, click here: http://heirloomgardener.blogspot.com/2007/12/dortmund-rose-hips.html

I purchased Dortmund from Antique Rose Emporium. Dortmund covered the arbor within a season, however, it is what I would call a well mannered climber–it never gets out of hand by too much exuberant growth for an arbor. With Dortmund though, you must be vigilant about tying in its canes to the arbor as it has very large curved thorns. Also, wear long sleeves and good, thick gloves for the yearly pruning in March.

This post was inspired by Gardening Gone Wild’s Garden Bloggers’ Design Workshop on Arbors and Pergolas: http://www.gardeninggonewild.com/?p=599

The Egg Garden Path Makeover: Replacing the Terra Cotta Stepping Stones with Pebbles

One of my goals for this upcoming gardening season is to improve my paths. Below are before and after pictures of last year’s path makeover in the Egg Garden.

Previously, the path was 18-24 inches wide and was made primarily of twelve inch square terra cotta stepping stones. This didn’t work because the path was too narrow and the stepping stones were sinking into the earth. To create the new path, I first moved some plants (mainly self-seeders) to widen the path to 24-36 inches. Second, I simply added pebbles over the old terra cotta stepping stones. In order to cover the entire area, I probably used 10-12 fifty pound bags of pebbles and will need to add 2-3 bags to refresh the path this spring. The new path is now more functional, as well as more attractive.

For more ideas on gardening paths, there is a great Gardening Gone Wild Garden Design Workshop on paths here: http://www.gardeninggonewild.com/?p=457

For more on the Egg Garden, click here: http://heirloomgardener.blogspot.com/2008/01/egg-garden-in-summer.html

The Rose Garden in Spring & Summer; Daffodils Replace Lavender Border

To help me plan for this coming gardening season, I am going through some of my pictures from last year. Here are two pictures of the Rose Garden from last spring and summer.

The first picture is from early spring before the roses bloom. Previously, the path was lined with lavender, but the lavender didn’t work. The purpose of lining the path was to provide interest before the roses started to bloom. The lavender looked great when I first put it in during the summer, but the next season I learned that it is one of the last perennials to wake up from winter–later than the roses themselves. Thus, I pulled out all of the lavender and replaced it with daffodil bulbs. As you can imagine, the daffodils looks much better in spring than the lifeless lavender. The second picture is from late spring when the roses have started to bloom.

The Rose Garden was created from a strip of previously unused lawn. The central brick pathway starts at the back of the Cutting Garden runs through the Rose Garden and ends at the Children’s garden. For more information on the creation of the Rose Garden, click here: http://heirloomgardener.blogspot.com/2007/12/creating-rose-garden.html


Q. What Do You Do With Rocky Soil? A. Make Dry Laid Walls

In honor of Gardening Gone Wild’s Design Workshop on fences and walls, here is a post about a rock “wall” my husband and I created.

In a prior post, I wrote about the disaster which befell us two summers ago when one of our oak trees fell after a storm and the tulip tree growing with it had to be removed subsequently:
This event not only ruined the shade garden I just planted, but also unearthed more rocks than you could believe. Further, the heavy machinery in and out of our backyard compacted the earth and made even more rocks visible on the surface. I always knew my property was rocky seeing that each time I dig a hole I come up with more rocks. But, what to do with so many rocks at one time?

In preparation of redesigning our backyard, I sketched on graph paper the outline of a central lawn bordered by different gardens and play areas for the children. Before finalizing the plan and laying the new top soil and grass seed for the lawn, we used the rocks to demarcate the future lawn and garden areas. It always helps me to transfer my plan on paper to the ground and adjust the plan according to what looks best.

Once we finalized these lines, we decided to relocate all of the now visible rocks from the tree and lawn areas for the safety and comfort of running and walking barefoot. It was at this stage that we decided to make the “wall” that provided a name for the Walled Garden.

We followed none of the rules of laying a dry laid wall, but simply stacked the rocks together in a line. It’s not as beautiful as New England’s dry laid walls, but its primitive appearance fits with the rest of our garden. All of the rocks have the distinctive orange coloring of all of the iron-rich earth in Chatham, New Jersey and the surrounding area.

For more on Gardening Gone Wild’s Design Workshop, click here:

http://www.gardeninggonewild.com/?p=466