
This month’s Garden Bloggers’ Design Workshop at Gardening Gone Wild is on Front Yards. This was one of the topics last year, and given what a common design challenge it is, they’ve decided to revisit it. Last year, I posted the saga of how I’ve continued to change my front yard garden from something that was once unremarkably suburban to a series of mixed borders. You can read that prior post here. For this year’s workshop, I thought I’d share some hard-earned lessons on a particular design challenge that I’ve faced, but is not usually addressed in gardening books or magazines: the downward sloping front yard garden.
.
If I tell you that I live on a hill, then you probably imagine a house on the top of a hill. If you don’t have a flat front yard, it’s more likely that you have an upward sloping one. But what if you have a downward sloping one? How can you make it as beautiful and as inviting as any other? Here are some of the design elements that have worked for me:
.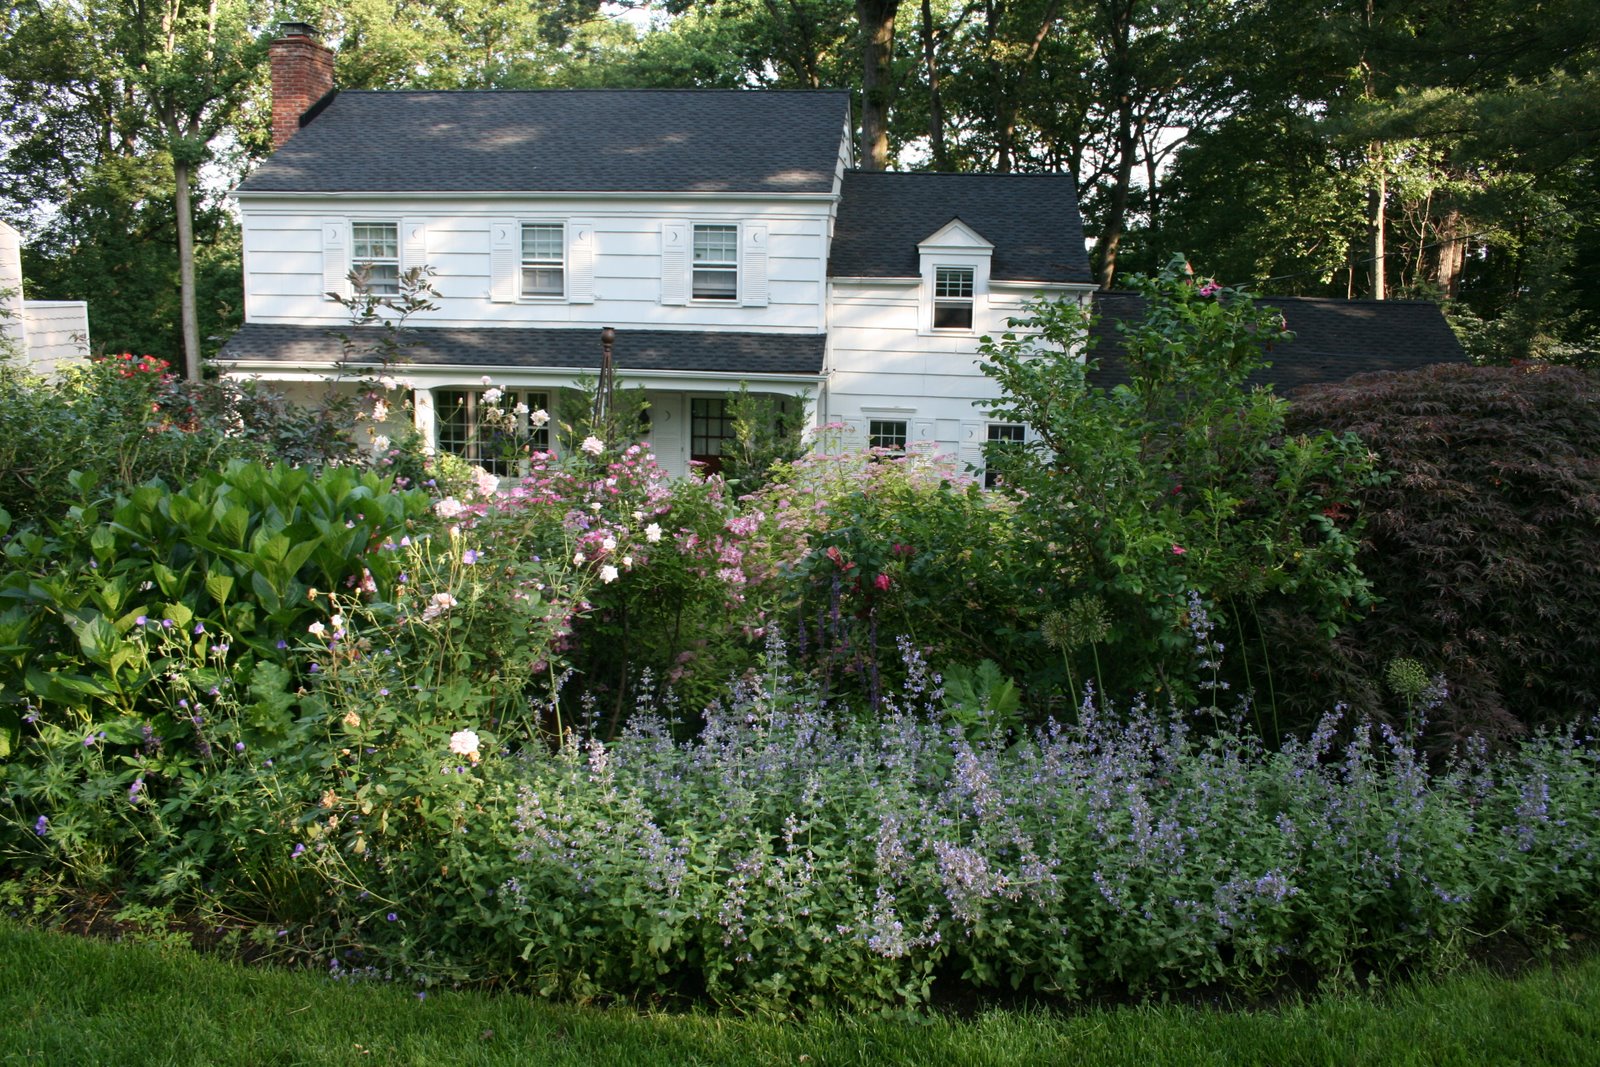 1. Add a street-level garden to beautify your neighborhood and add some privacy. While I can appreciate a beautifully manicured lawn, it just doesn’t provide the same effect when you live on a downward slope. I have a small section of lawn between the street and a mixed border, which is the top of a garden that extends down the slope to the driveway, called Goldberry Hill.
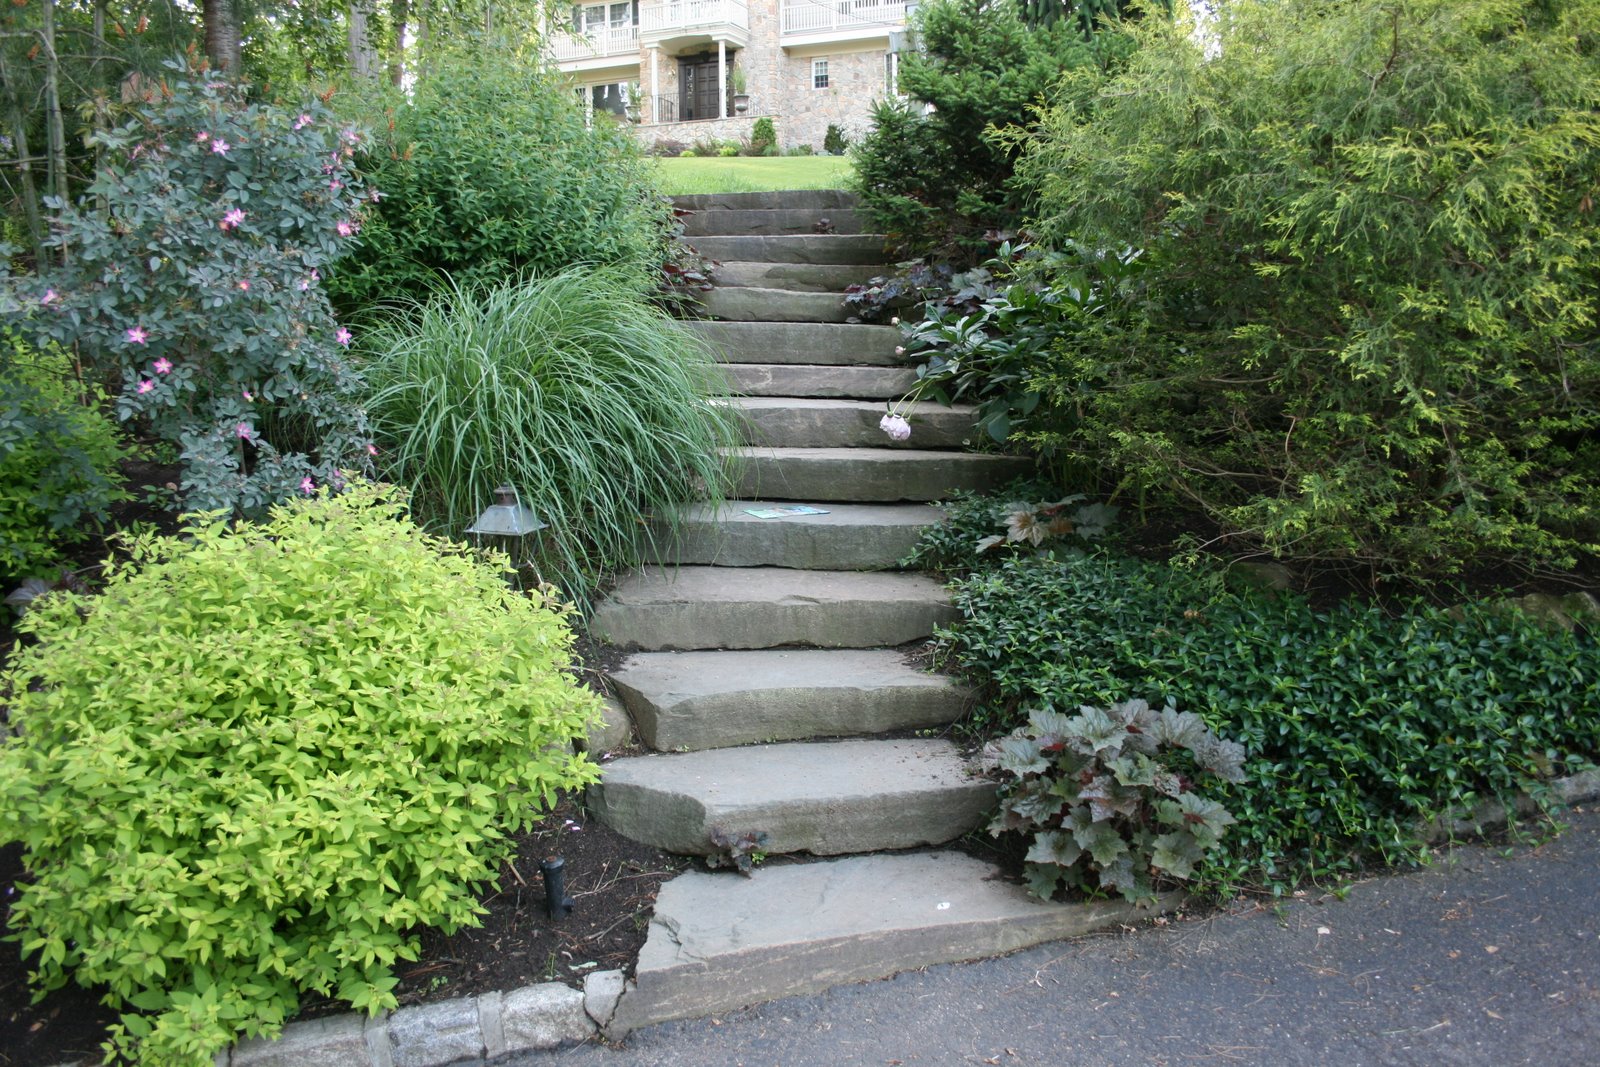
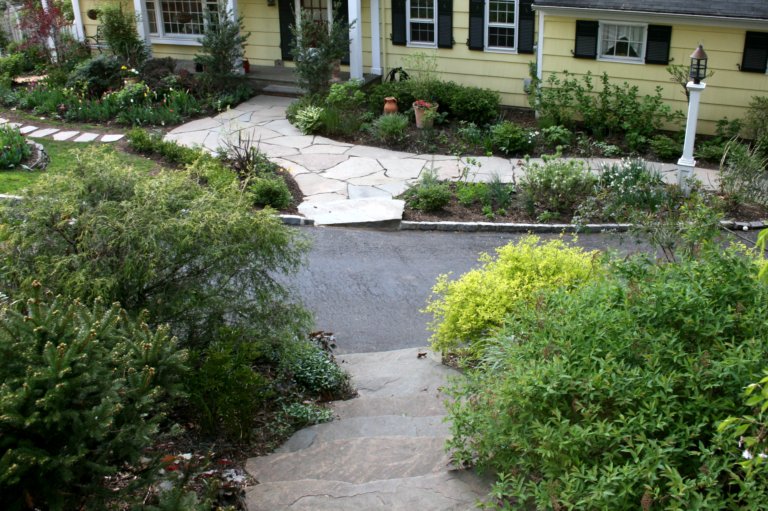
.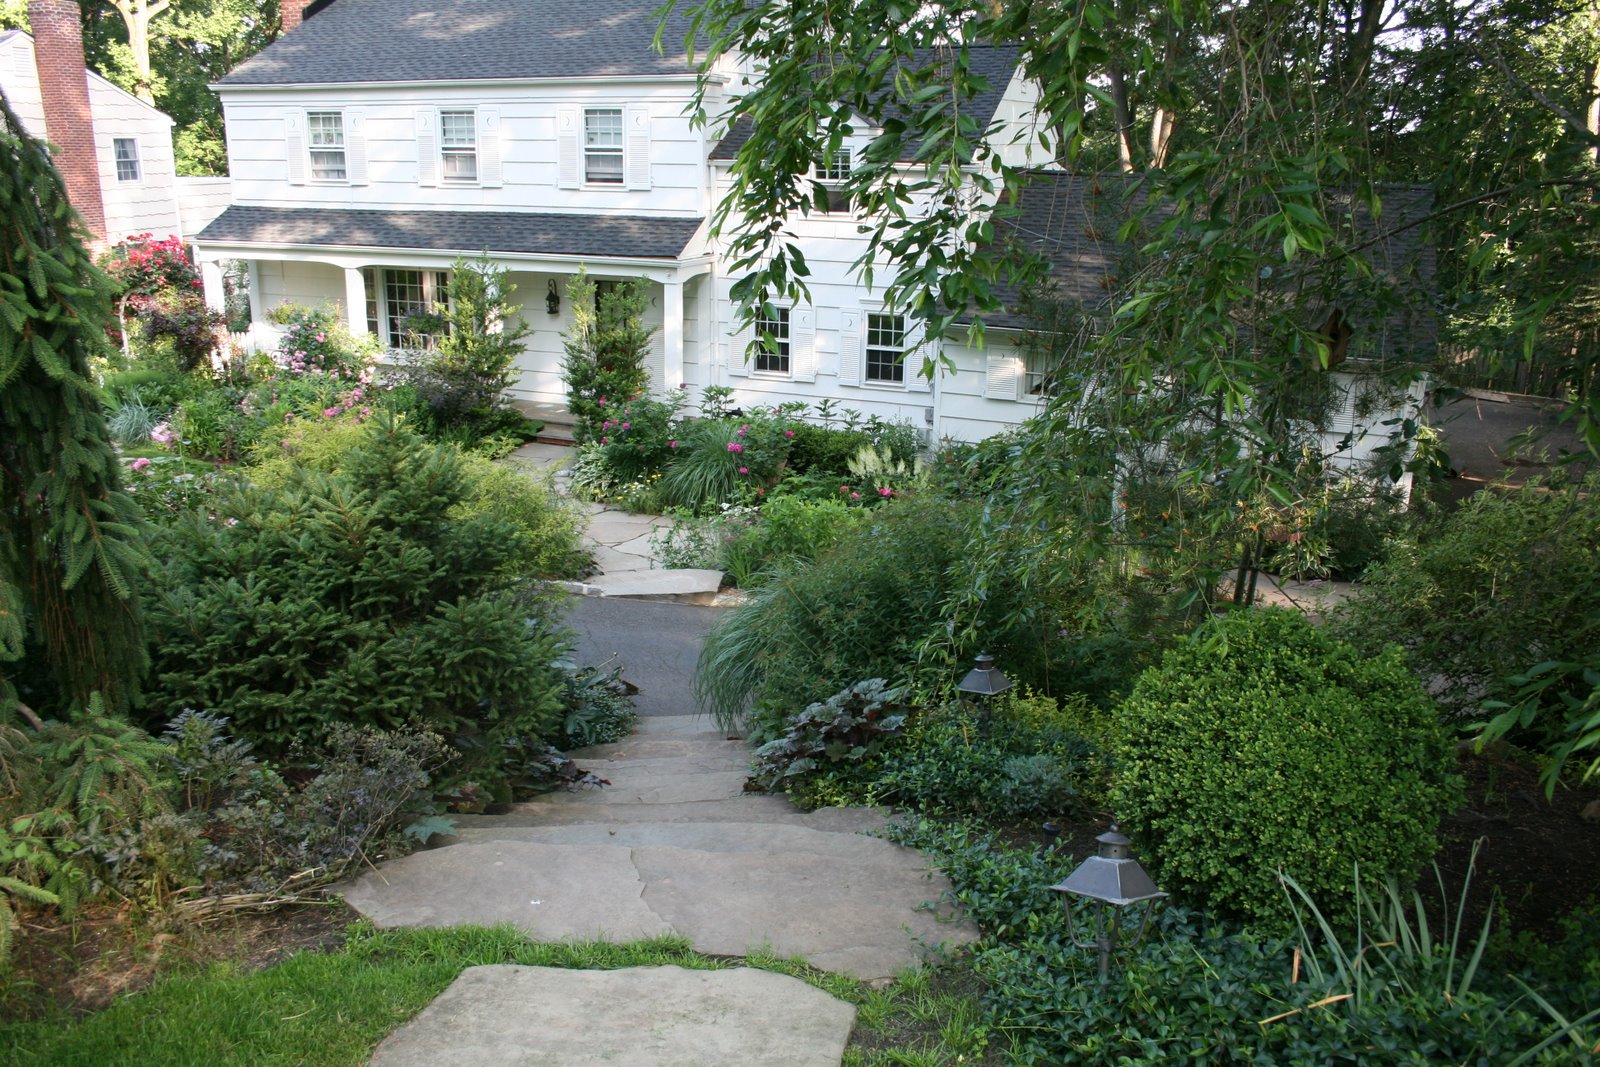 2. Add a staircase to your front door. An important element for all front yard gardens is to be welcoming to visitors. One of the best ways to do that is to make it an easy and obvious way to get to your front door. When you live on a downward slope, the best way to do this is to add a staircase. We have a bluestone staircase, which I love: it is weather-proof and will last forever, it is not slippery when wet, and it aesthetically blends in with the garden. There are plantings on either side of the staircase.
.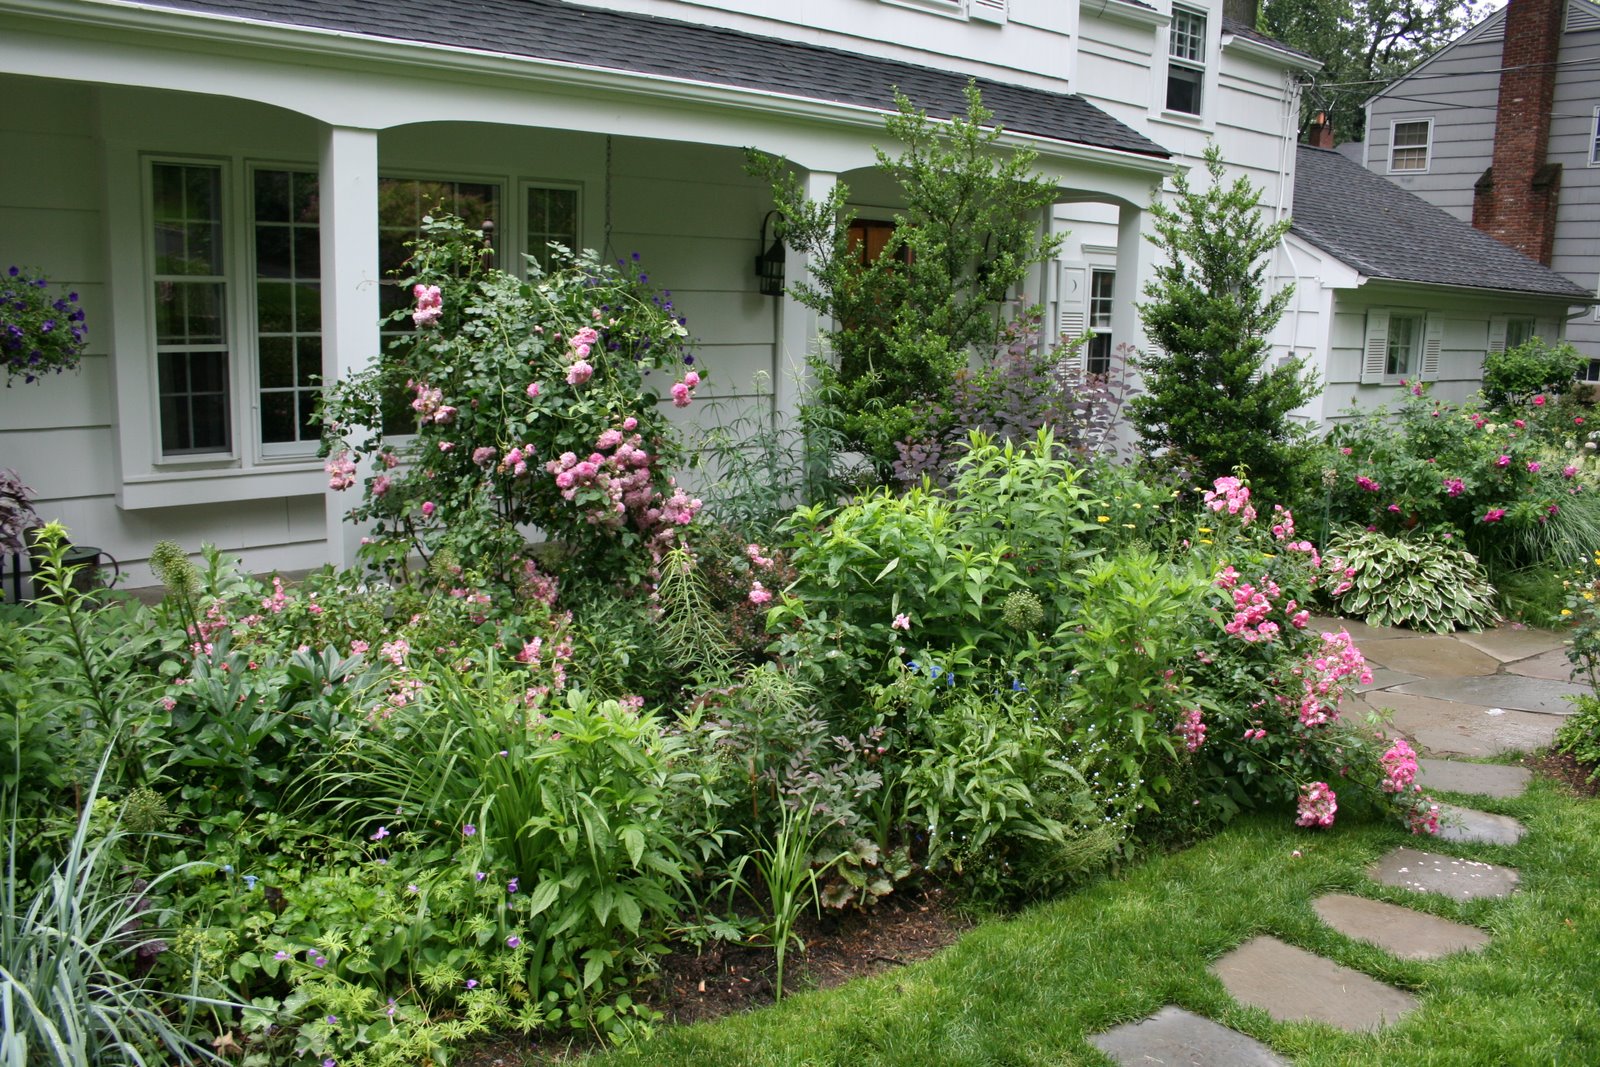 3. In the limited flat space in front of your home, add deep beds. From the street, or as you walk down the staircase, it is these deep beds that you and your visitors will see. Even if you live on a downward slope, your builder had to level out some space for your home. This is your opportunity to garden like everyone else.
. 4. Extend the deep beds in front of your home up the slope, where possible. At the far end of my home, there used to be a large, overgrown evergreen that dominated the landscape and made it difficult to get to the backyard. In that space, we added an oval-shaped garden, called the Egg Garden. Because it is at the far end and unobstructed by the driveway, it has grown each year, such that it has now started to extend up the slope. You can read a longer post about the creation of the Egg Garden here.
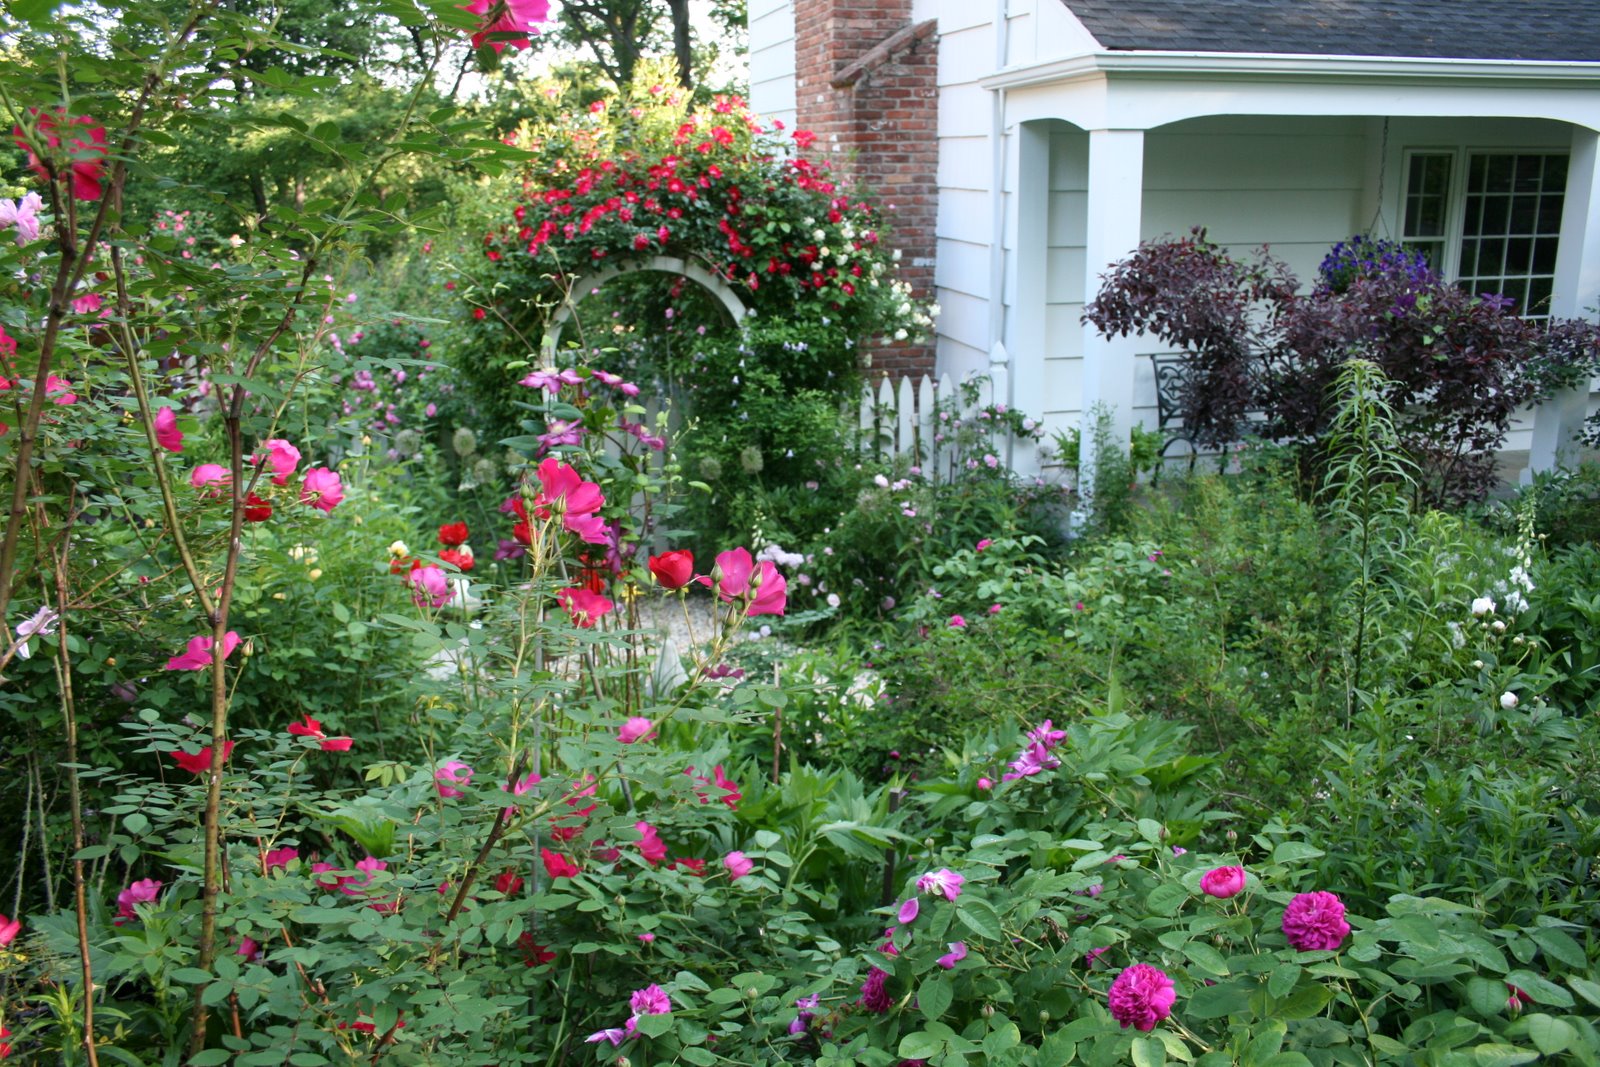
. 5. On the part of the slope that faces the house and is invisible from the street, add private beds. The best thing about having your house on the downward part of the slope is that it can feel more private. I can sit in my living room and look out onto the garden on the slope, called Goldberry Hill, instead of just looking directly at the houses across the street.
.
Related posts: Heirloom Gardener’s Four-Year Makeover of Her Front Garden and The Egg Garden in June: Replacing the Overgrown Evergreen in the Front Corner of Our Home with a Mixed Bed
Category: Front Border
Goodbye, Old Oak Tree…What Should I Plant in Your Place?
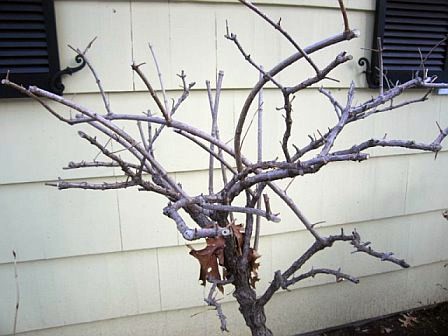
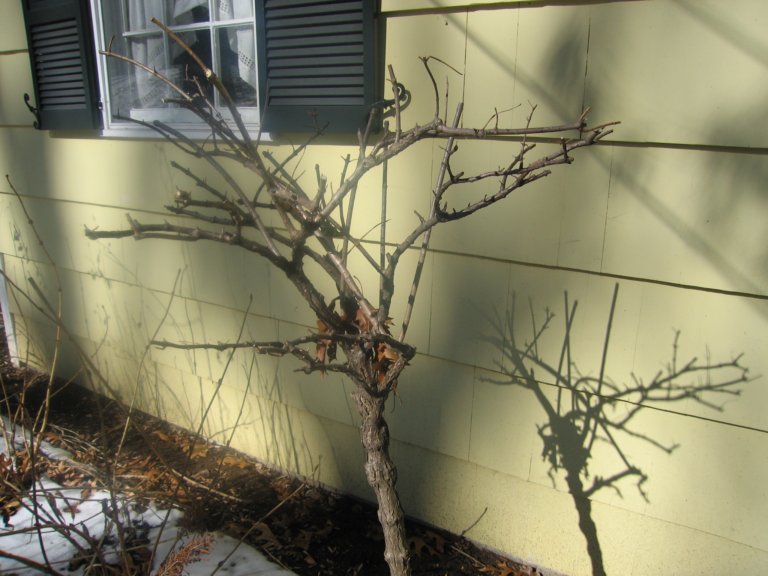
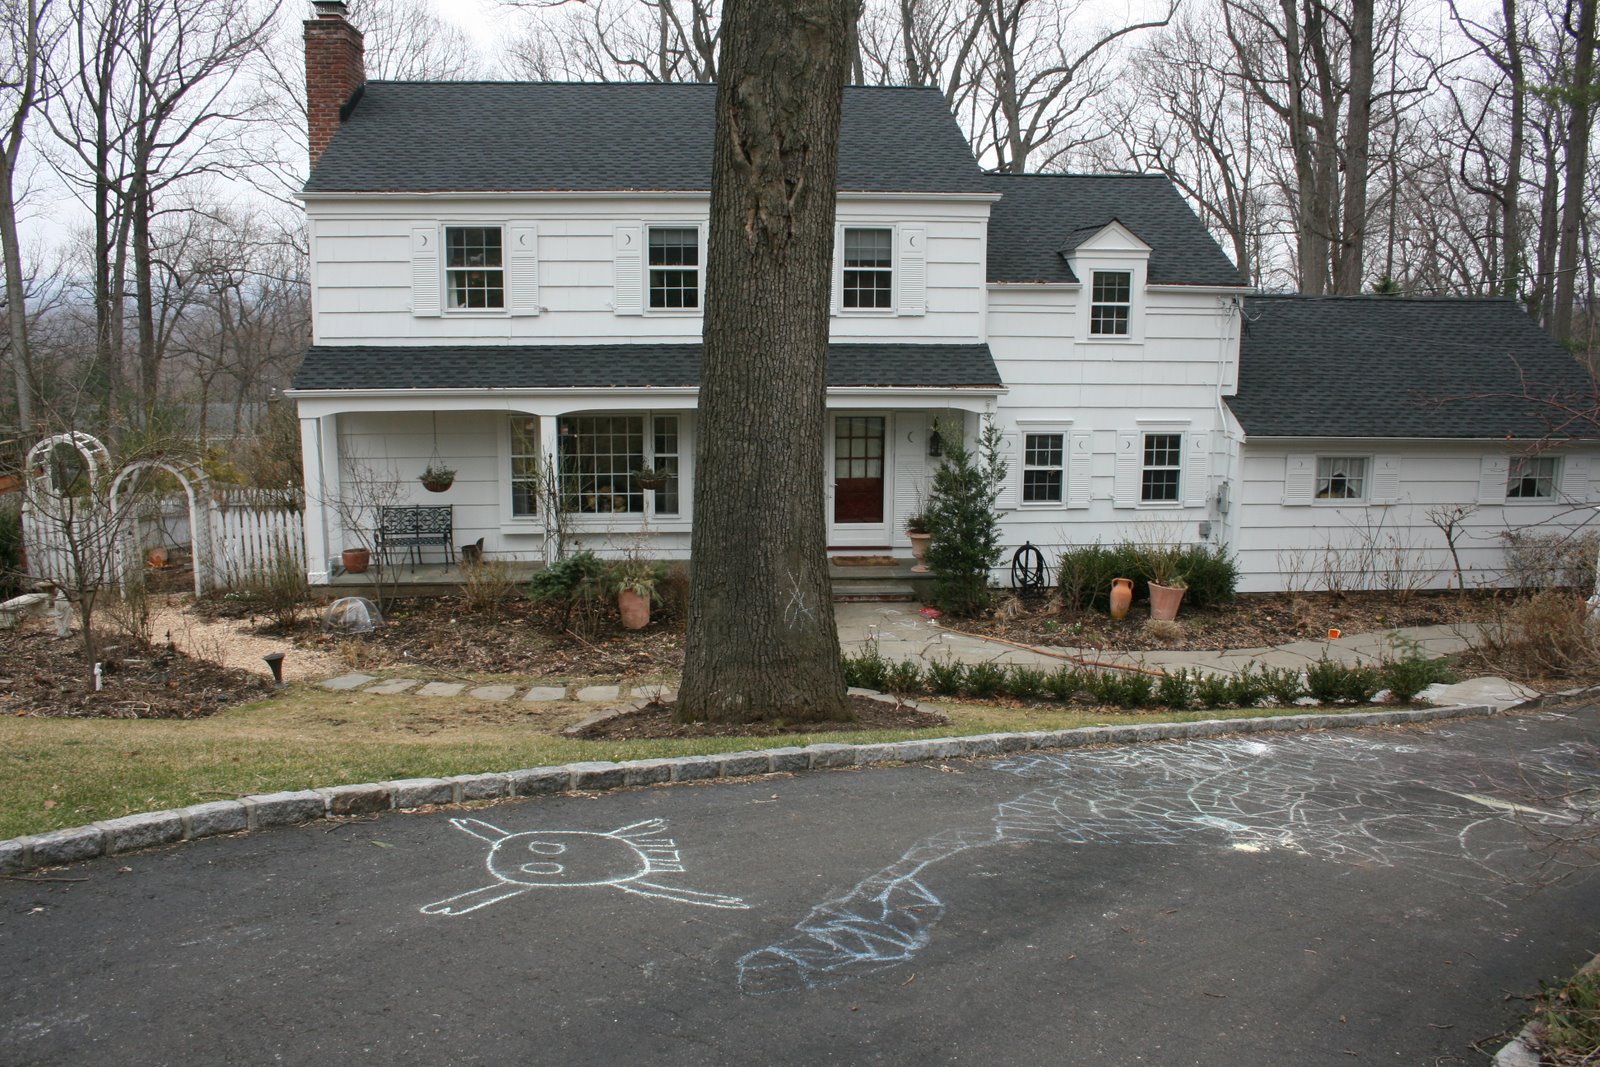 The mature oak tree in our front yard, right in front of our home (first picture) had unusual growths on it.
 With some fear that it would disastrously collapse on our home some day, we consulted our favorite arborists, Savatree–who are not quick to cut down any tree–and they sadly agreed that the tree should be removed. A few days later, they removed the tree (second picture).
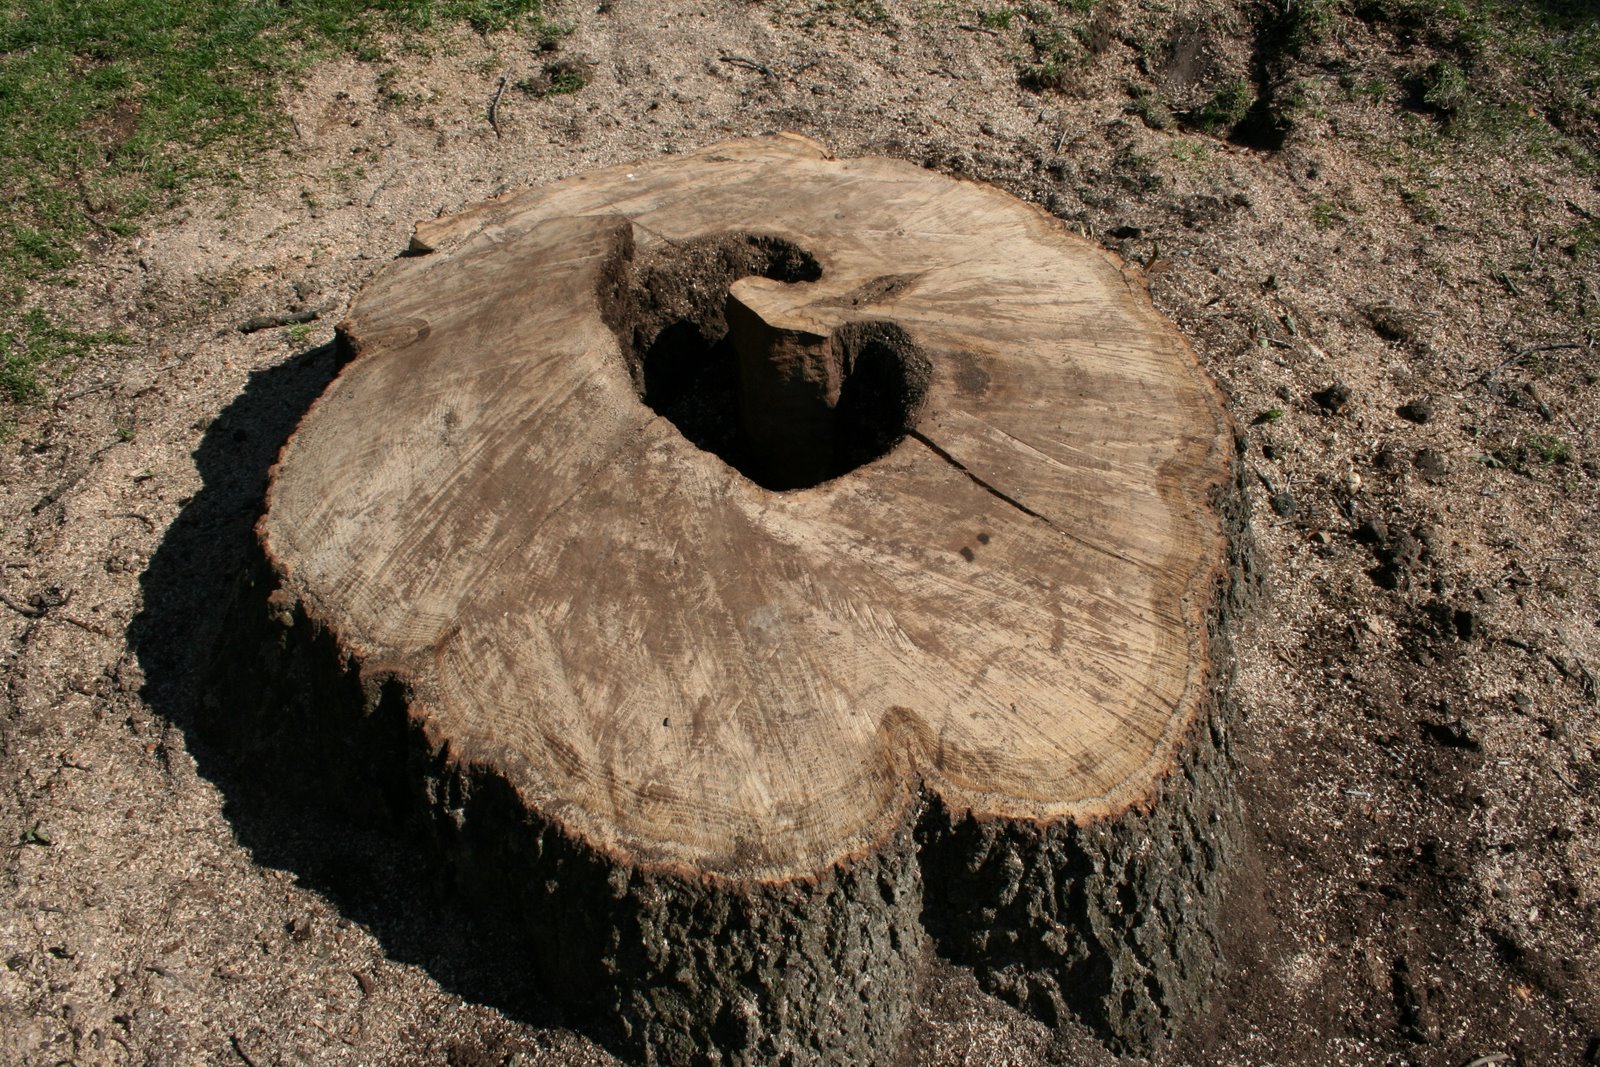 After the tree was removed, we could see that, in addition to the disease causing the growths, the trunk had also become hollow in the core (third picture).
What do you do with the tree stump grindings that are left behind? We now have a cubic yard or two of stump grindings. I am saving some to mix into our compost. The rest I am spreading as playground mulch in the Walled Garden. It’s soft under bare feet and now I don’t have to buy and spread the cedar mulch I usually put down.
The question now is: what do I plant in the place of the old oak tree? It’s now full-sun of course and it is right outside of the large picture window where I like to sit and read or knit or have a cup of tea. Any suggestions?
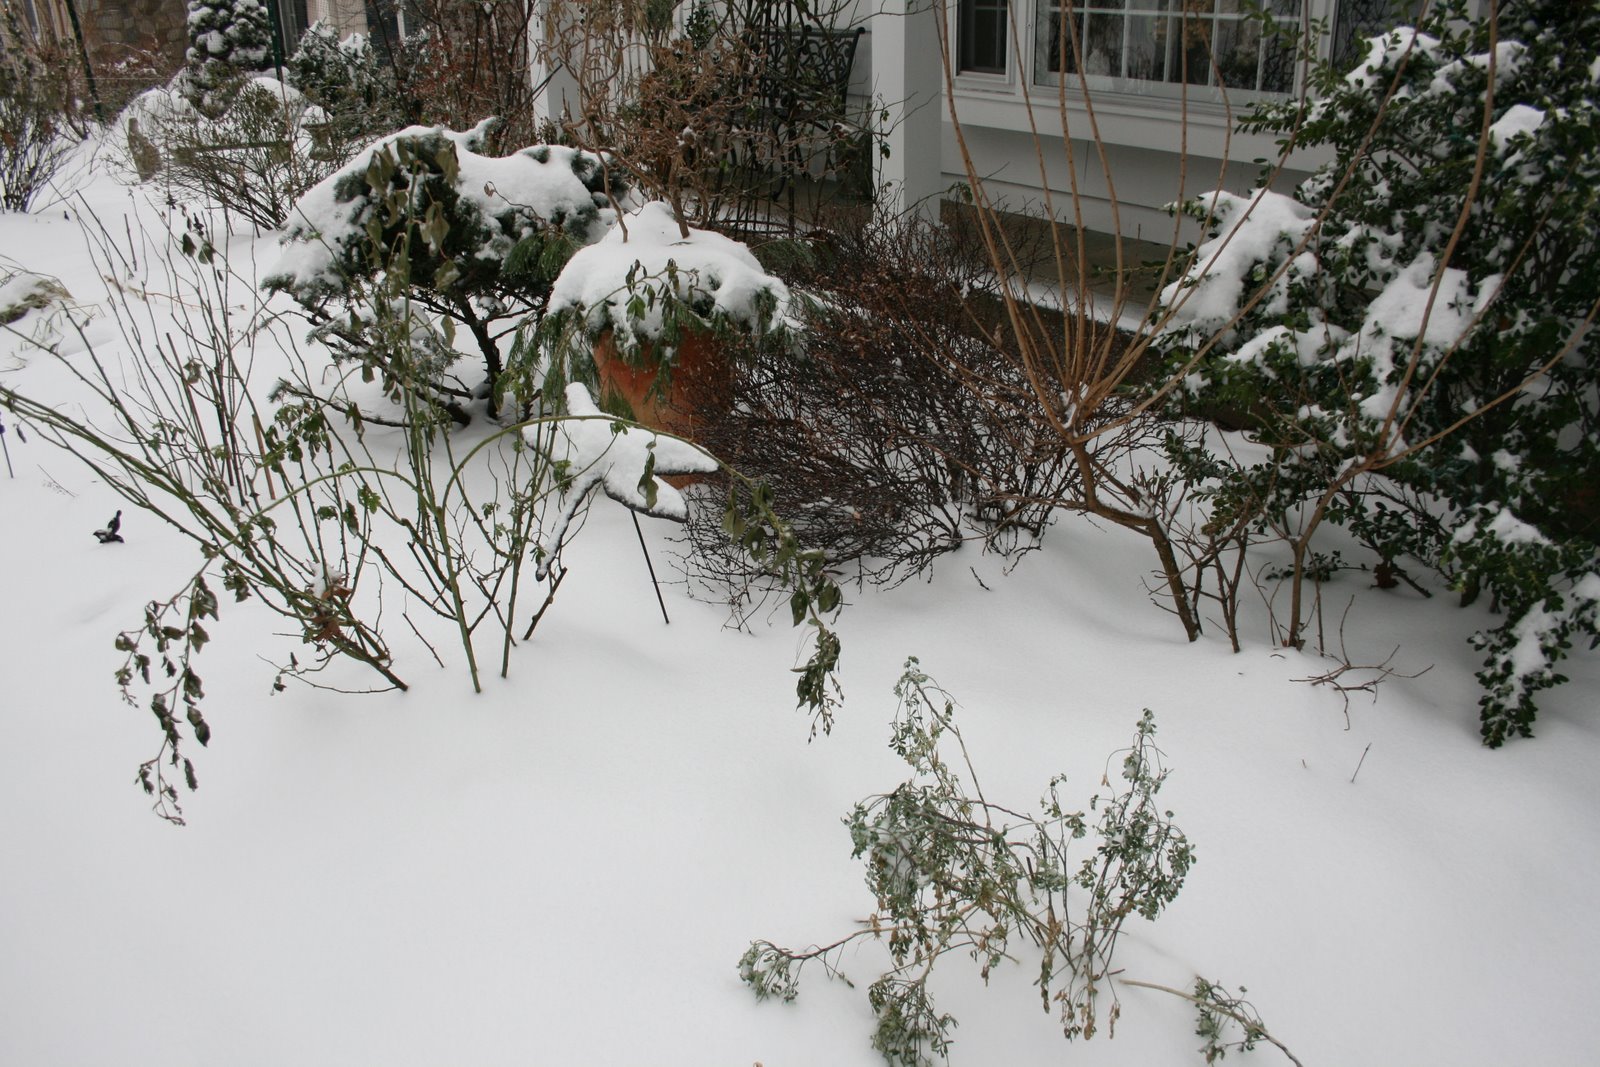
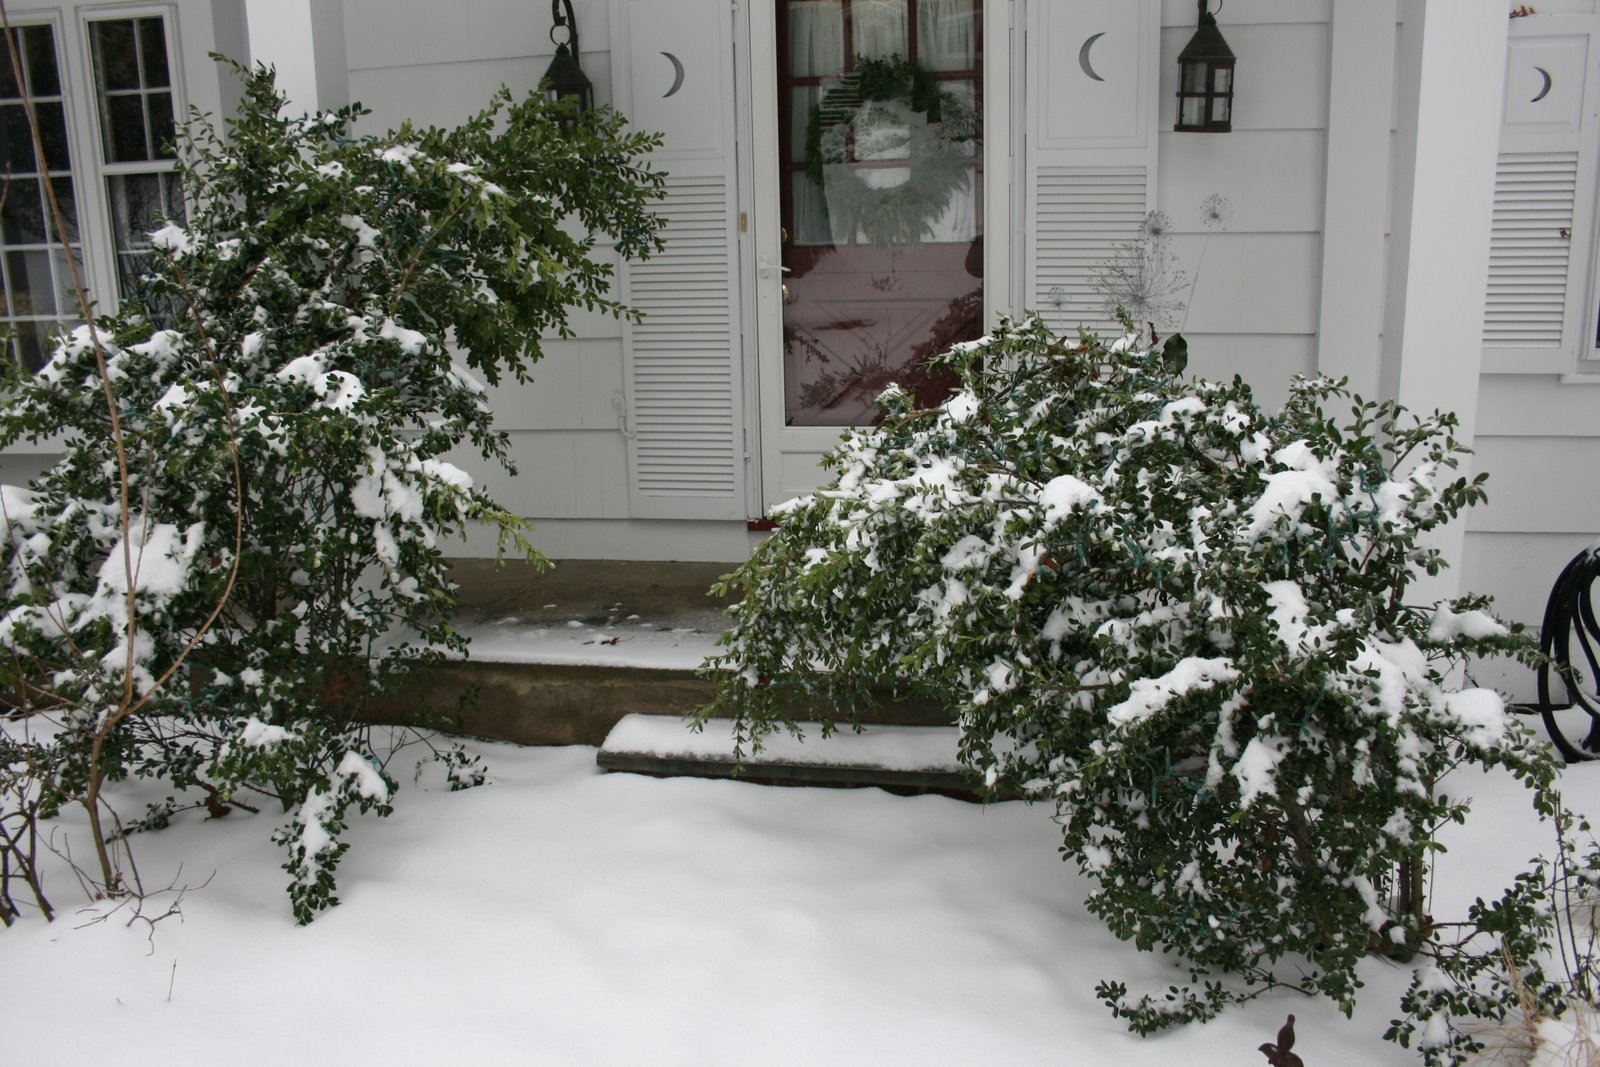
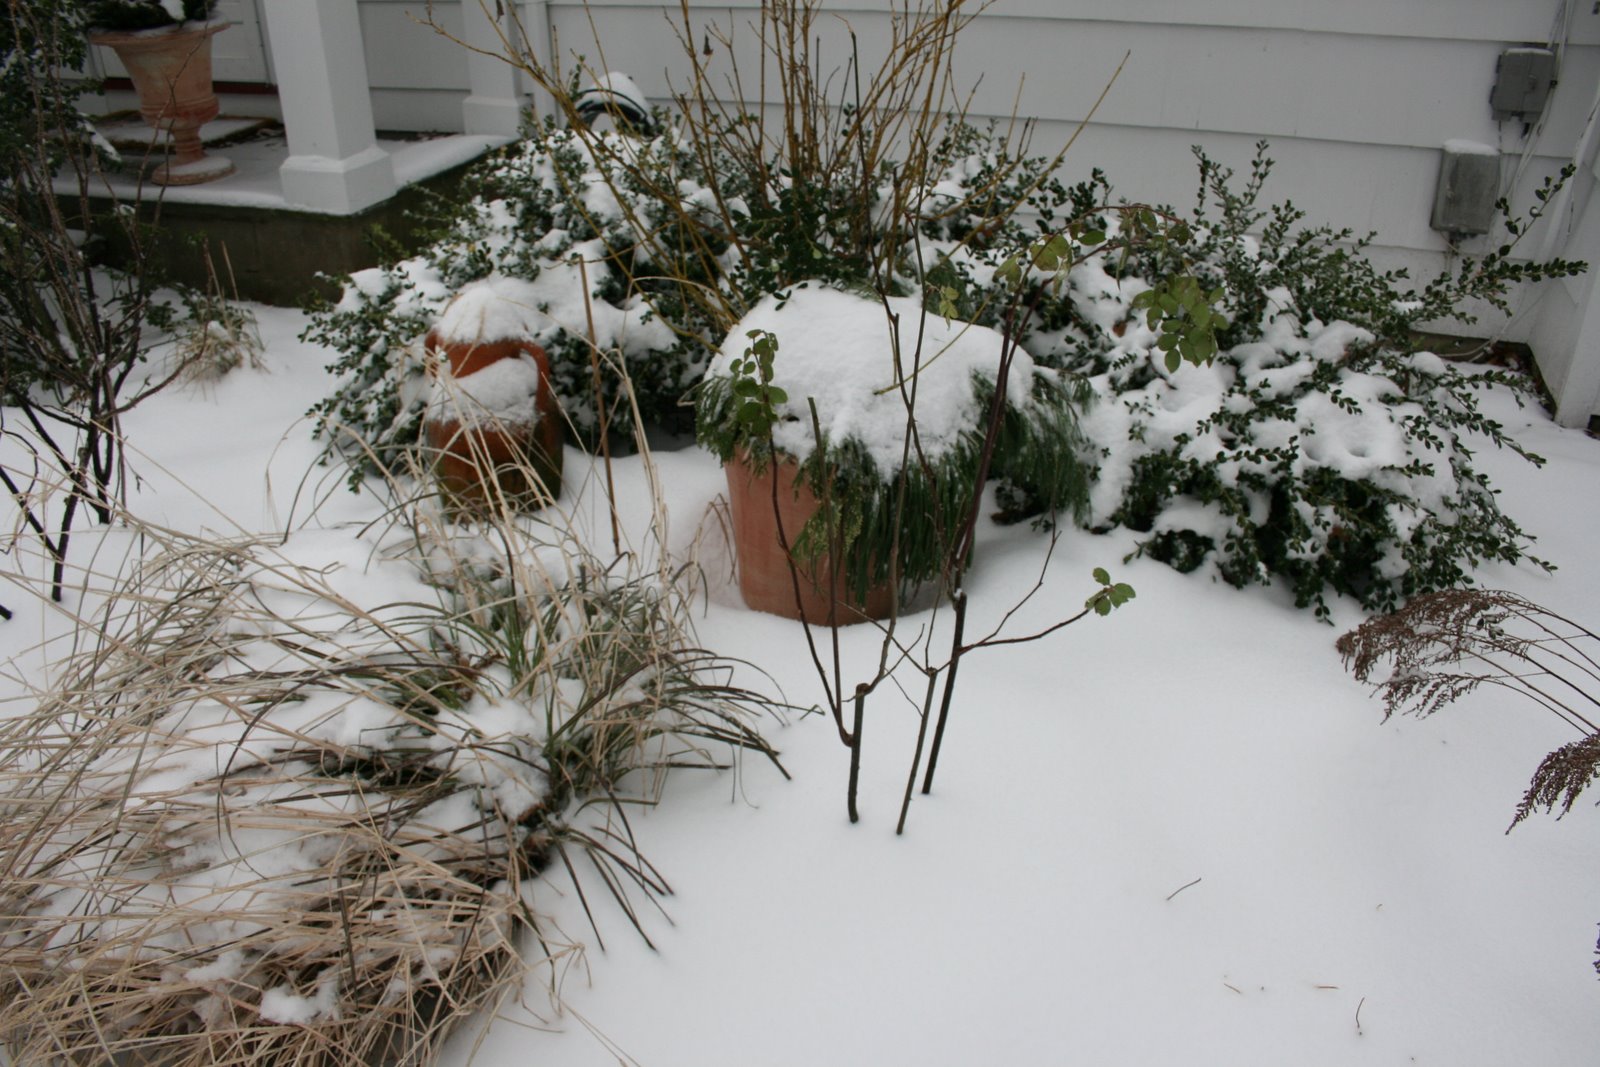
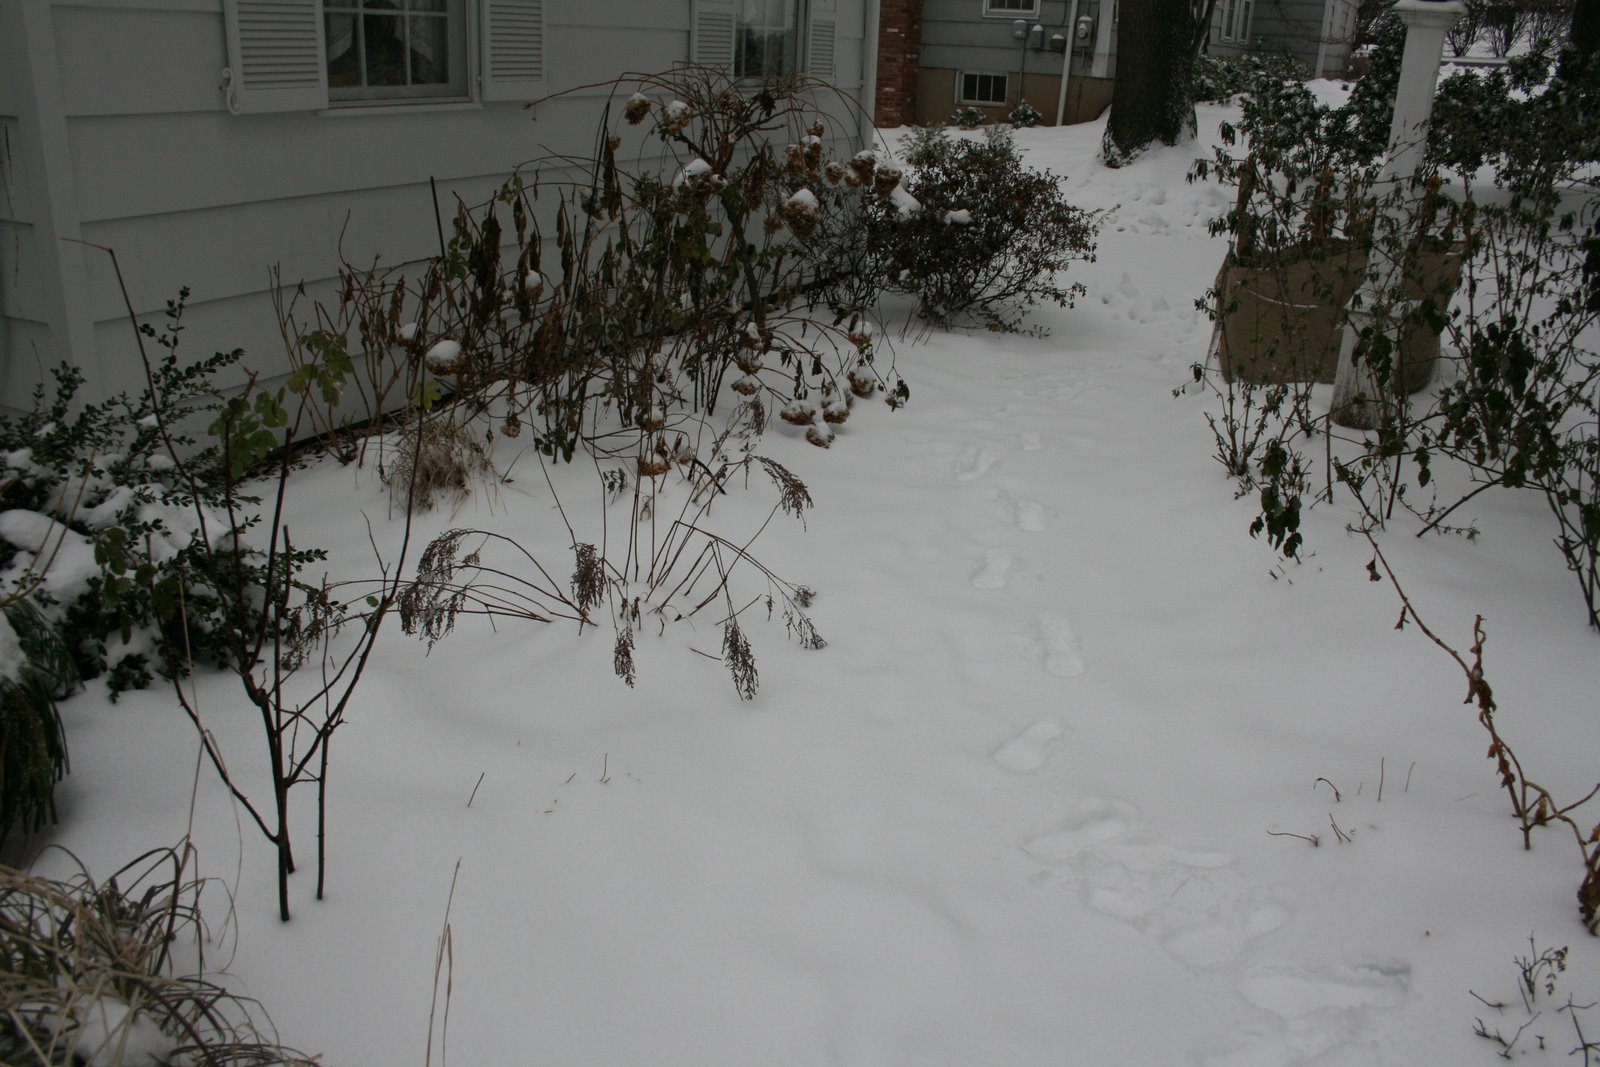
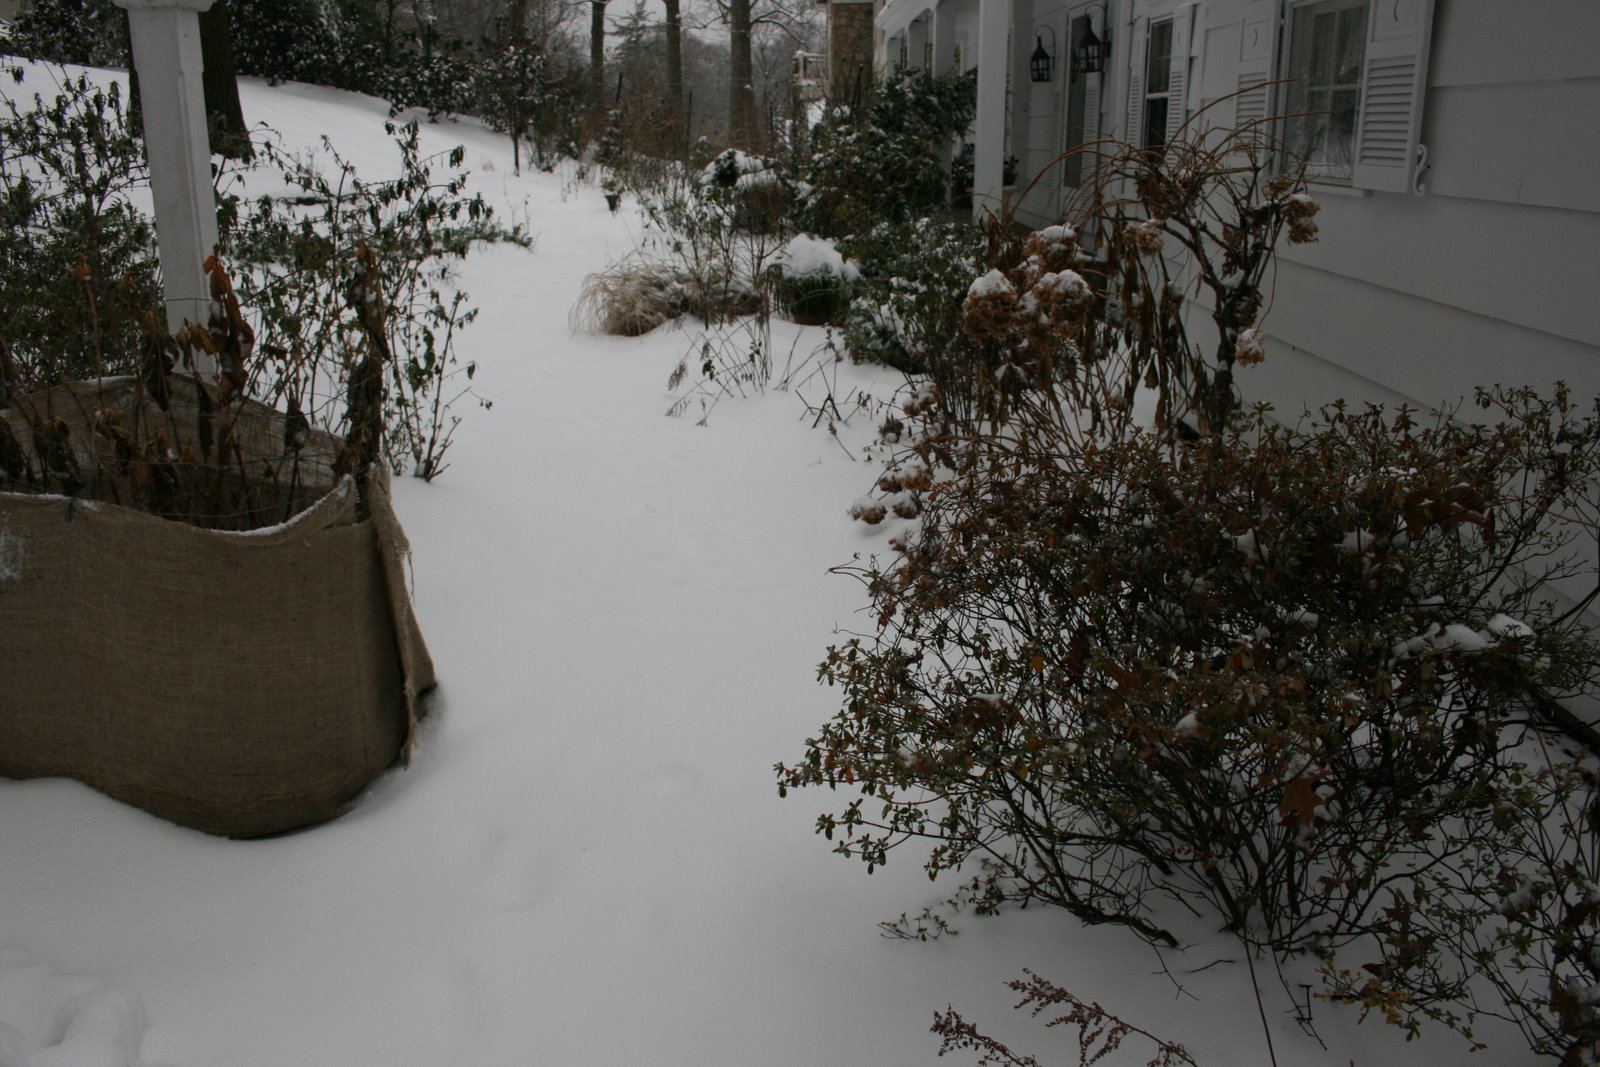
The Winter Garden: The Front Border Under The First Snow
Pee Gee Hydrangea: Four Seasons of Beauty
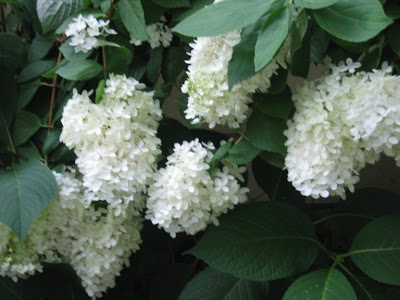
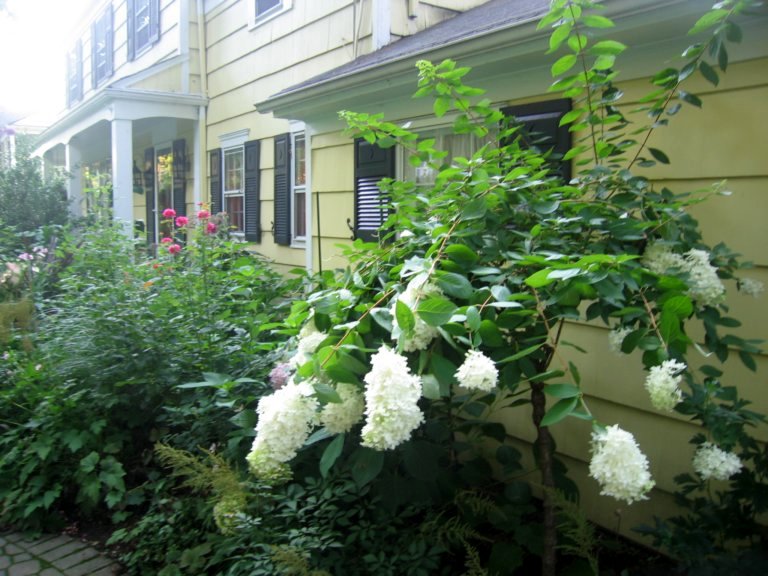
One of the many reasons I love hydrangeas is that they look good year-round (for a related post on year-round color, click here). Right now, their autumn colors are a highlight. See below some pictures of the pee gee hydrangea (Hydrangea paniculata) in the Front Border during all four seasons.
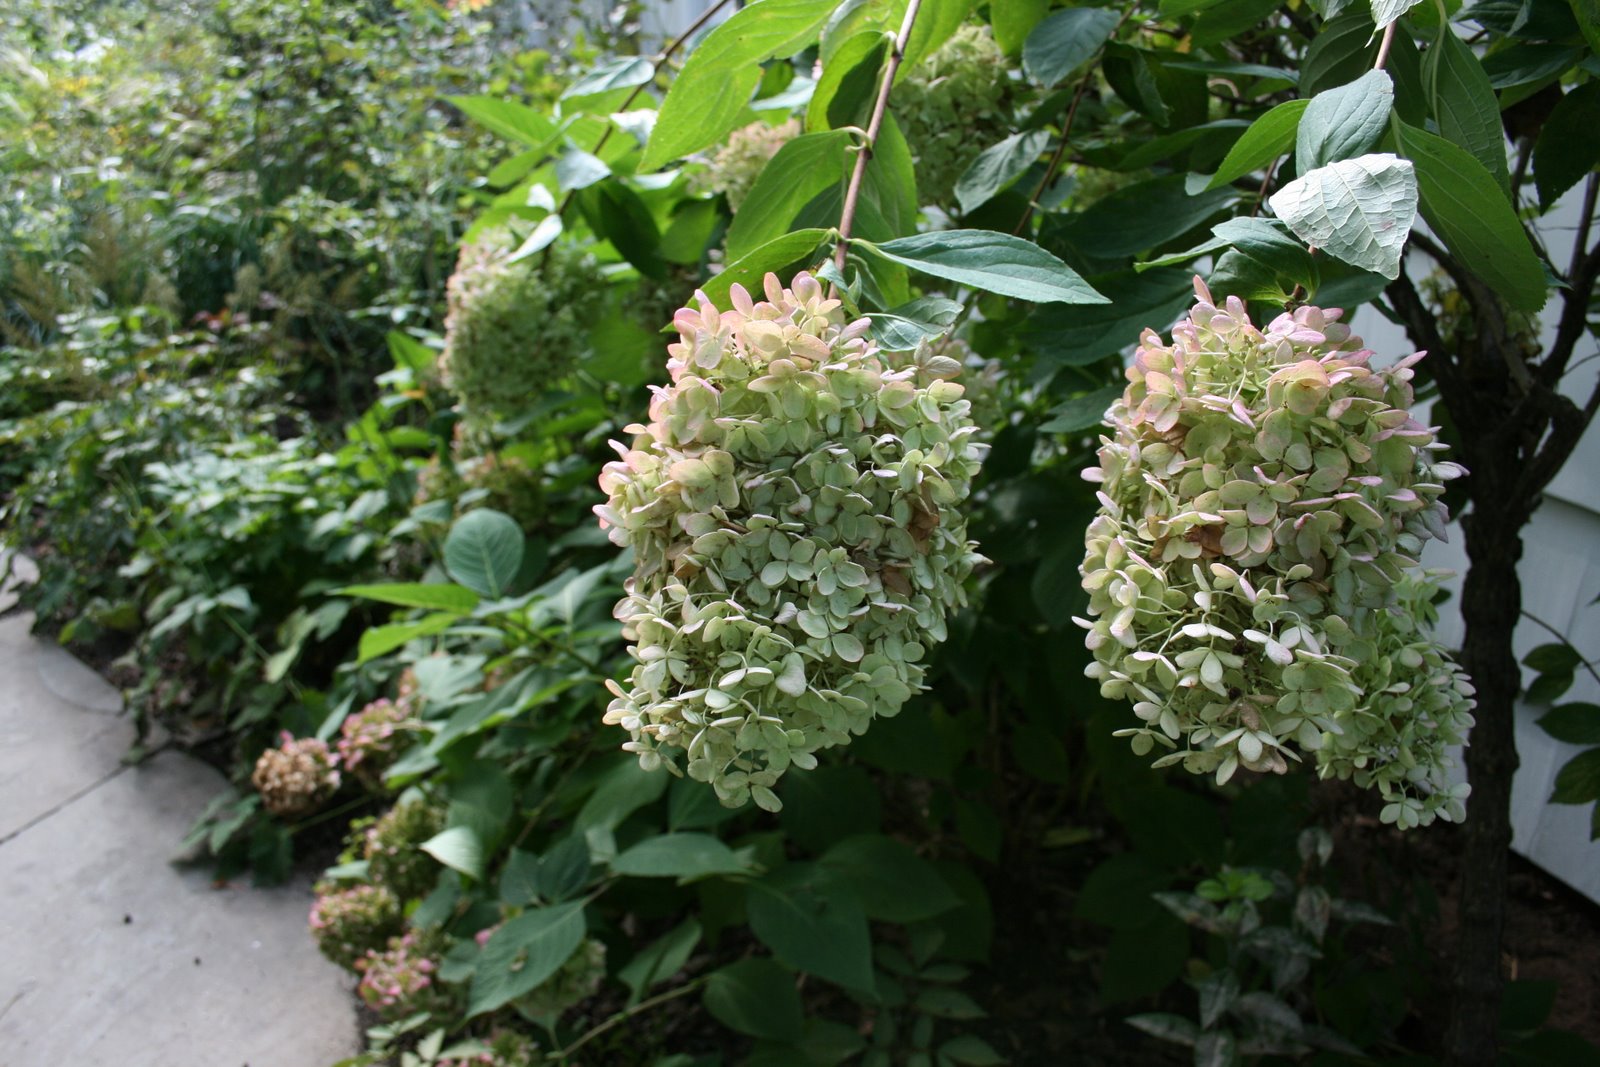 Autumn blooms turn pale green and pink.
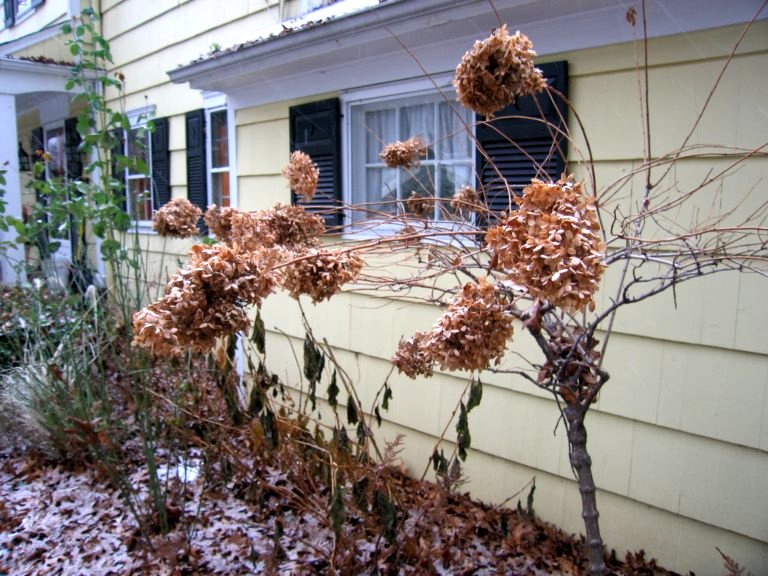 Winter blooms turn light brown.
 Spring after pruning (for a prior post about pruning pee gee hydrangeas, click here).
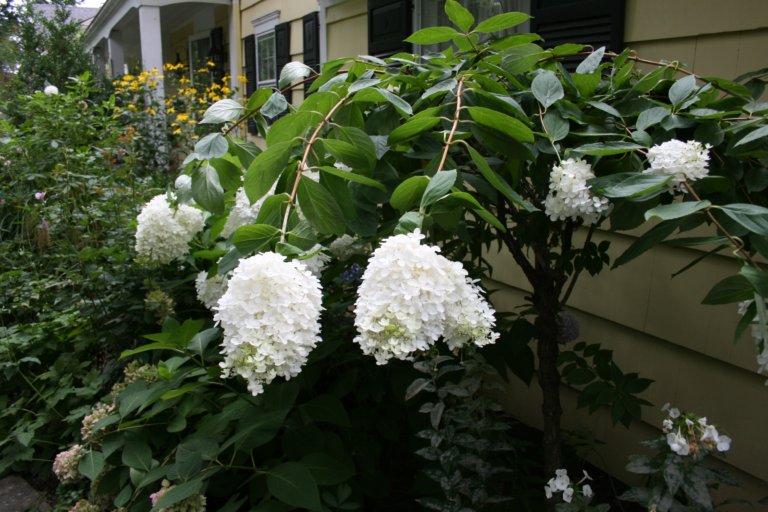 Summer blooms of brilliant white.
How to Propagate Hydrangea, Part II: Layering Marechal Foch
 In completing my expanded Front Border, I wanted to repeat some of the plants that existed in some of the neighboring beds. This first picture is a large, mature hydrangea, which I think is Marechal Foch, across the driveway on Goldberry Hill.
 As you see in the close up of the mature specimen, the leaves are thick and shiny. The mopheads change a lot over the course of the summer. Two weeks ago, in the the last picture on my Garden Bloggers’ Bloom Day post, the blooms were various shades of pink.
 The third picture is the baby of Marechal Foch in the Front Border which I propagated last year by layering my mother plant.
Layering is one of the easiest ways to increase your number of hydrangea. Simply choose a low growing branch. Place it in contact with the soil by burying it a bit or putting a rock on top of it. Leave the branch alone, yet check every month or so to see if it has begun to form roots in the area touching the ground. Once roots are developed, sever it from the mother plant. The baby hydrangea can be then left in place to grow a bit more or moved to a new location, as I did with this one.
~
Garden Bloggers’ Design Workshop: Heirloom Gardener’s Four Year Makeover of Her Front Garden – How to Improve Boring Suburban Landscaping
April’s Garden Bloggers‘ Design Workshop on Front Yard Gardens is very timely for me seeing that my spring project was to complete the four year redesign of our front garden, which is made up of the Front Border immediately in front of the house and, standing in front of the house to the immediate left, the Egg Garden.
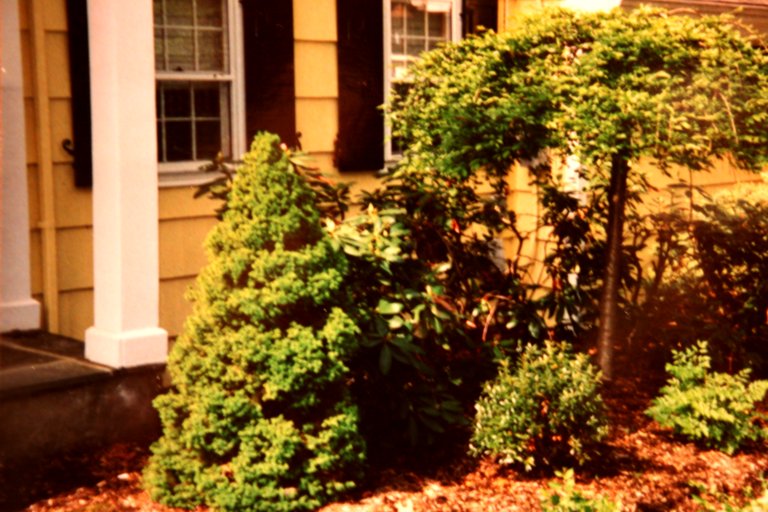
When we moved into our house, the front garden had the usual foundation plantings: evergreen trees and shrubs with two flowering trees for color. It was dull, static, and uninspiring. The first three pictures show the front border before I began replanting it.


.
.
.
.
.
.
.
.
.
.
.
.
.
To my neighbors’ amazement, I proceeded to take out the whole thing and replant it myself. The first year, I replanted the existing borders and created the Egg Garden. The existing borders had three problems: they did not change with the seasons–summer looked the same as fall and spring, and winter was only slightly different; some of the plants had grown so large that they covered windows and were out of proportion with the house; and the borders needed very little maintenance which meant there was little gardening to be done.
~
I started by removing the large problem plants: the huge rhododendron which was out of proportion with our two-story colonial, the two amorphous evergreen cones flanking the front door, and a weeping cherry which obscured the windows of the library. Then I took away anything that was poorly suited for the site, like the leucothea in full sun, or that did nothing for the border, like a deformed Ceris ‘Forest Pansy.’ Next, I improved the soil by adding four inches of mushroom compost. Finally, I began replanting with small trees, shrubs, perennials, annuals, vines, grasses, and bulbs. I also added a bird feeder.
~
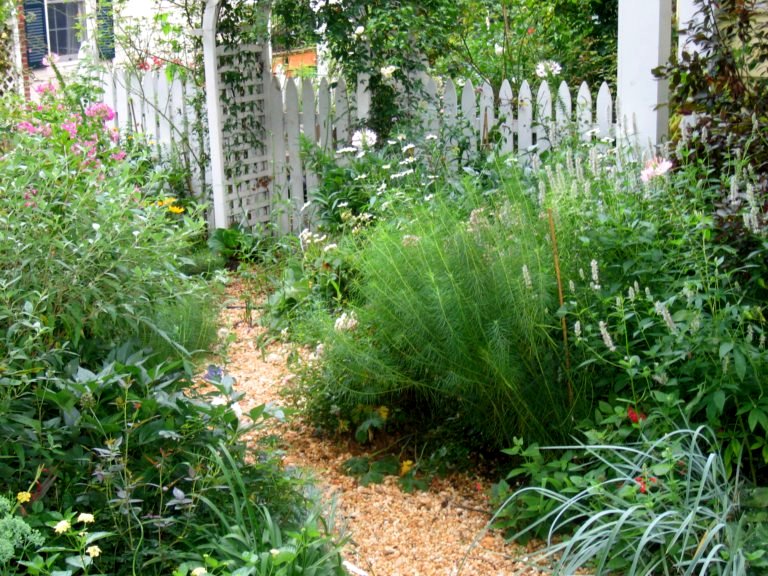
The Egg Garden was created almost entirely from the space that was formerly occupied by the rhododendron and is bordered in the back by the fence and arbor that enclose the Cutting Garden. Small six-by-six stepping stones through the grass connected the front walkway to larger, but not large enough, twelve-by-twelve inch stepping stones through the Egg Garden to the Cutting Garden.


.
.
.
In the second year, I expanded both the Front Border and the Egg Garden, and spent time planting both more densely. I also decided to remove the bird feeder which seemed more appropriate in the backyard. In its place, I installed a tutuer on which I decided to grow the rose Lavender Lass and clematis Blue Bird and Francesca.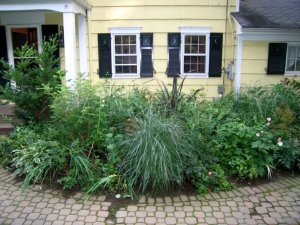


.
.
.
.
.
.
.
.
.
.
.
.
.
.
.
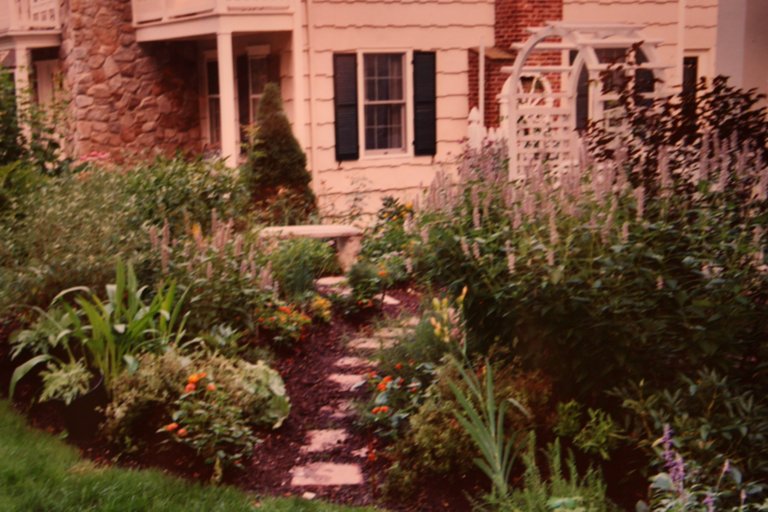
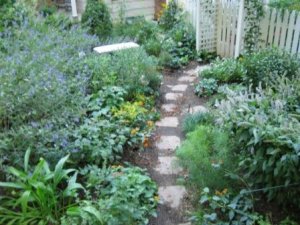
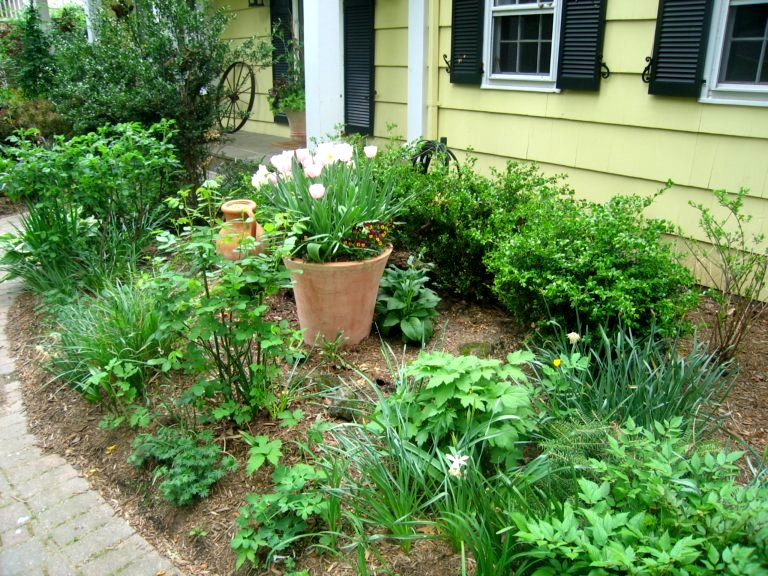
In the third year, I added a large pot and a semi circular boxwood hedge in front of the library, to give that area definition and a focal point. In the Egg Garden, I widened the path and replaced the twelve by twelve inch stepping stones with loose gravel. As always, I looked for ways to expand the floral display with more bulbs, clematis, and annuals.

 .
..
.
.
.
.
.
.
.
.
.
.
.
.
.
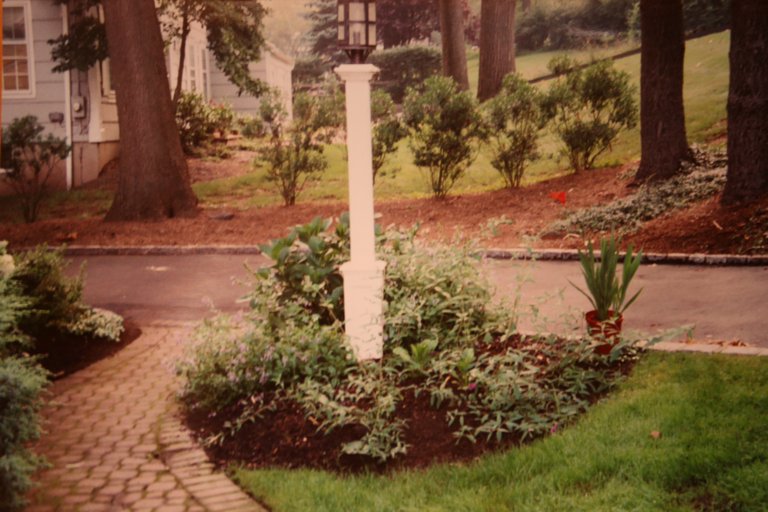
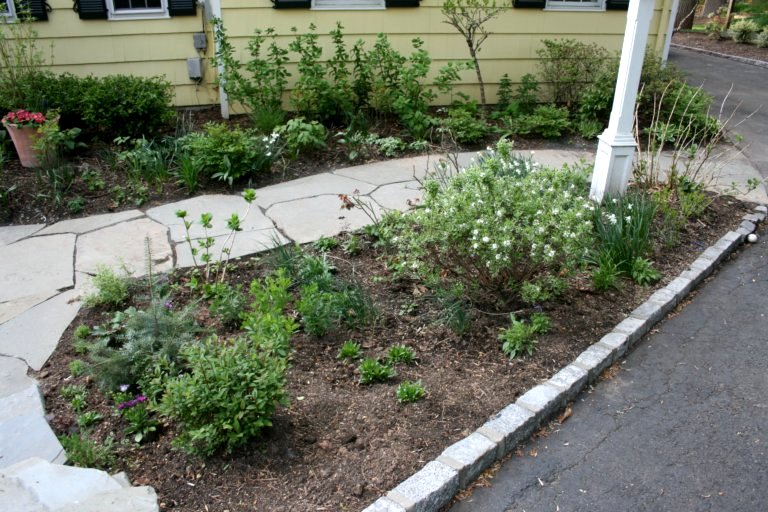
This year, I am completing the final phase of the front border renovation. I replaced the old path of brick pavers with a wider one of irregular blue stone to compliment the other stone work in the garden. I also continue the blue stone stairs on the other side of the driveway. Previously, the steps took you from the mailbox to the driveway through Goldberry Hill. From there, you were expected walk down the driveway and then onto the entrance of the path leading to the front door. No one did this, not even me. One of the cardinal rules of my garden is that there should be paths where people walk.
~
~
Further on, in place of the small six by six inch stepping stones that connected the front path to the Egg Garden, there are now more appropriately sized two by two foot blue stones. Throughout, I chose irregular blue stone pieces to harmonize with the less formal plantings.
~
The borders in the front were also to be expanded to flank each side of the new stairs. I wanted continuity in plantings around the new steps and those already there, so that it would not be obvious that they were installed at two different times. I chose to use the same plants or plant types so that the steps would echo each other.
~
The project is just about complete now. I will have to see how the plants grow in before I add more to the new plantings. In the fall, I will plant more spring blooming bulbs.
~
The project is just about complete now. I will have to see how the plants grow in before I add more to the new plantings. In the fall, I will plant more spring blooming bulbs.

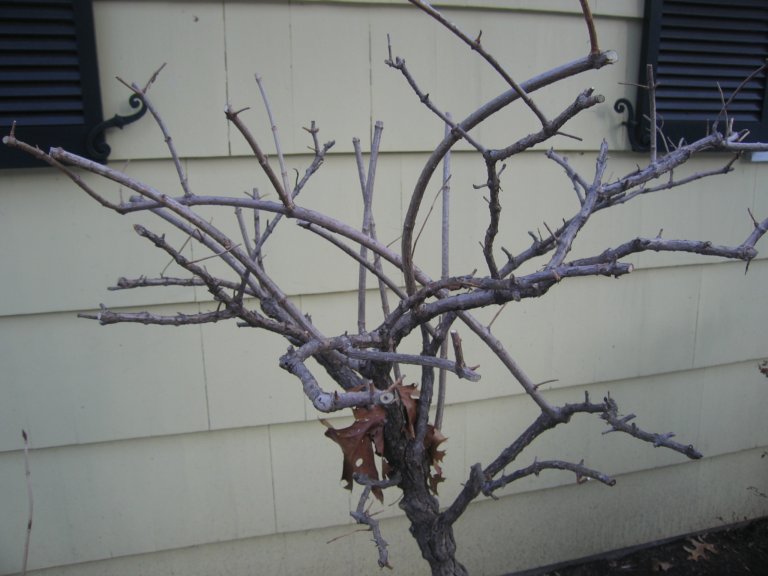
How to Prune Pee Gee Hydrangeas and Wisteria: Before Spring Growth Resumes
 February is the time in my garden to prune the pee gee hydrangeas and the wisteria. I have two pee gee hydrangea standards: one along my front walk (pictured before and after pruning) in the Front Border and another along the fence in the back garden. I do this primarily because space is limited where it’s growing and, secondly, by pruning it I get more blooms (for a picture of the blooms, click here: http://heirloomgardener.blogspot.com/2008/01/front-border-in-summer-plan-for-new.html).
 The best time to do this is when the plant is dormant, before the buds begin to swell. If you wait until spring growth resumes, you risk removing this year’s flowers. Pruning can be done in the early winter, but you will miss the lovely dried blooms during the winter. Every year I prune away the previous year’s growth for the one along the walkway. I also take out any twiggy branches that have died back during the winter. For the other which has more space allotted to it, I trim it back to shape it and remove spindly growth.
 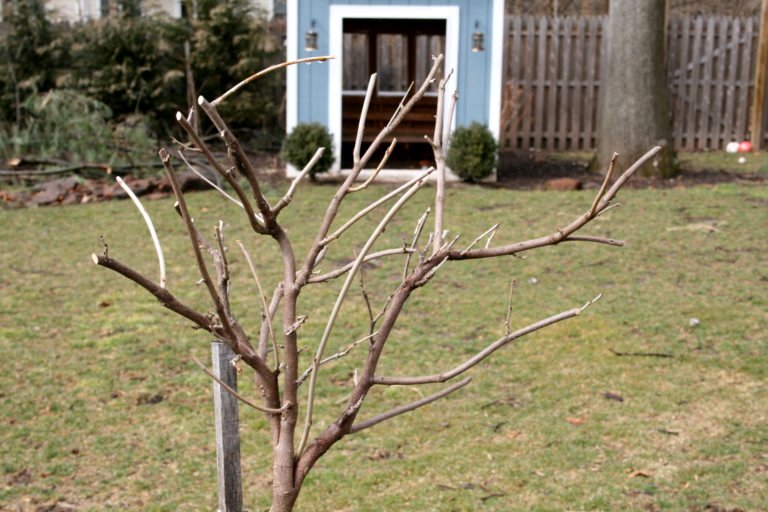 The wisteria I have is grown as a tree, but the pruning for it is the same as it would be for one grown against a wall. Each branch is cut back to the third or forth bud and any wispy growth is removed. The wisteria is good now until mid summer at which point it will need pruning again.
 ~
*****
~
Here is a picture of the same pee gee hydrangea in bloom:
 Related post: How and Why to Prune Hydrangeas
Front Border in Summer & Plan for the New Path
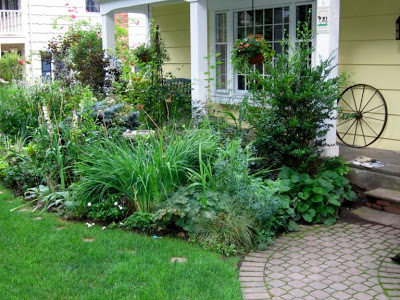
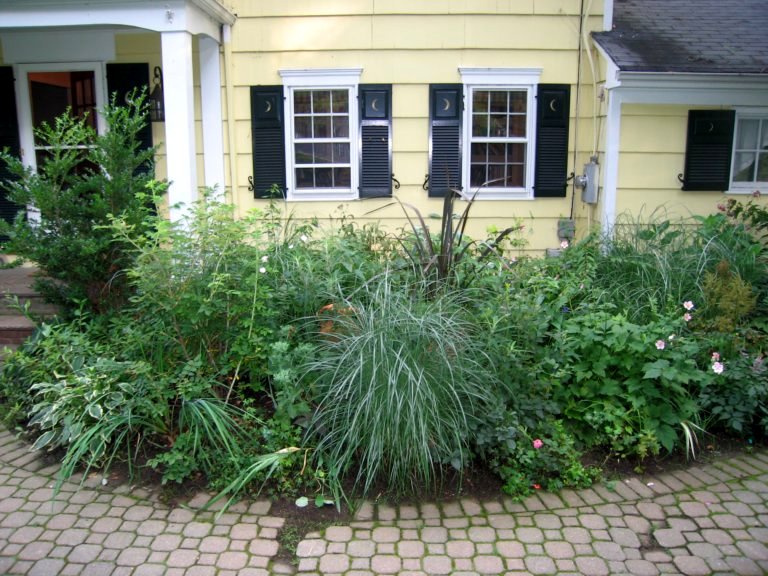
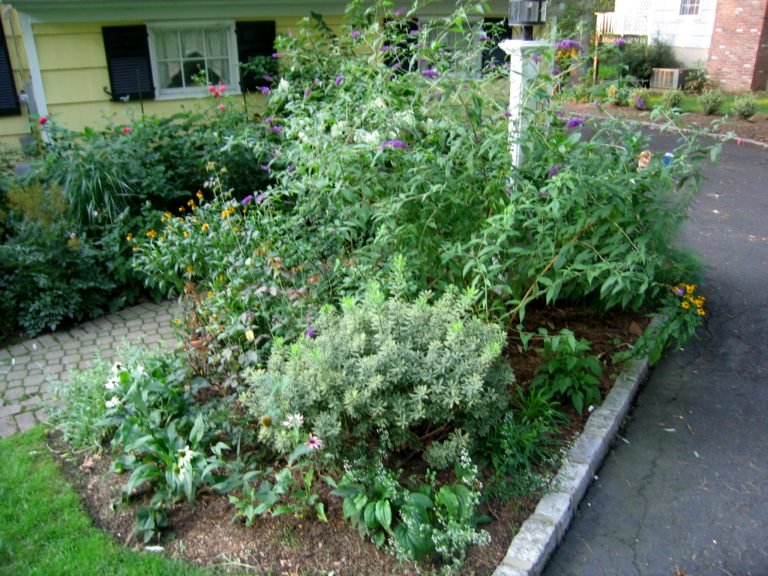
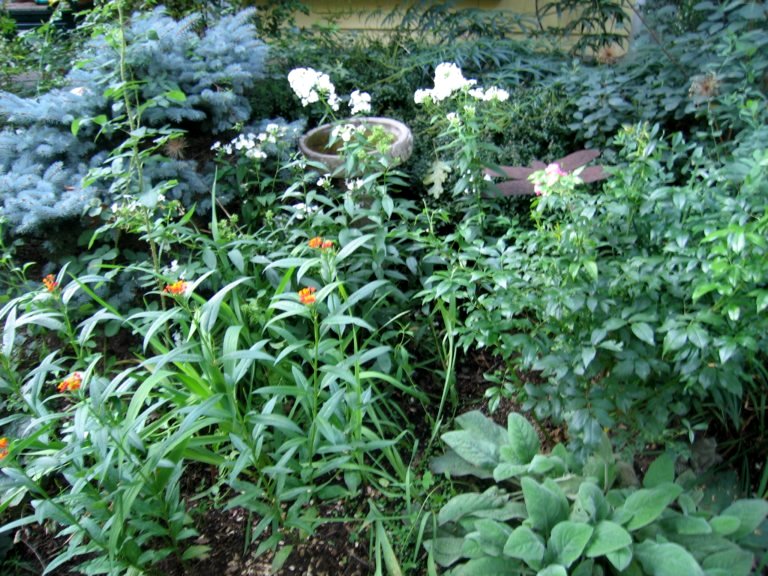
To help me plan for this coming gardening season, I am going through some of my pictures from last year. Here are some of the Front Border from last summer. The Front Border is a mixed border.
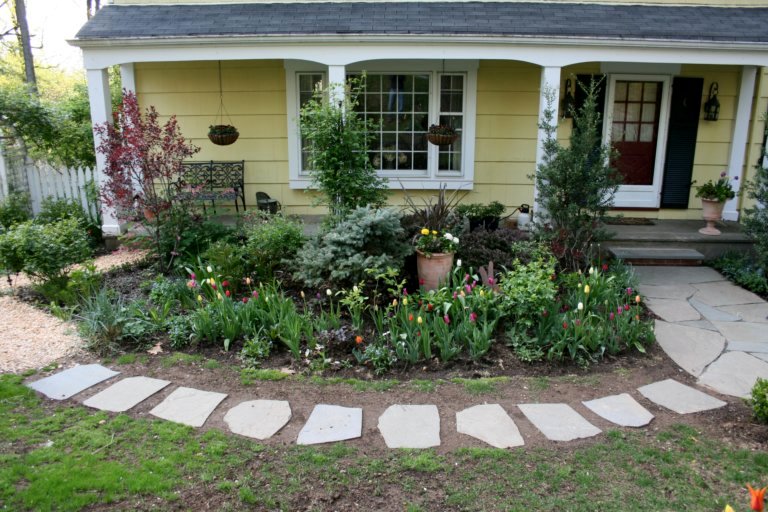
One of this year’s projects will be to fix the path that runs from the driveway to the front door. The path has two problems. The first is that some of the stones that make up the path have started to sink and the path is becoming hazardous to visitors. This is a relatively minor problem compared to the second. The second problem is that the path is in the wrong place. From the street, you walk down the steps through Goldberry Hill. At the bottom of the steps, you want to walk directly across the driveway, across the grass, and to the front door. This is where the path should be. Instead of this route, the path requires you to make a right turn down the driveway about twenty feet and then a sharp left turn around the light post (you can see this in the last picture).
The solution will be to create the direct path that does not exist with a continuation of the steps and stones that already exist on Goldberry Hill. You can see the steps on Goldberry Hill here: http://heirloomgardener.blogspot.com/2008/01/gardening-on-hill-goldberry-hill-in.html
Follow-up post: Heirloom Gardener’s Four Year Front Garden Makeover, including pictures of the new path

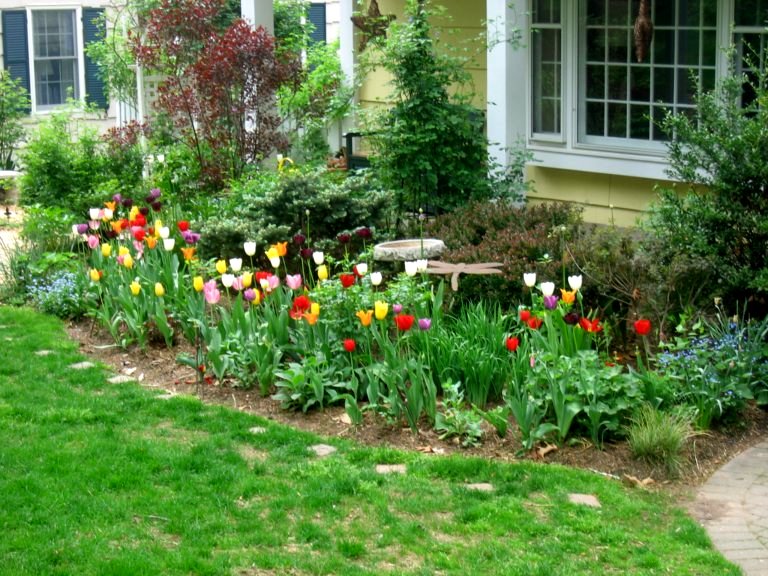
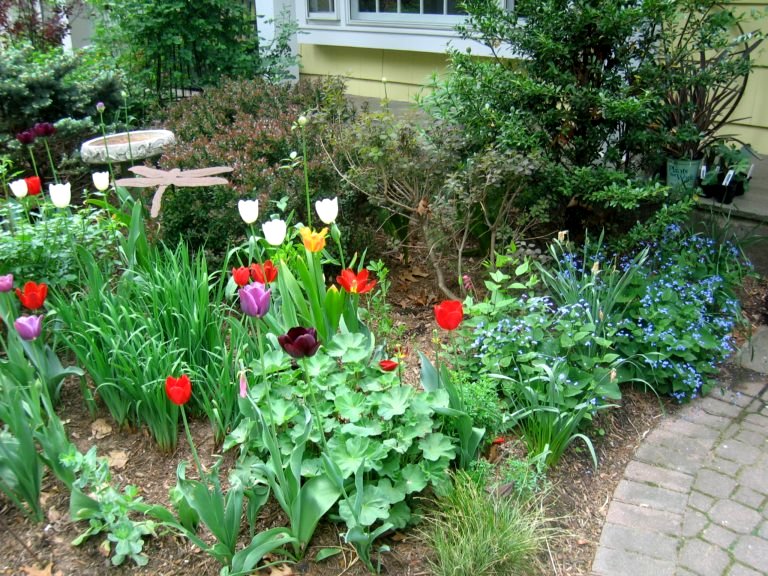
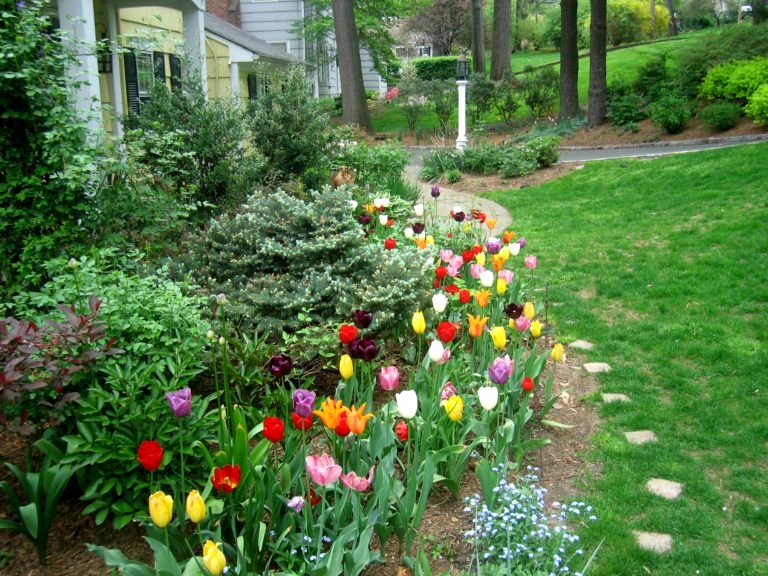
The Front Border Last Spring With Tulips
To help me plan for this coming gardening season, I am going through some of my pictures from last year. Here are some of the Front Border from last spring during high tulip season.

