
This month’s Garden Bloggers’ Design Workshop at Gardening Gone Wild is on Front Yards. This was one of the topics last year, and given what a common design challenge it is, they’ve decided to revisit it. Last year, I posted the saga of how I’ve continued to change my front yard garden from something that was once unremarkably suburban to a series of mixed borders. You can read that prior post here. For this year’s workshop, I thought I’d share some hard-earned lessons on a particular design challenge that I’ve faced, but is not usually addressed in gardening books or magazines: the downward sloping front yard garden.
.
If I tell you that I live on a hill, then you probably imagine a house on the top of a hill. If you don’t have a flat front yard, it’s more likely that you have an upward sloping one. But what if you have a downward sloping one? How can you make it as beautiful and as inviting as any other? Here are some of the design elements that have worked for me:
.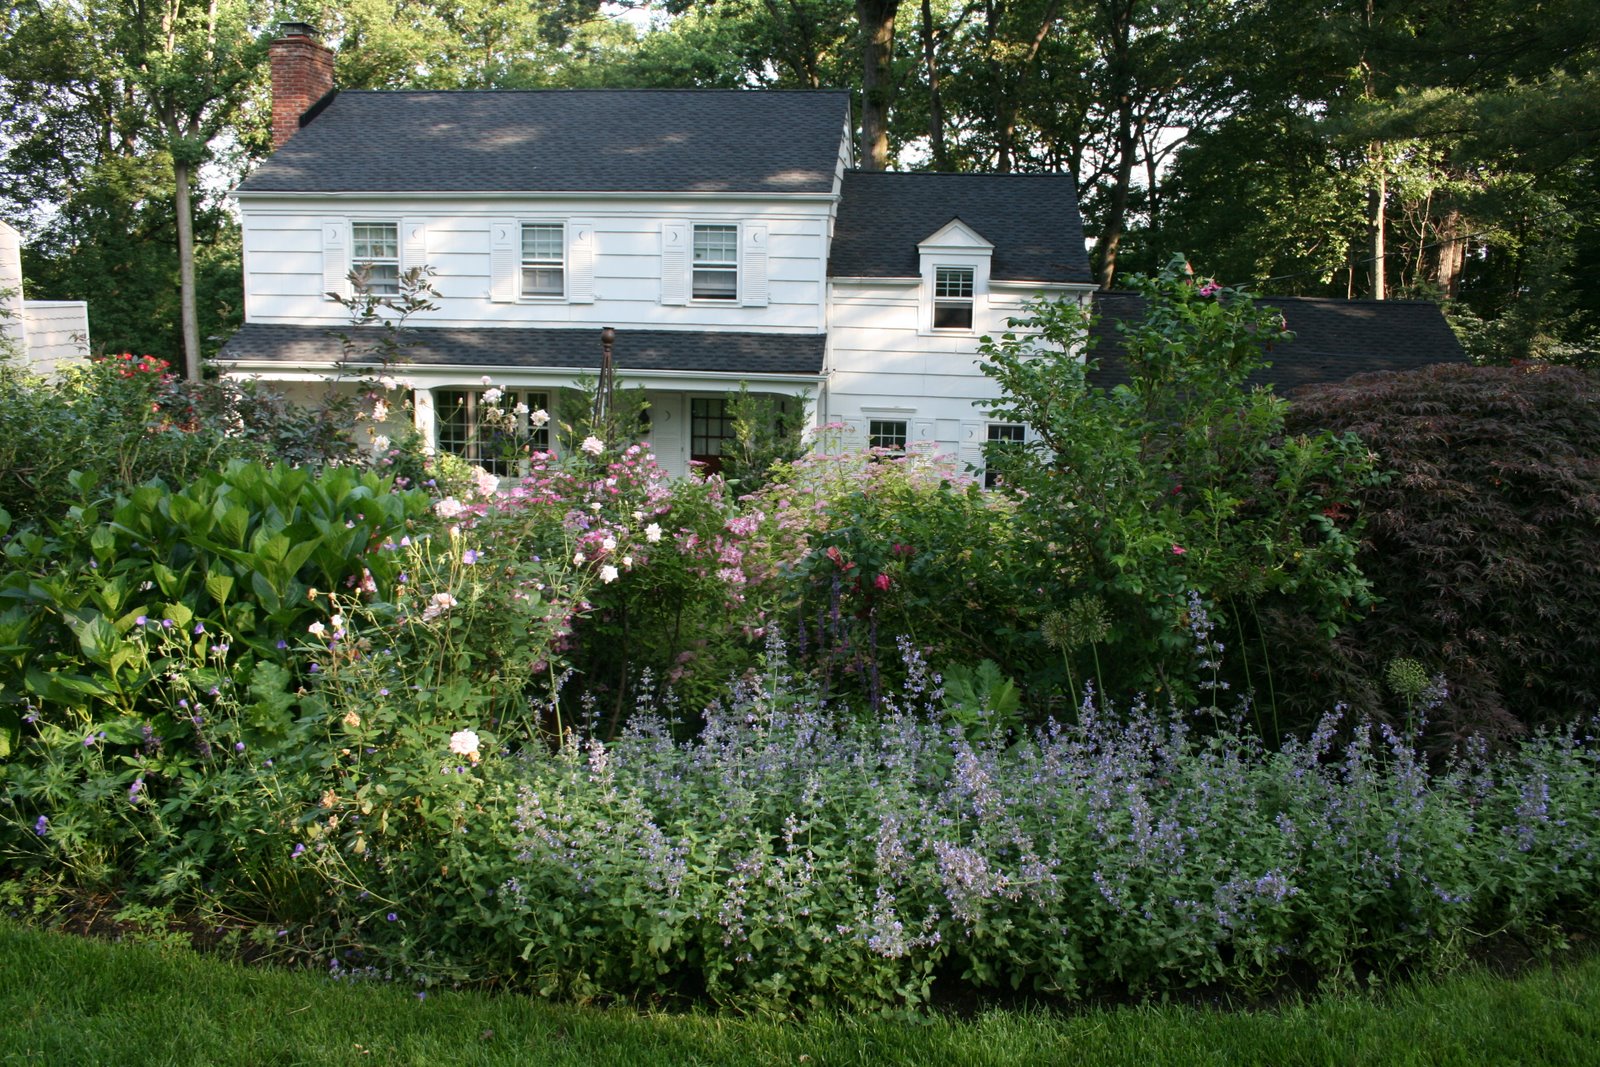 1. Add a street-level garden to beautify your neighborhood and add some privacy. While I can appreciate a beautifully manicured lawn, it just doesn’t provide the same effect when you live on a downward slope. I have a small section of lawn between the street and a mixed border, which is the top of a garden that extends down the slope to the driveway, called Goldberry Hill.
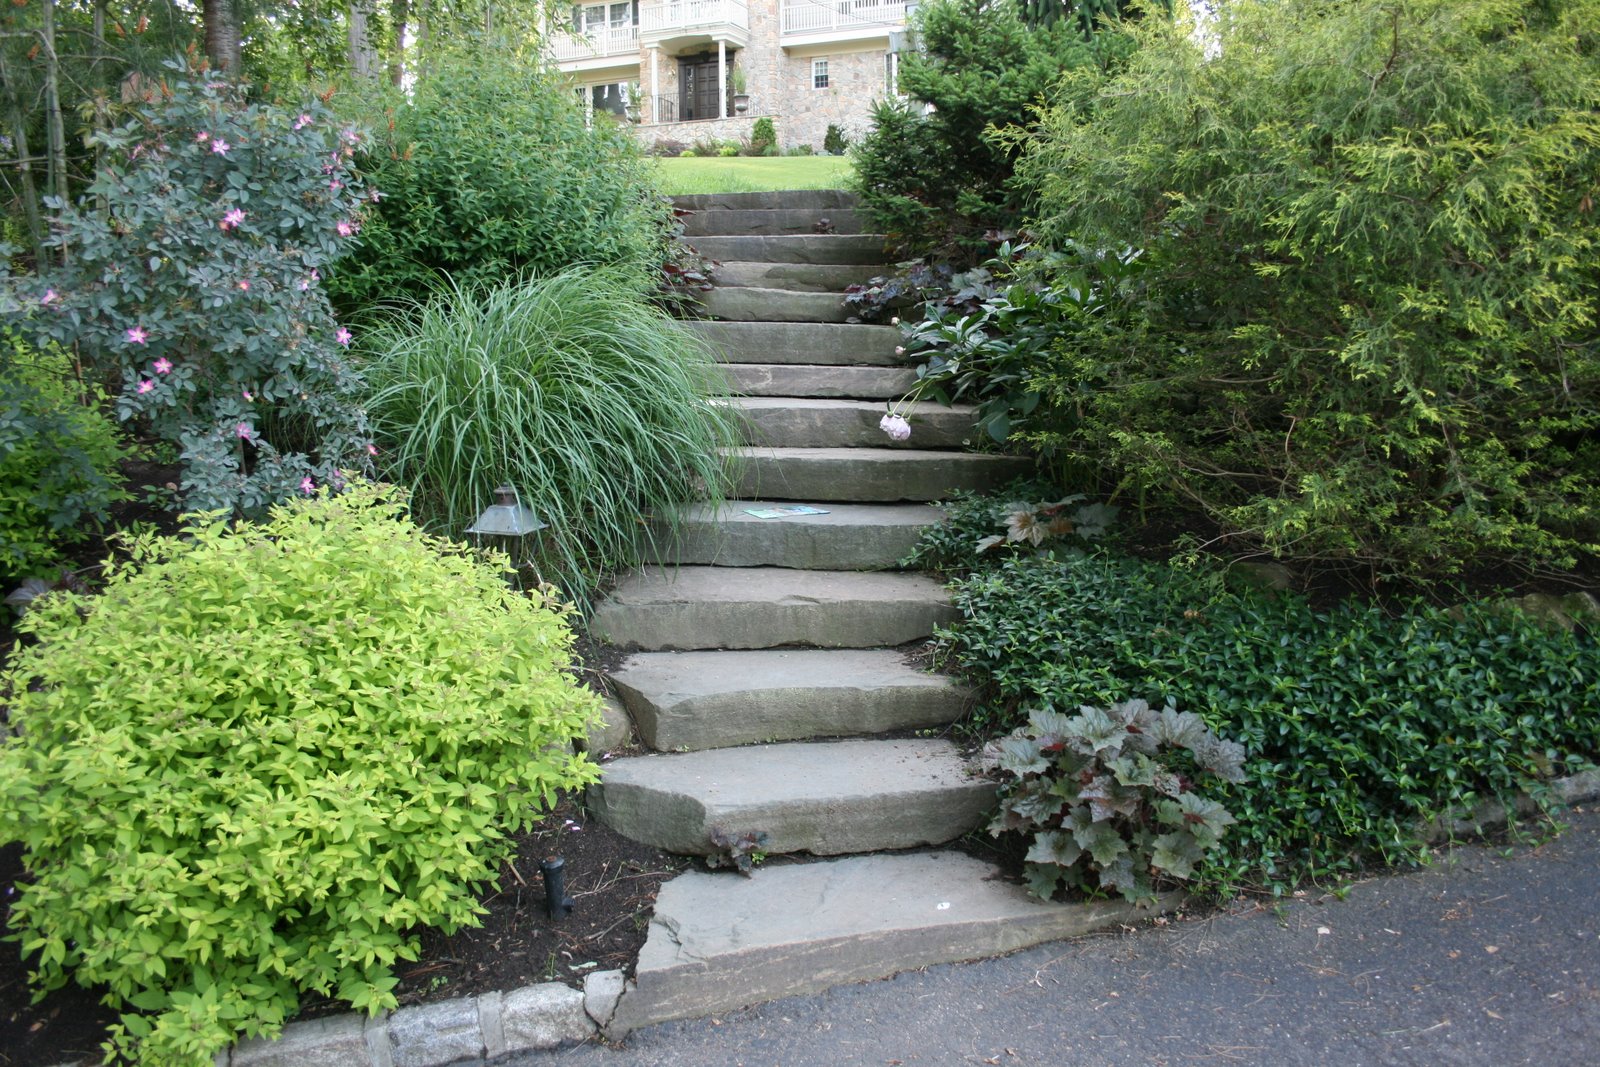
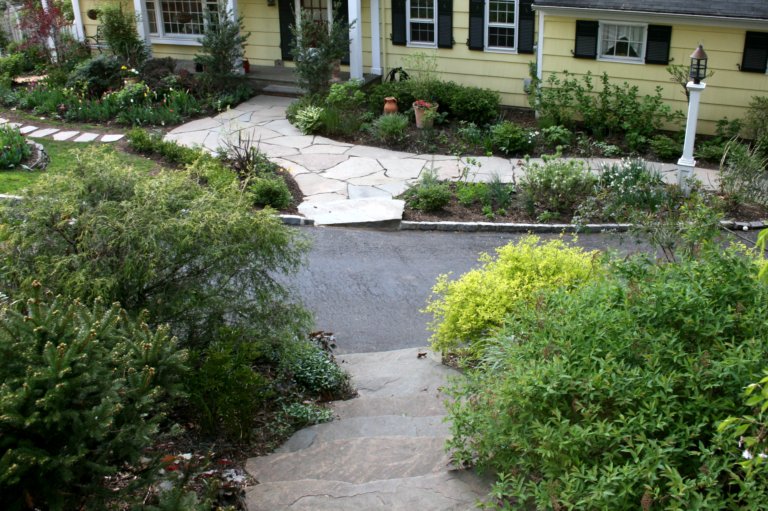
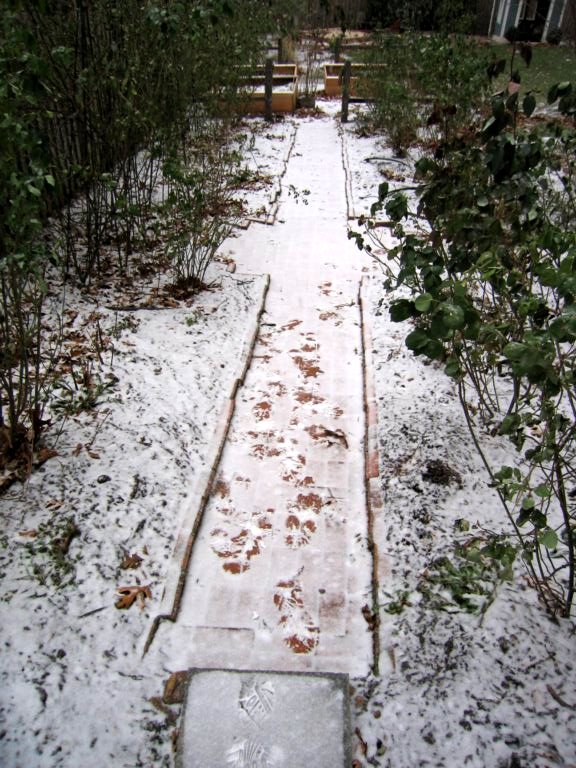
.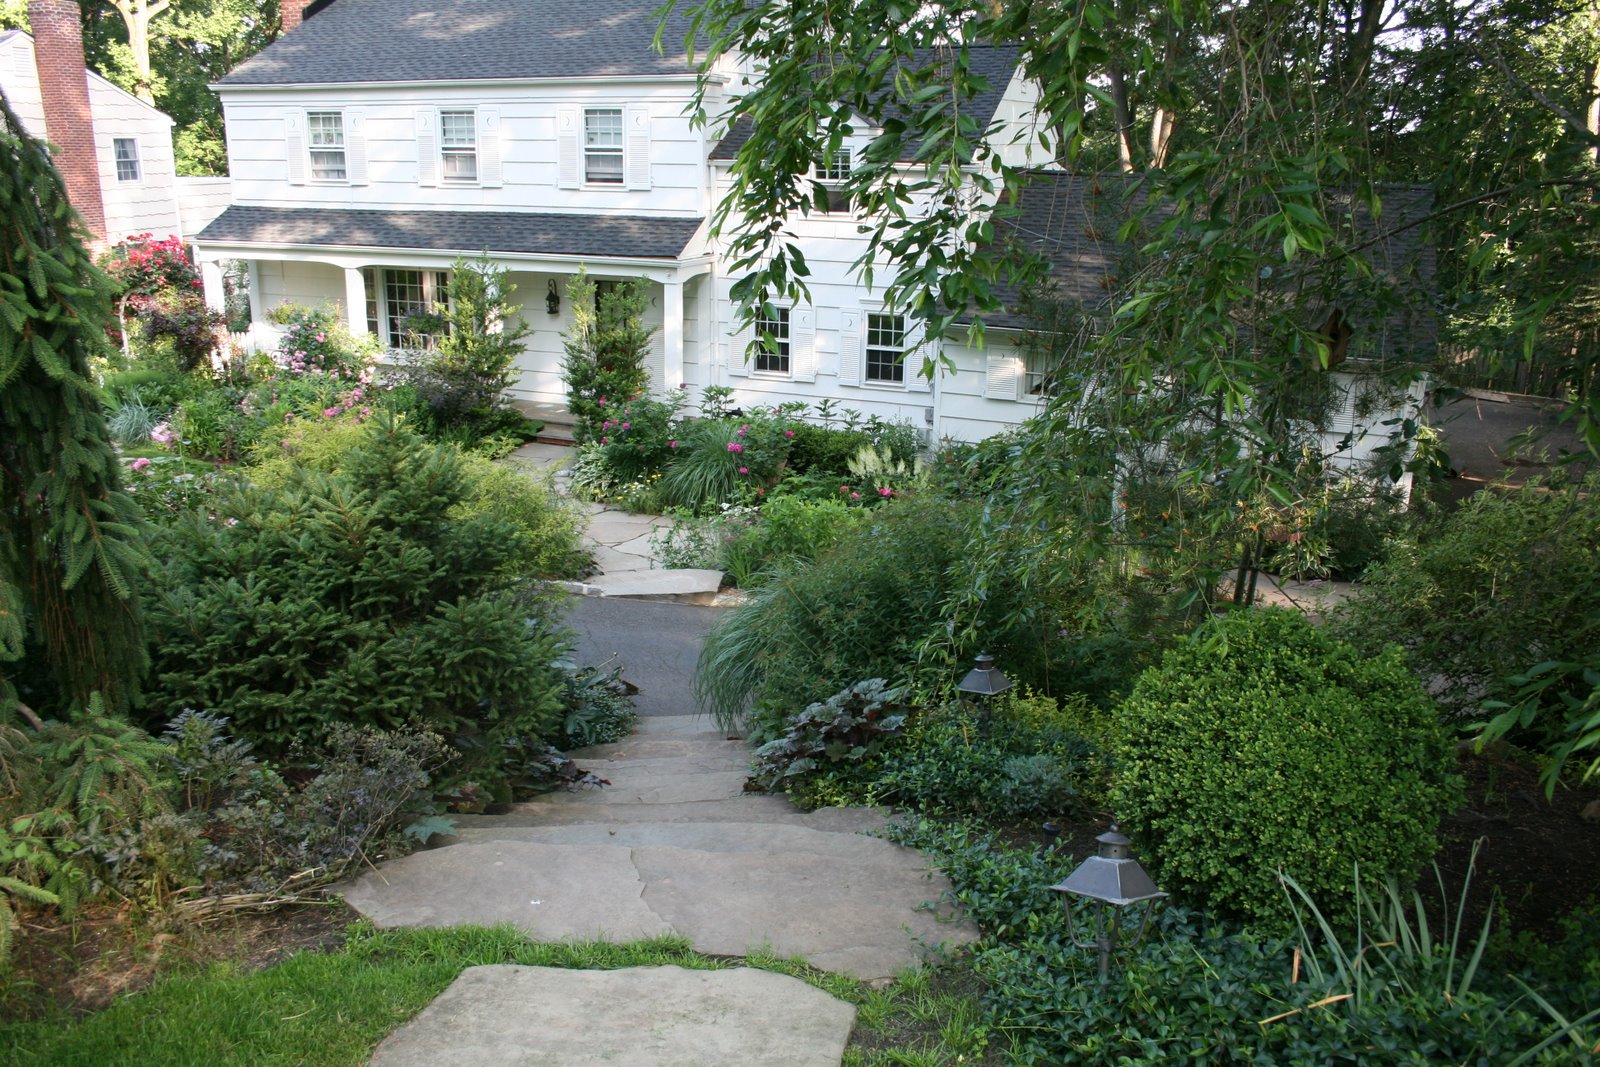 2. Add a staircase to your front door. An important element for all front yard gardens is to be welcoming to visitors. One of the best ways to do that is to make it an easy and obvious way to get to your front door. When you live on a downward slope, the best way to do this is to add a staircase. We have a bluestone staircase, which I love: it is weather-proof and will last forever, it is not slippery when wet, and it aesthetically blends in with the garden. There are plantings on either side of the staircase.
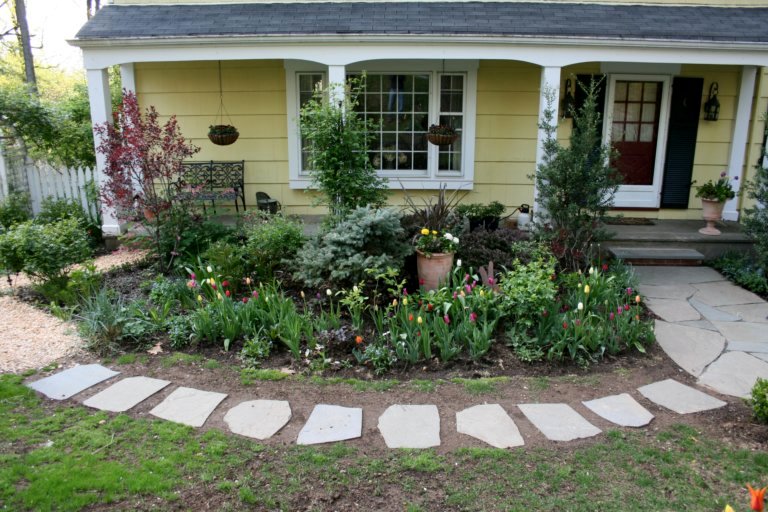
.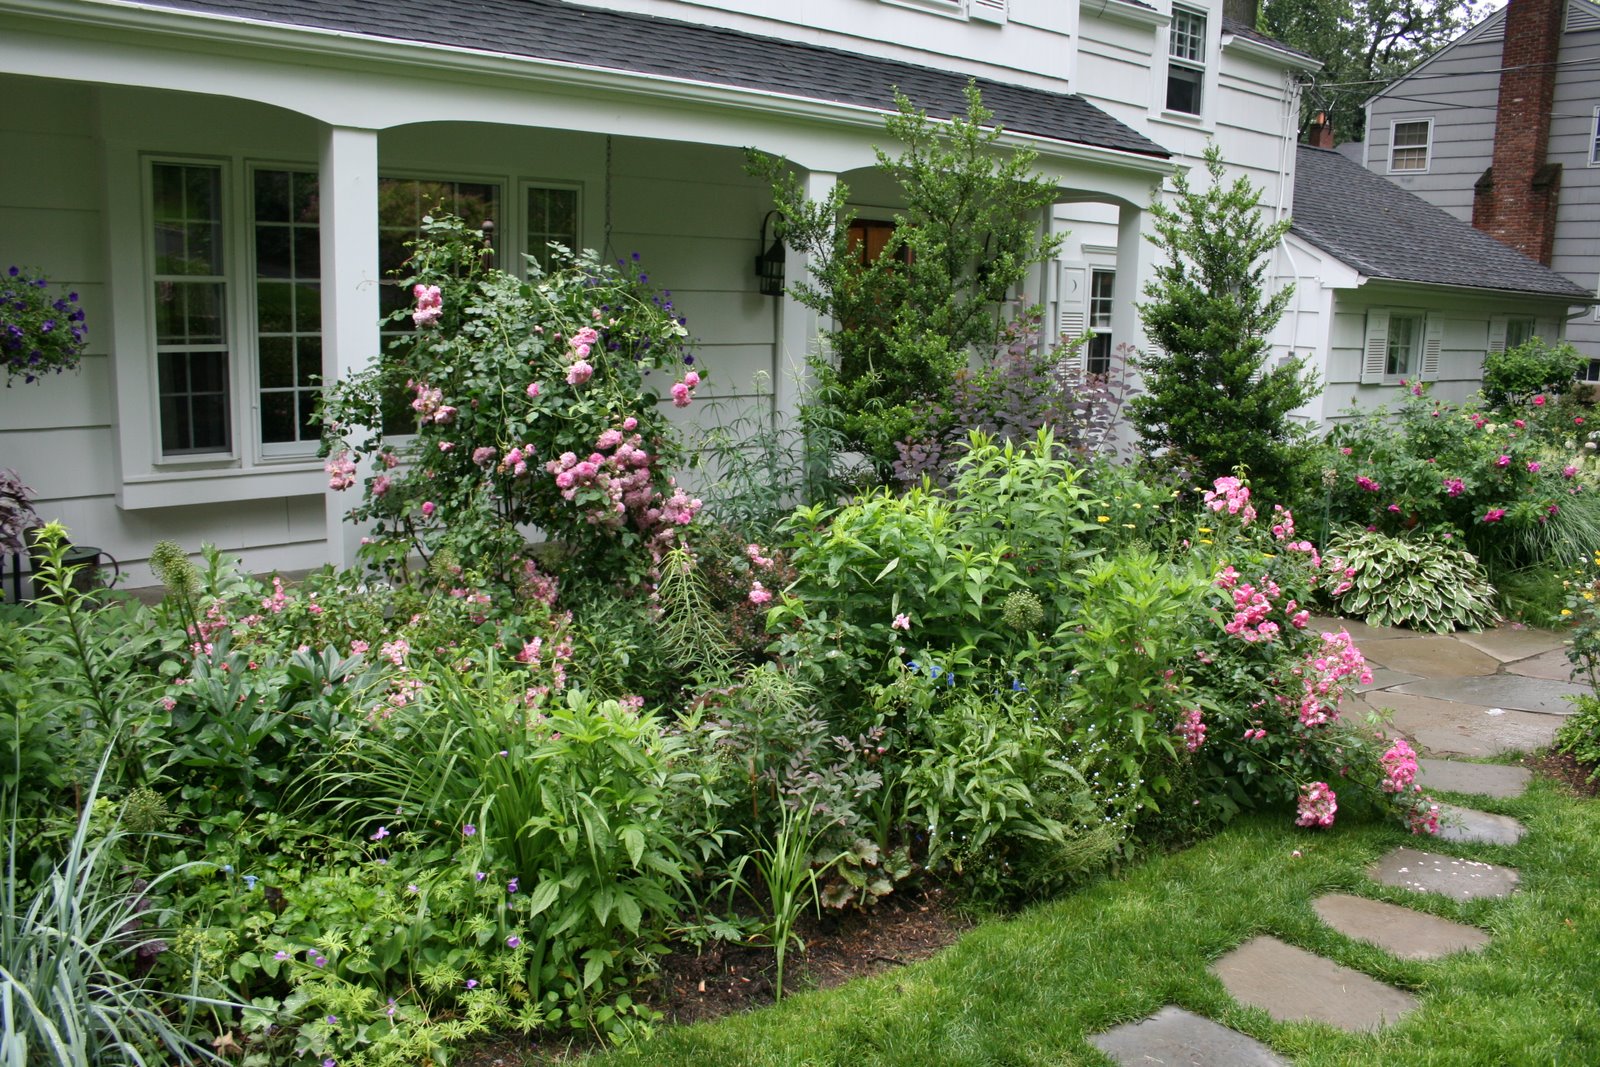 3. In the limited flat space in front of your home, add deep beds. From the street, or as you walk down the staircase, it is these deep beds that you and your visitors will see. Even if you live on a downward slope, your builder had to level out some space for your home. This is your opportunity to garden like everyone else.
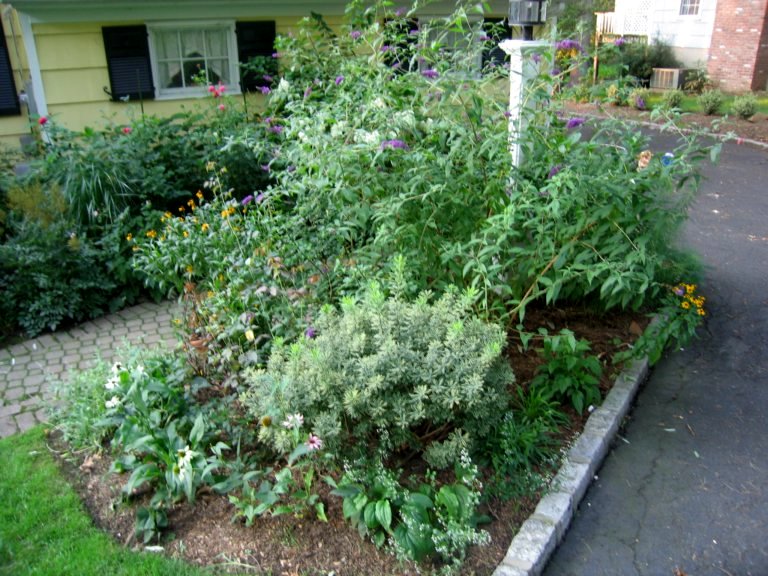
. 4. Extend the deep beds in front of your home up the slope, where possible. At the far end of my home, there used to be a large, overgrown evergreen that dominated the landscape and made it difficult to get to the backyard. In that space, we added an oval-shaped garden, called the Egg Garden. Because it is at the far end and unobstructed by the driveway, it has grown each year, such that it has now started to extend up the slope. You can read a longer post about the creation of the Egg Garden here.
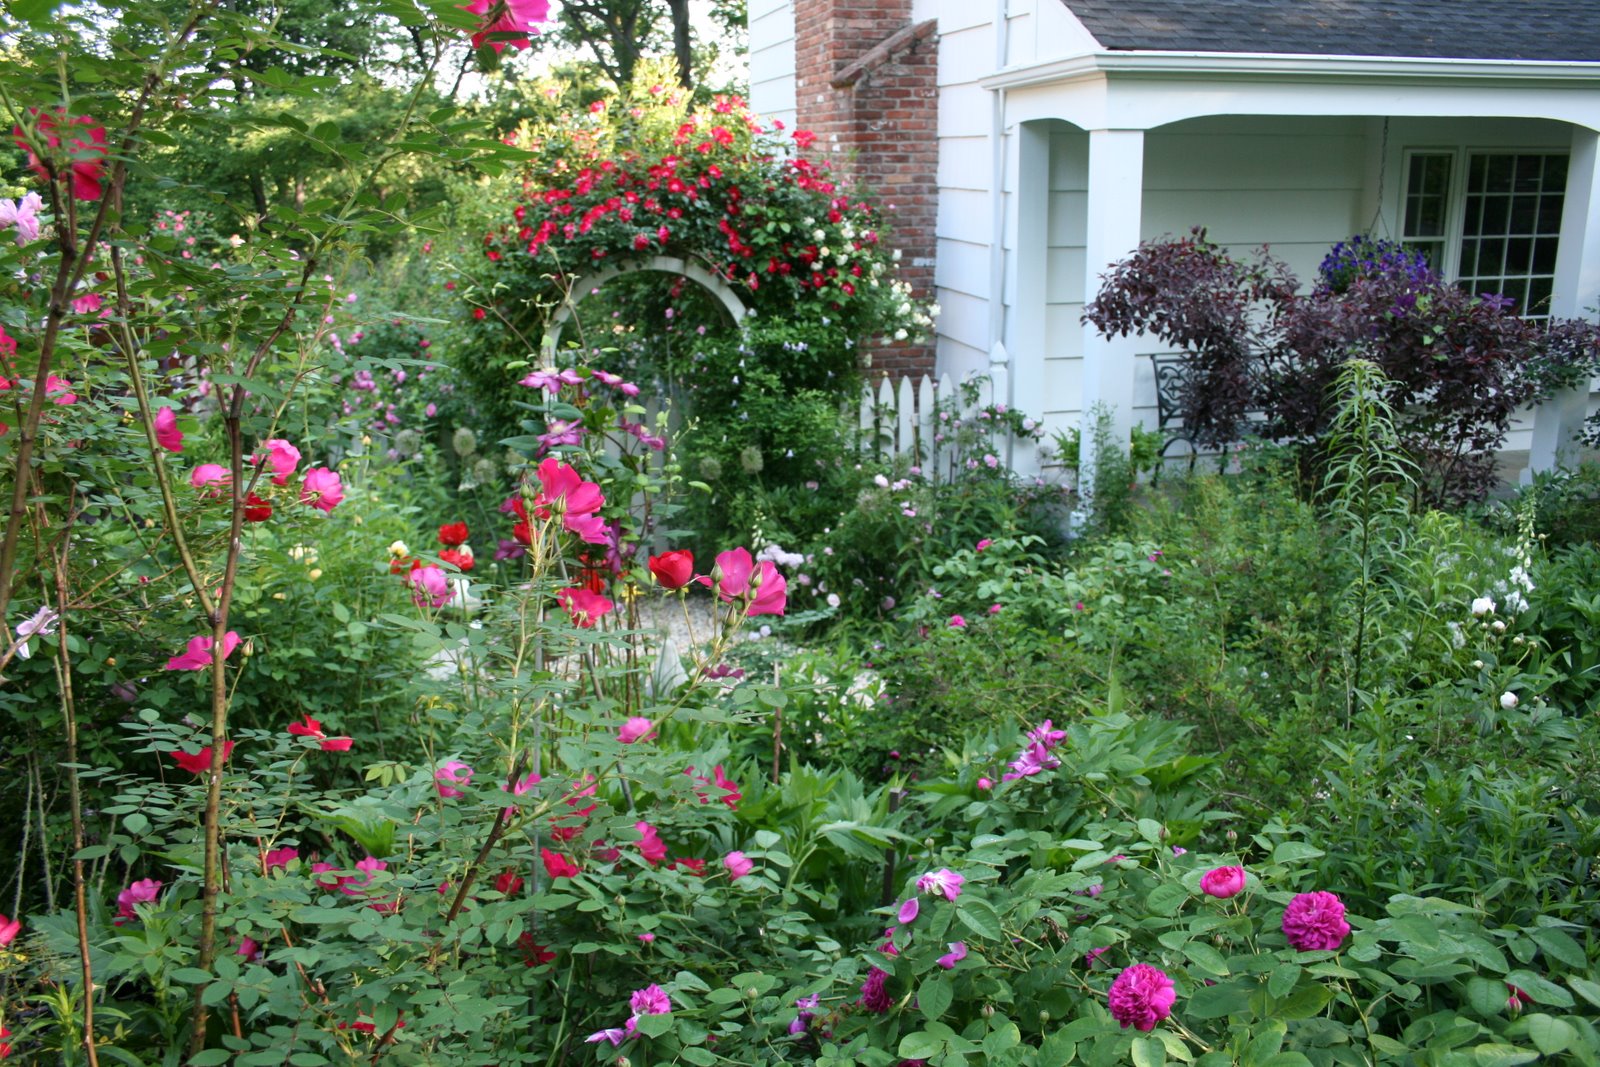
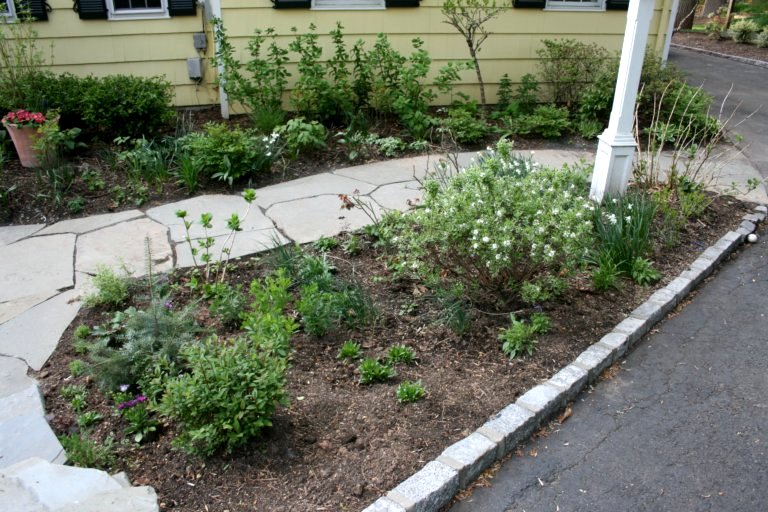
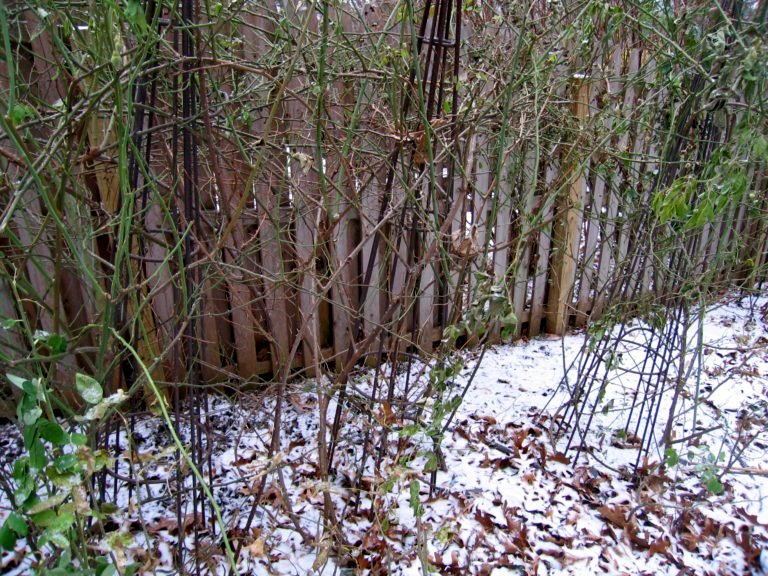
. 5. On the part of the slope that faces the house and is invisible from the street, add private beds. The best thing about having your house on the downward part of the slope is that it can feel more private. I can sit in my living room and look out onto the garden on the slope, called Goldberry Hill, instead of just looking directly at the houses across the street.
.
Related posts: Heirloom Gardener’s Four-Year Makeover of Her Front Garden and The Egg Garden in June: Replacing the Overgrown Evergreen in the Front Corner of Our Home with a Mixed Bed
Category: Garden Bloggers’ Design Workshop
Garden Bloggers’ Design Workshop: Heirloom Gardener’s Four Year Makeover of Her Front Garden – How to Improve Boring Suburban Landscaping
April’s Garden Bloggers‘ Design Workshop on Front Yard Gardens is very timely for me seeing that my spring project was to complete the four year redesign of our front garden, which is made up of the Front Border immediately in front of the house and, standing in front of the house to the immediate left, the Egg Garden.
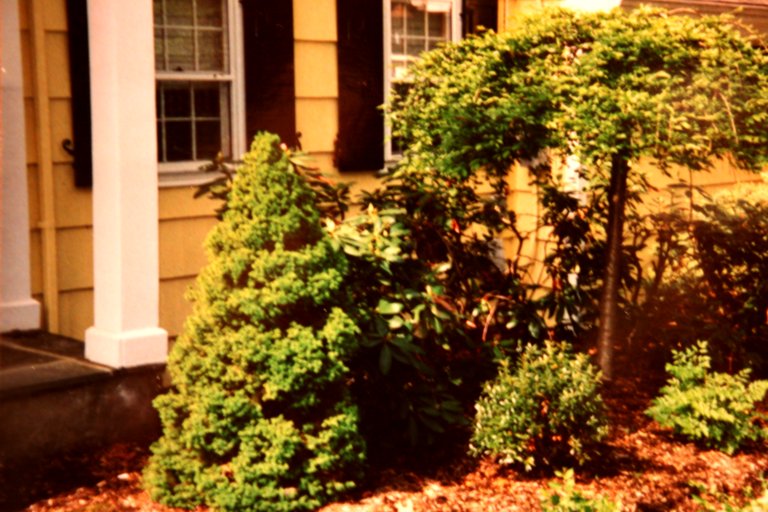
When we moved into our house, the front garden had the usual foundation plantings: evergreen trees and shrubs with two flowering trees for color. It was dull, static, and uninspiring. The first three pictures show the front border before I began replanting it.


.
.
.
.
.
.
.
.
.
.
.
.
.
To my neighbors’ amazement, I proceeded to take out the whole thing and replant it myself. The first year, I replanted the existing borders and created the Egg Garden. The existing borders had three problems: they did not change with the seasons–summer looked the same as fall and spring, and winter was only slightly different; some of the plants had grown so large that they covered windows and were out of proportion with the house; and the borders needed very little maintenance which meant there was little gardening to be done.
~
I started by removing the large problem plants: the huge rhododendron which was out of proportion with our two-story colonial, the two amorphous evergreen cones flanking the front door, and a weeping cherry which obscured the windows of the library. Then I took away anything that was poorly suited for the site, like the leucothea in full sun, or that did nothing for the border, like a deformed Ceris ‘Forest Pansy.’ Next, I improved the soil by adding four inches of mushroom compost. Finally, I began replanting with small trees, shrubs, perennials, annuals, vines, grasses, and bulbs. I also added a bird feeder.
~
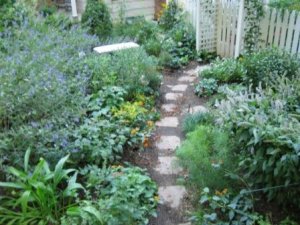
The Egg Garden was created almost entirely from the space that was formerly occupied by the rhododendron and is bordered in the back by the fence and arbor that enclose the Cutting Garden. Small six-by-six stepping stones through the grass connected the front walkway to larger, but not large enough, twelve-by-twelve inch stepping stones through the Egg Garden to the Cutting Garden.


.
.
.
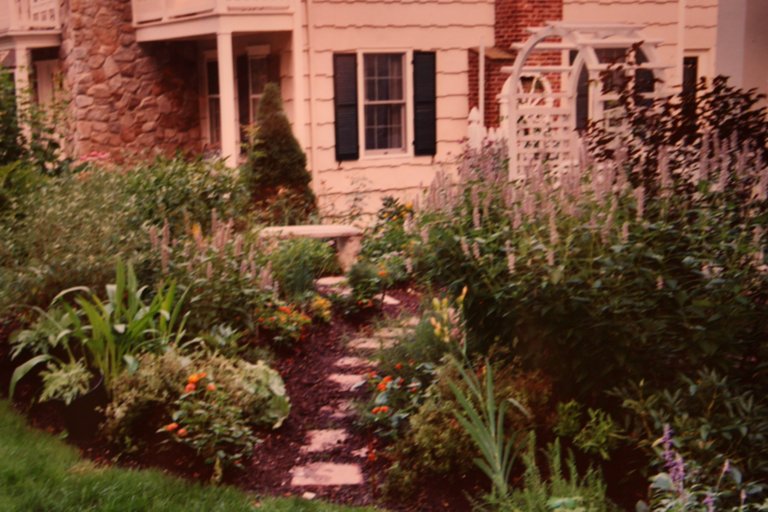
In the second year, I expanded both the Front Border and the Egg Garden, and spent time planting both more densely. I also decided to remove the bird feeder which seemed more appropriate in the backyard. In its place, I installed a tutuer on which I decided to grow the rose Lavender Lass and clematis Blue Bird and Francesca.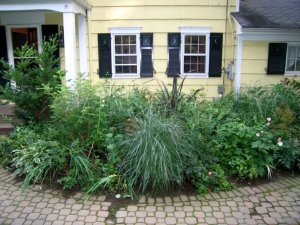


.
.
.
.
.
.
.
.
.
.
.
.
.
.
.
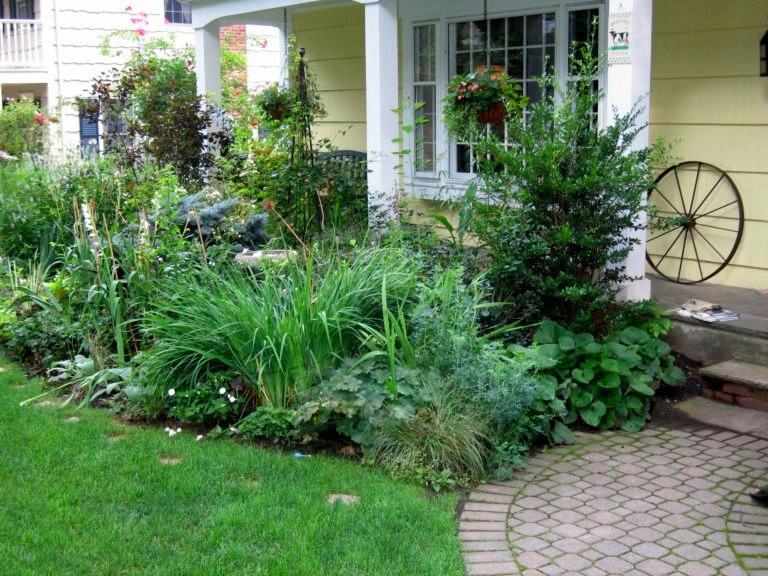
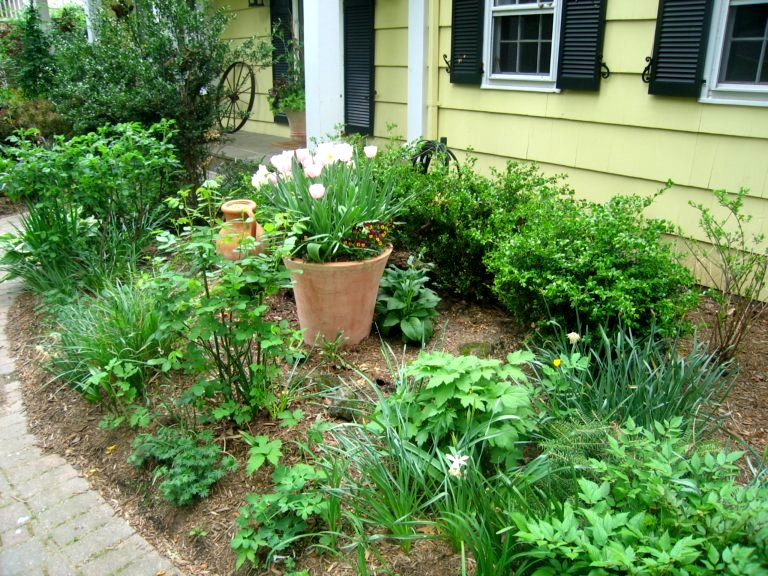
In the third year, I added a large pot and a semi circular boxwood hedge in front of the library, to give that area definition and a focal point. In the Egg Garden, I widened the path and replaced the twelve by twelve inch stepping stones with loose gravel. As always, I looked for ways to expand the floral display with more bulbs, clematis, and annuals.
 .
..
.
.
.
.
.
.
.
.
.
.
.
.
.
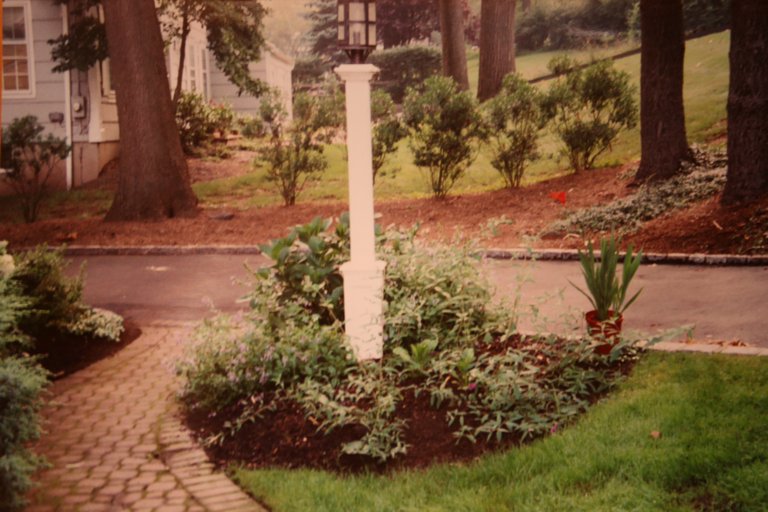
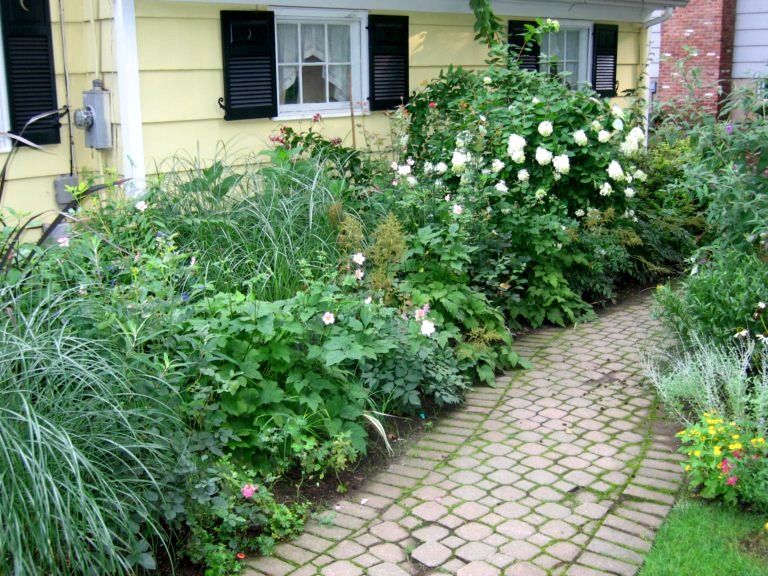
This year, I am completing the final phase of the front border renovation. I replaced the old path of brick pavers with a wider one of irregular blue stone to compliment the other stone work in the garden. I also continue the blue stone stairs on the other side of the driveway. Previously, the steps took you from the mailbox to the driveway through Goldberry Hill. From there, you were expected walk down the driveway and then onto the entrance of the path leading to the front door. No one did this, not even me. One of the cardinal rules of my garden is that there should be paths where people walk.
~
~
Further on, in place of the small six by six inch stepping stones that connected the front path to the Egg Garden, there are now more appropriately sized two by two foot blue stones. Throughout, I chose irregular blue stone pieces to harmonize with the less formal plantings.
~
The borders in the front were also to be expanded to flank each side of the new stairs. I wanted continuity in plantings around the new steps and those already there, so that it would not be obvious that they were installed at two different times. I chose to use the same plants or plant types so that the steps would echo each other.
~
The project is just about complete now. I will have to see how the plants grow in before I add more to the new plantings. In the fall, I will plant more spring blooming bulbs.
~
The project is just about complete now. I will have to see how the plants grow in before I add more to the new plantings. In the fall, I will plant more spring blooming bulbs.

Garden Bloggers’ Design Workshop – Container Plantings: Variety, Soil, and Care
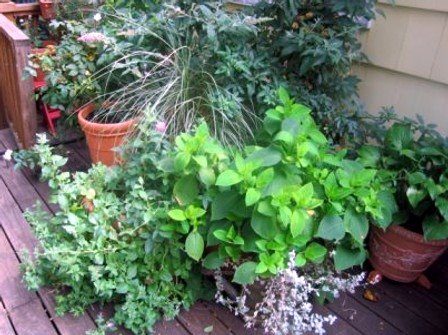
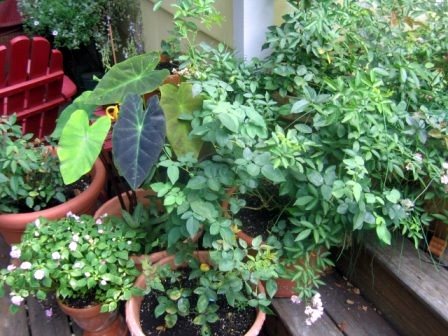
 When I first moved to my current garden, I gardened strictly in containers for the first two years. I covered my 800 square foot deck with everything imaginable, leaving barely enough space for eating and sitting. During that time, I learned a lot about container gardening from both failures and successes. The three most important lessons I learned are: anything can grow in a container; the potting soil matters a great deal; and containers must be cared for and freshened up throughout the year.
 Anything Can Grow In A Container
Anything that grows in the ground can grow in a pot. Containers are not just about annuals. More can be added to the garden by varying the contents of your containers. For example, two years ago I planted a culinary herb garden near our Children’s Garden. I found that it was too far from the house to duck out while cooking for a quick snip at an herb or two. So, last year I relocated the herb garden into pots on the deck. I have one huge pot with dill, chives, and basil; one with rosemary, tarragon, and various kinds of thyme; and a few smaller ones with different varieties of basil. I usually grow any new roses I want to try in pots: everything from the small Clotidle Soupert to the rampant climber Cecile Brunner. Evergreens, shrubs, grasses, vines, even trees can be grown in pot. I have had a lilac growing for five years now in a pot on the deck and each year the blooms get better and better.
 When growing shrubs and trees in pots for the long term, I’ve learned to treat them as really large bonsai plants. Each year, I renew their soil by removing some and adding organic amendments and manure. Also, every few years I trim off the outer most roots of the plants on one side to allow more root development without the danger of the plant becoming root bound. With this treatment, my lilac is still growing in its original planting pot.
 The Potting Soil Matters a Great Deal
As regards the potting medium, consider again what will be growing in the pot. For tropical plants that like a lot of moisture like elephant ears, I use a heavy potting soil with lots of organic matter added to it that will hold moisture well. This year I am mixing the organic Gardeners’ Gold potting soil with dehydrated cow manure. For my roses, that mixture would kill them because the water would sit too long close to their roots. So for roses, I could take the same Gardeners’ Gold, but to it add perlite and cow manure so that the proportions are 1:1:1. This yields a rich, well draining soil. For a plant which likes leaner soil, take out the cow manure and use a less organic potting soil as a base.
 Containers Need Year-Round Care
Once the container is planted, the care for that container does not stop there. Since containers are their one ecosystem, I must be very attentive to watering, particularly during heat waves, and fertilizing. Usually, I water every morning and sometimes again later if the weather has been particularly brutal. I also fertilize once a week with fish emulsion, sea weed emulsion, or a liquid complete fertilizer.

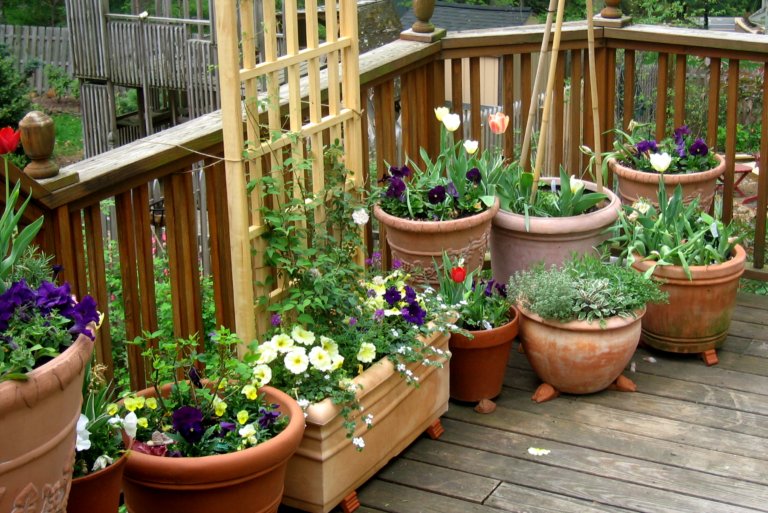
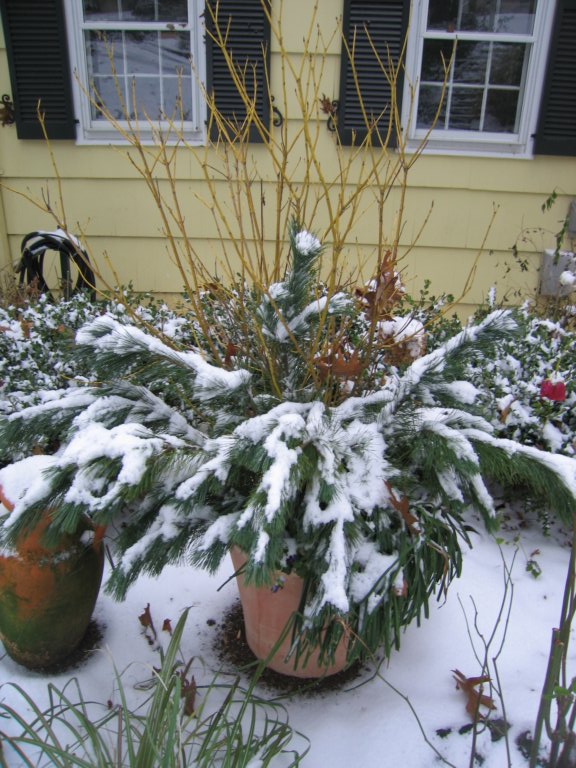
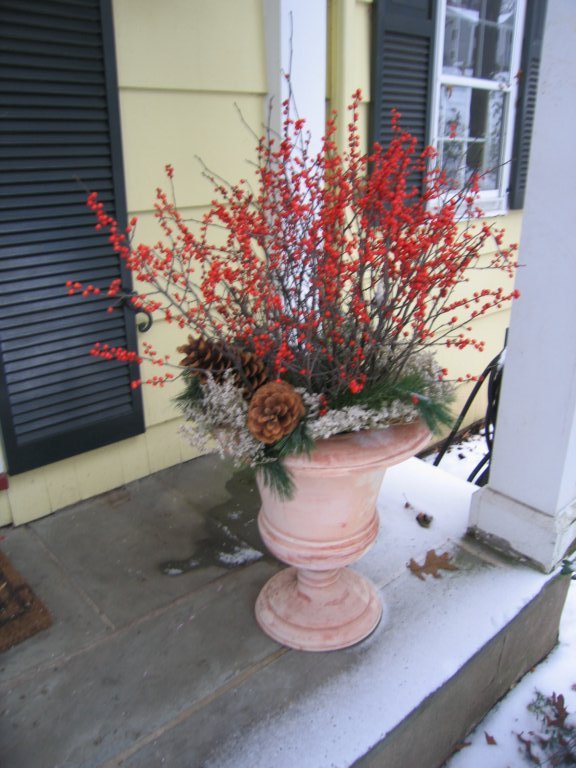
In the border, I often use containers which I can change with each season. The pot that sets in the front of our library began in the spring with a melange of daffodils, tulips, and muscari ringed with pansies. In June, I replaced the planting with red hot pokers, caladium, and a very tall phormium. Then in autumn, everything except the red hot poker came out. I add then a three foot tall yellow twig dogwood, pansies, and a few medium sized gourds.  After Thanksgiving, I removed the gourds and replaced them with white pine boughs and trimmed back the leaves of the red hot poker for neatness. For this spring, I left the dogwood and the red hot poker. I have added pink primroses and pansies. The constant changing of the containers offers something new for each season and gives me more opportunity to experiment.
~
 After Thanksgiving, I removed the gourds and replaced them with white pine boughs and trimmed back the leaves of the red hot poker for neatness. For this spring, I left the dogwood and the red hot poker. I have added pink primroses and pansies. The constant changing of the containers offers something new for each season and gives me more opportunity to experiment.
~
Before the frost, I also move my non-hardy containers that I want to over-winter either into the garage (roses, fig tree) or into the house (elephant ears).
~
*****
Containers add so much to my garden and plant knowledge. It is a great way to experiment with different plants and combinations without the commitment of planting in the ground. Also, seeing how a plant thrives in a pot with a specific planting medium helps me understand under what conditions it will thrive in the ground.
~
This post is a part of Gardening Gone Wild’s Garden Bloggers’ Design Workshop – Container Plantings: (http://www.gardeninggonewild.com/?p=940).
~
~
Related posts: Early Spring Containers, Winter Containers
Garden Color: Inspiration from Chanticleer in Wayne, Pennsylvania
 Chanticleer, in Wayne, Pennsylvania, is one of my greatest sources of inspiration as a gardener. It describes itself as ‘America’s pleasure garden’ and that it is. I love Chanticleer because you can tell the staff loves plants and loves to play with them in creative combinations and venues. Everything is done to please and exite the senses.
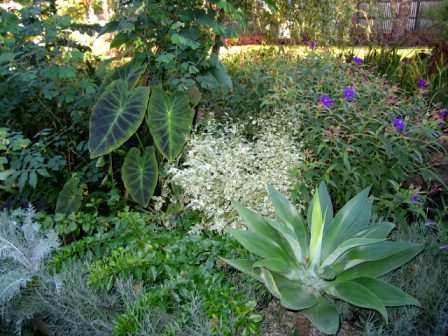
 Color at Chanticleer is as much about flowers as it is about foliage. The combination of various leaf colors, textures, and shapes makes the garden interesting without any thought to flowers.
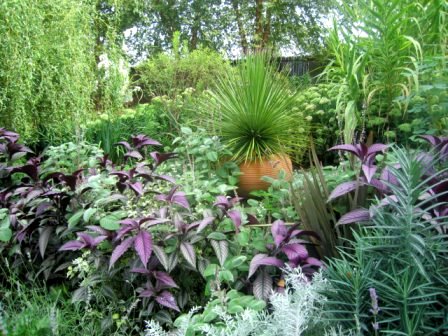
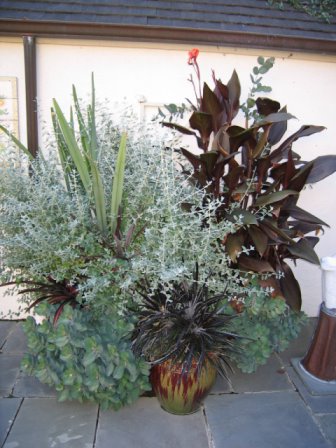
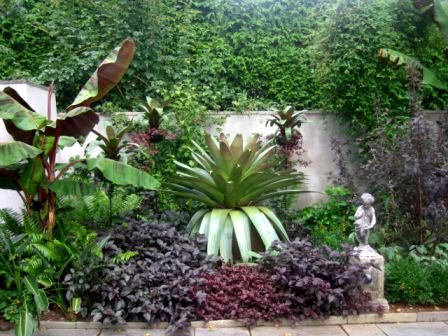 Purple leafed plants run as a theme through Chanticleer. I love how dark leaves interact with light and add a deep rich beauty which soothes the mind rather than excites.
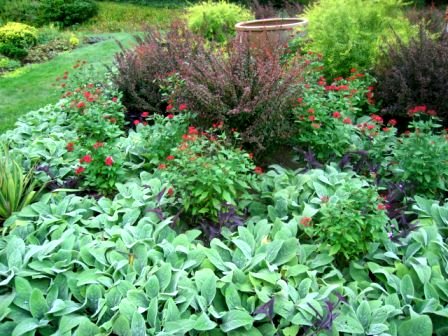 Over the last several years of viewing Chanticleer, I have added two smokebushes (Cotinus ‘Grace’ and ‘Royal Purple’), Rose glauca, purple phormiums, dark leafed clematis like ‘Freda’, amaranthus ‘Hopi Red Dye’ to my garden. The dark color relieves the green and really brings out any silver toned plants nearby. Also, the purple foliage looks great in floral arrangements.
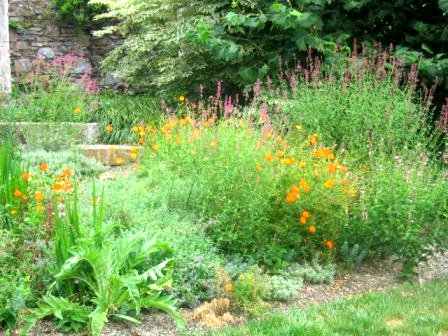
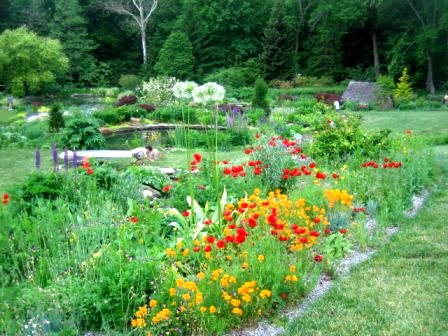 One of my favorite quotations from Christopher Lloyd as it regards planting and border design is that “you should never have to explain what you were trying to do.” At Chanticleer, this rings true. All the plantings are dense, rich, and full. The feeling of abundance surrounds you. There is rarely one of anything. Instead, it’s large swaths of poppies set against orange wallflowers.
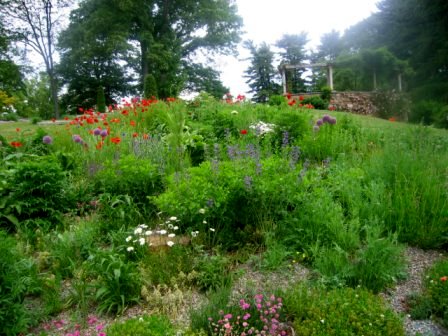 My garden is my small piece of Eden where I can experience this. This year I want to do a combination of yellow anthemis and orange butterfly weed. I know from Chanticleer I’ll want to plant more than I think of both.
 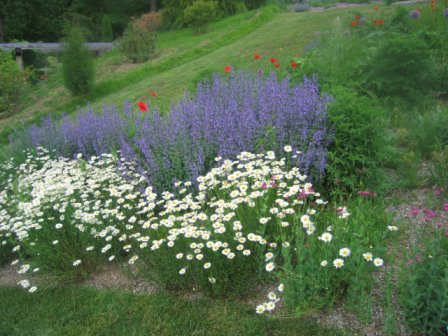 For more information about Chanticleer, click here: http://www.chanticleergarden.org/
  This post was inspired by the “Garden Bloggers’ Design Workshop – Colors in the Garden” at one of my favorite gardening blogs, Gardening Gone Wild: http://www.gardeninggonewild.com/?p=698
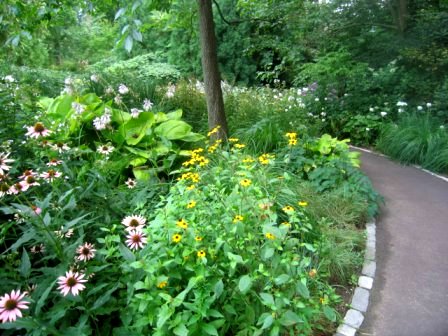
Twelve Months of Garden Color in New Jersey (Zone 6b)
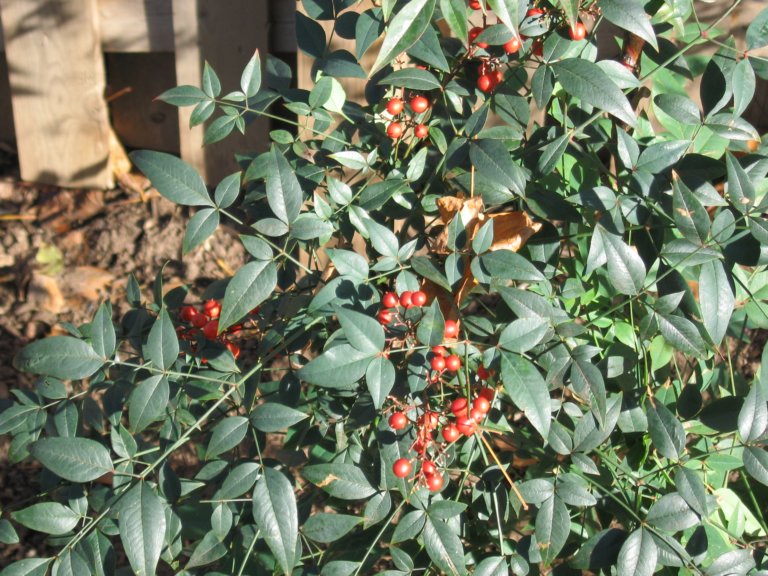
As it relates to color in the garden, one of my goals is to create year-round interest. Looking through my pictures, the year starts with whites and yellows; the middle months have a full range of of bright colors; and the year ends with the deep colors of berries. Here is a brief overview of these colors with one picture for each month of the year.
This post was inspired by the “Garden Bloggers’ Design Workshop – Colors in the Garden” at one of my favorite gardening blogs, Gardening Gone Wild: http://www.gardeninggonewild.com/?p=698
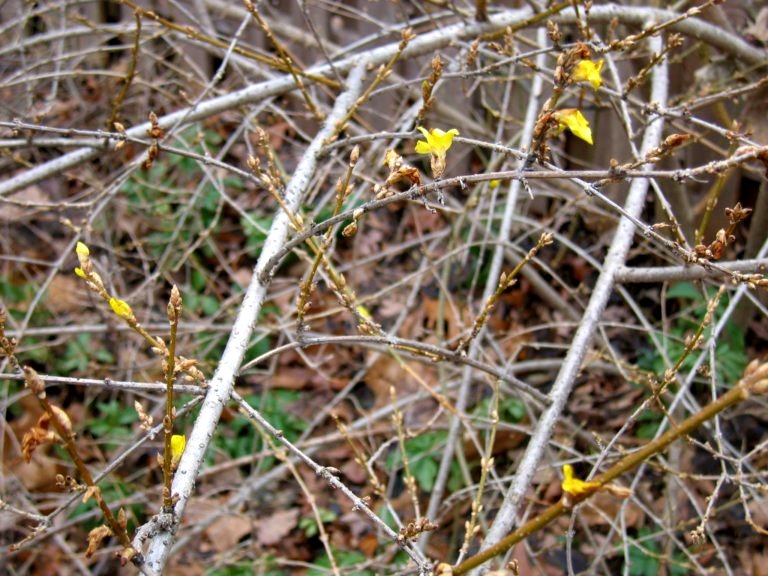 January in northern New Jersey (zone 6b) is a hard month to find any color in the garden. Fortunately, whenever the weather warms up into the forties, the forsythia start to show off some of their blooms. Of course, when it gets cold again, they hide themselves away until it warms up in earnest. This is the time when I start to cut the branches off and bring them indoors to force–my favorite thing to do with forsythia.
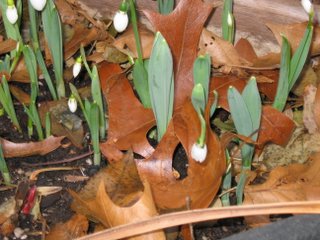 February is the month for snowdrops. I have snowdrops in the Cutting Garden and, last fall, planted more in the Walled Garden. These small flowers are so cute and the first real sign that spring is coming. Given their size, you really can’t plant too many of them–think hundreds. Since I like to plant a lot, I buy my snowdrops wholesale from Van Engelen. Once they come up, I cut small bunches for vases. Pests do not eat these bulbs.
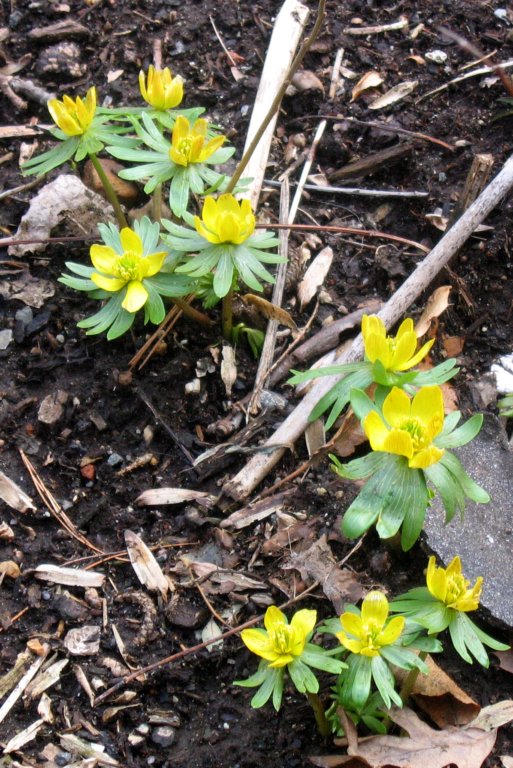 The March bulb show begins with winter aconite. It is another small bulb that I planted under Prunus ‘Forest Pansy’ in my front border. It took me a couple of years for me to get these established. I was most successful with bulbs from Old House Gardens. I think the difference was that these bulbs dry out very easily and Old House Gardens coats the bulbs in a horticultural wax to prevent this. If you know someone with an established clump, it’s best to beg a few in the green and replant them immediately in your garden. Pests do not eat these bulbs.
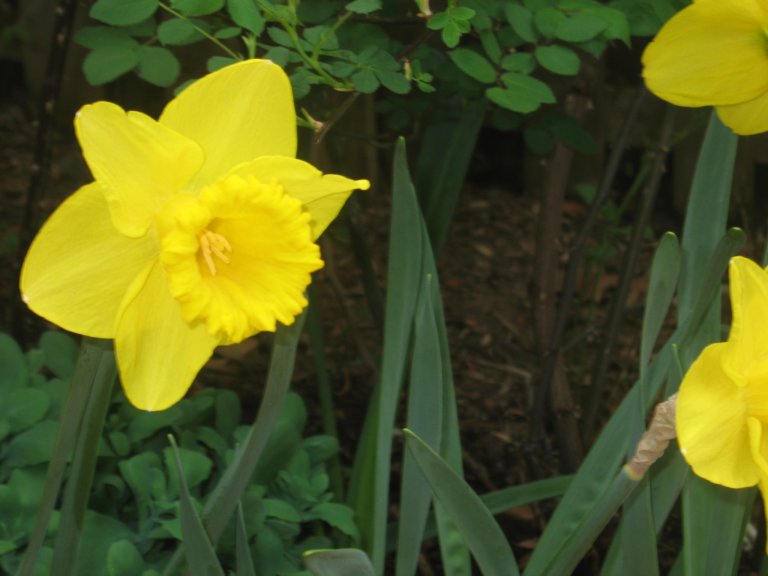
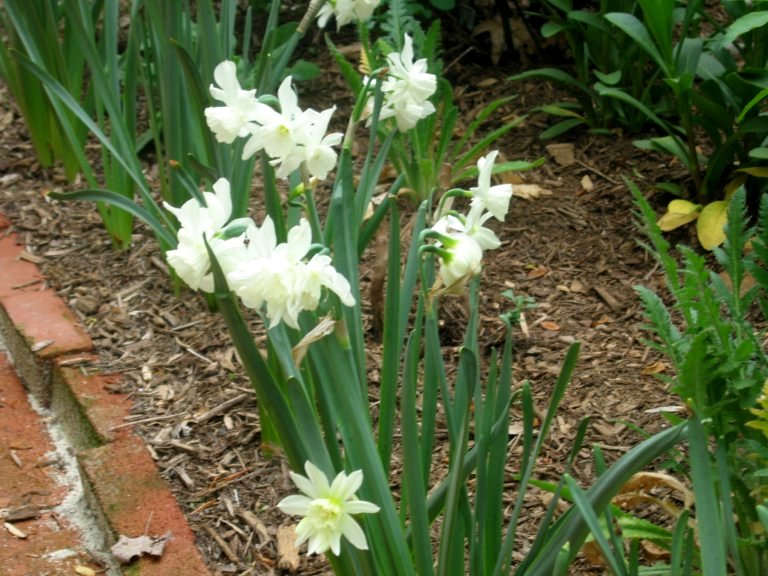 April, of course, is the month for daffodils. I plant hundreds of daffodils all over the garden. I plant all sizes and colors, but am particularly fond of the white daffodils. The earliest actually start to bloom at the end of March and they last through April into May. Pictured here is an old heirloom Thalia.
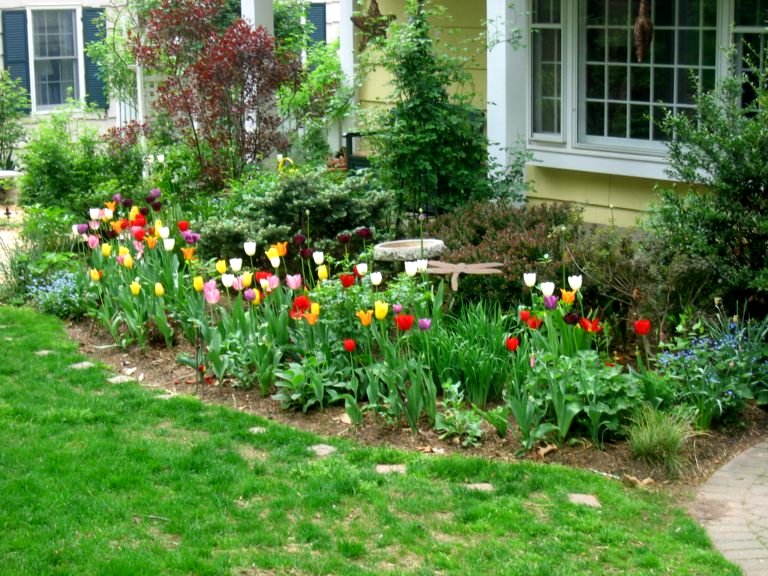
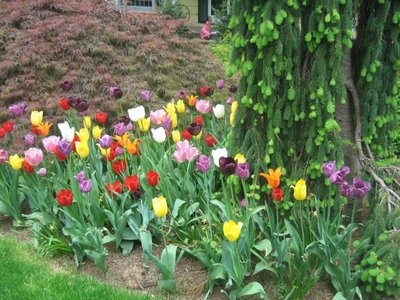 May is one of my favorite months in the garden as tulips explode everywhere. Last year, my combination was inspired by the Granny’s Garden collection from Old House Gardens. I planted a mix of the following tulips, most of which are older varieties: Cum Laude, Glowing Pink, Kingsblood, Maureen, Queen of the Night, Dillenborg, Mrs. John Scheepers, Colour Cardinal, Princess Irene, and Ballerina.
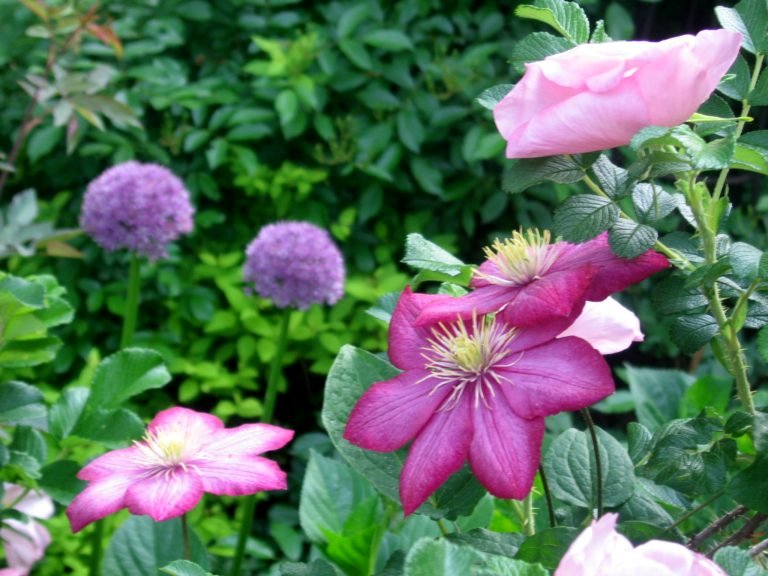
June is the most colorful month in my garden. As the spring bulbs wind down, the garden bursts into bloom with roses, clematis, alliums, peonies, poppies, and many more. In the picture is one of my favorite rugosa roses Frau Dagmar Hastrup. Frau Dagmar is small for a rugosa reaching only about 3 feet tall and about as wide. It begins blooming in May and continures until November. The leaves are a beautiful, quilted, dark green. Frau Dagmar also sets many hips when I stop deadheading. The fragrance of Frau Dagmar is magnificent.
 July is when the plants from and reminescent of the American prairie take over. Purple coneflower, the many rudbeckias, joe pye weed, heleniums, helianthus, phlox, milkweed, monarda, erygium, echinops, and shasta daisies all begin their bloom. These plants, despite the heat and humidity of summer, keep going and going while attracting many birds, hummers, and butterflies to the garden. By mixing these with grasses, you have color, movement, and beauty that will carry you well into September.
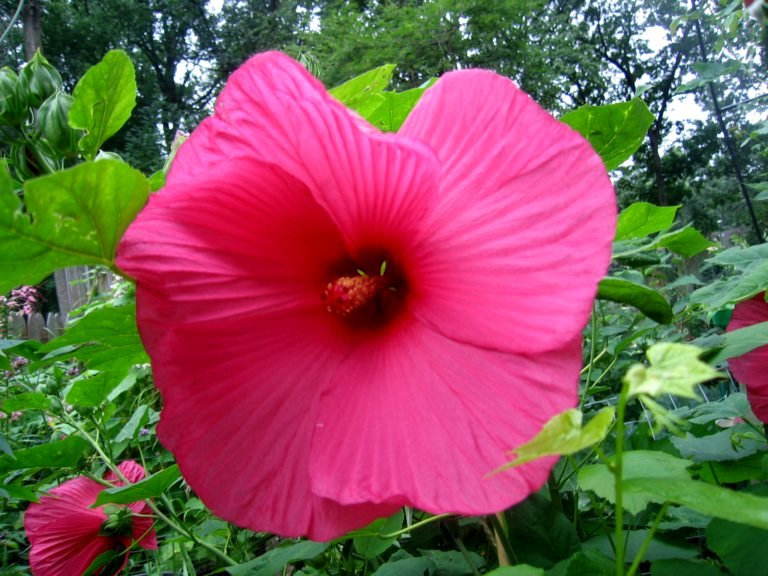 One of my daughters is in love with hibiscus and has been reminding me I haven’t put a picture of her hibiscus on my blog yet. In August, the huge tropical looking flowers garner lots of attention. The flowers are great floated in a vase and keep coming over a long period of time. Also, the seed pods of the hibiscus are quite beautiful afterward.
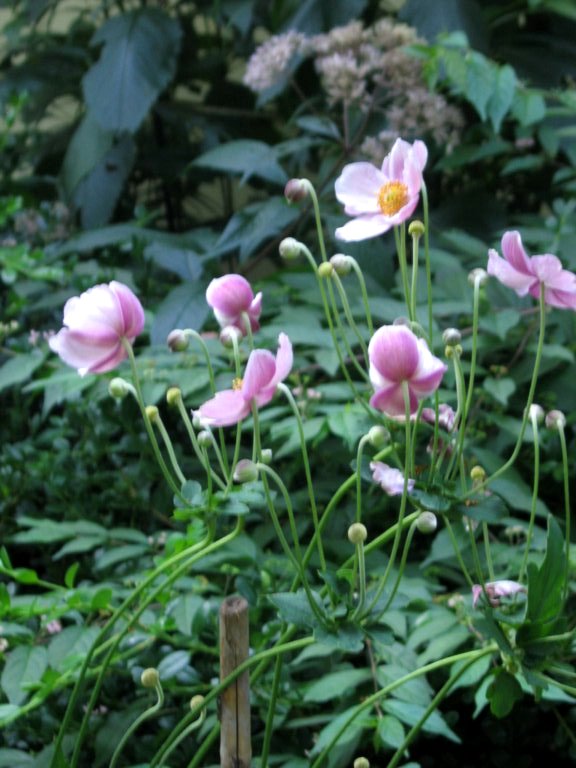 September is part of summer in my book. The garden is still in full swing with no sign of winding down. By the end of the month, however, the Japanese anemone ‘Queen Charlotte’ is beginning to bloom, signaling the very beginning of fall.
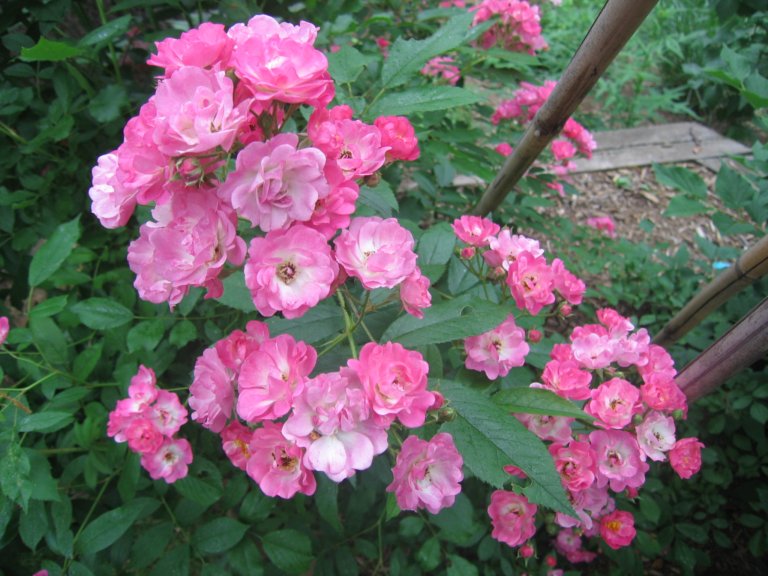
October is the month of rose rebloom. In our garden, any rose that is going to rebloom, puts on a very generous display in the autumn even if it hadn’t bloomed since June. The cooler temperatures in September helps to restart the roses after the heat of August. Pictured here is Belinda, an heirloom hybrid musk rose, purchased from Antique Rose Emporium. I deadheaded this rose throughout the summer and was rewarded in the fall with a very generous flush of roses in addition to the many others throught the summer.
 The butterfly weed pictured here was a welcome volunteer from a clump of Mexican milkweed I planted in 2006. I did not expect it to reseed for me given that its grown mainly in zone 8 and warmer. But the seedling did come and were enjoyed by many monarch catepillars. The plants came into bloom very late in the season. They, however, made it through many light frosts and only died well into November when we had a hard frost.
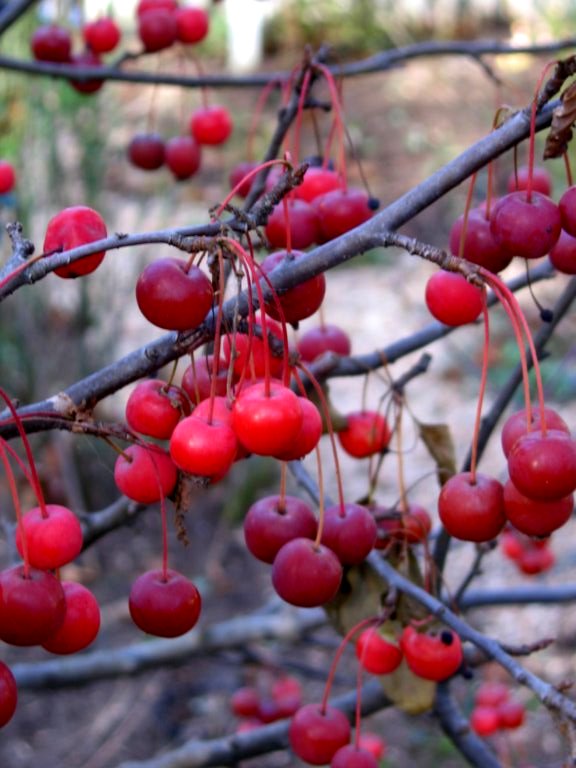
Creating the Rose Garden with a Central Brick Path
 After we established the Cutting Garden, there was a narrow portion of our property behind it and next to our deck that was another relatively unused portion of our yard, measuring approximately fifteen feet wide by thirty feet long.
Because this space had full-sun, I thought it was the perfect place for a rose garden. While I have roses in almost every part of the garden, a dedicated rose garden would provide more space for all of the roses that I wanted to grow.
The first picture is taken from the steps of the Cutting Garden looking down the path of the Rose Garden to the Children’s Garden.
The main structural element of the Rose Garden is the brick path that you see running through the center. I actually installed the brick path myself, which was a tremendous amount of work that I’m not sure I would want to do again.
After we established the path in the summer, we started to prepare the beds for planting the roses. In the fall, we put down newspaper to kill the grass and covered it with a thin layer of organic matter. In the spring, we dug in significant amounts of composted cow manure and mushroom compost. Then, we planted the roses.
Inspired by the Cranford Rose Garden at the Brooklyn Botanical Garden, I knew that I could fit a lot of roses into a limited space. We now have twenty-seven different roses in the Rose Garden, as well as bulbs and perennials.
 Some of the roses are grown on tutuers. The three pictured were purchased from the New York Botanical Garden, which has the best gift shop of all of the gardens I visit:
For pictures of the Rose Garden in season, click here:
http://heirloomgardener.blogspot.com/2008/01/rose-garden-in-spring-summer-daffodils.html
For information on the creation of the Cutting Garden, see this post:
http://heirloomgardener.blogspot.com/2007/11/creating-space-for-garden.html
Creating Space for a Garden: the Cutting Garden
Like many suburban gardeners, one of the hardest things to do is find space for all of the plants that you want to cultivate. One solution is to create gardens in the under-utilized parts of your property.
Like many suburban tracts, each home in my neighborhood has about thirty feet of space between each house. When we moved in, the fifteen feet on our side of the property line included a very large rhododendron, some unattractive evergreen trees, some grass, and a lot of weeds. The only thing we did on this strip of property was occasionally walk from the front yard to the back yard.
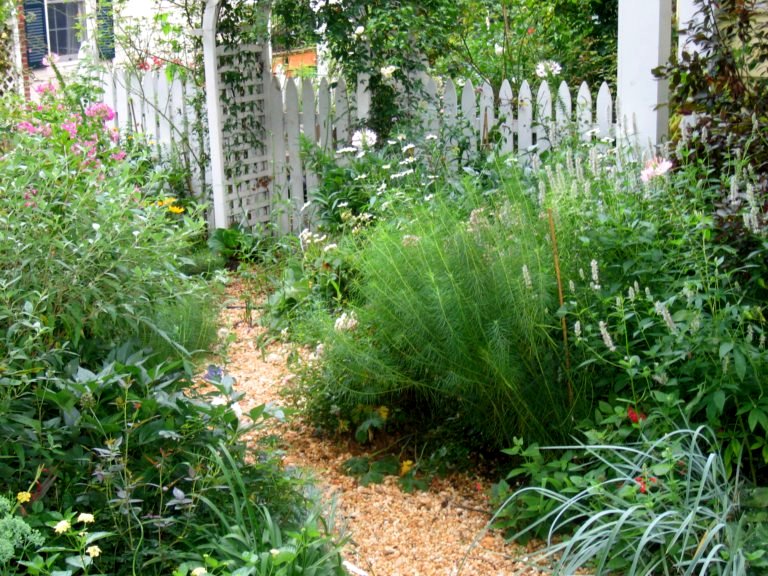
After a couple of years, we decided to remove the existing trees and plants and transform the space into a cutting garden. This space measures approximately fifteen feet wide and thirty feet long. We created a garden room by installing a wooden picket fence with an attractive arbor and gate in the front (visible in the first picture from inside the garden) and a simple gate in the back. Because the side yard was also on a slope, we installed a short, one-foot dry laid wall in the back to decrease the grade. 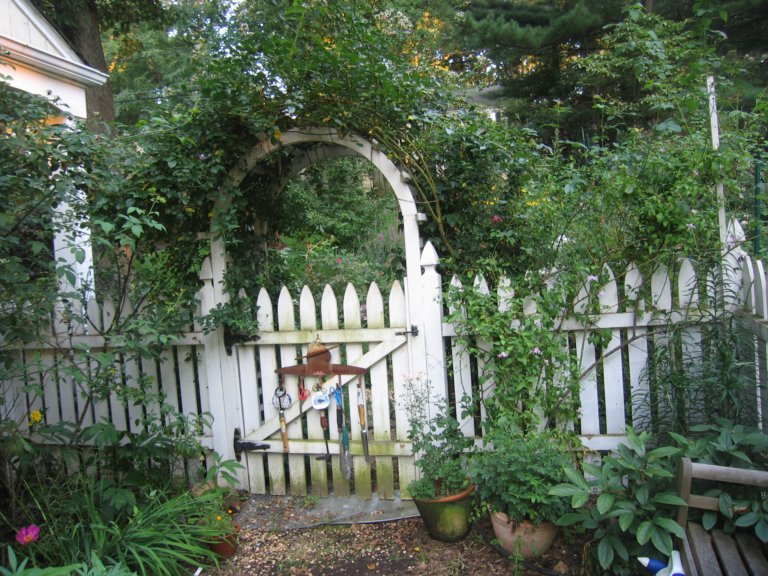
There are three foot beds on either side and a central four foot bed (visible in the second picture). The paths are too narrow at only two feet, but with only fifteen feet to work with, we had to make compromises. The soil was dead, so we dug down about two feet and also created shallow raised beds with ipe wood. Ipe is expensive, but it is far better for your garden than the toxic chemicals in pressure treated wood. Warning: ipe is very hard, which makes it rot and insect resistant, but it also makes it extremely difficult to cut with standard woodworking tools. I had to have my planks cut at the lumber yard. 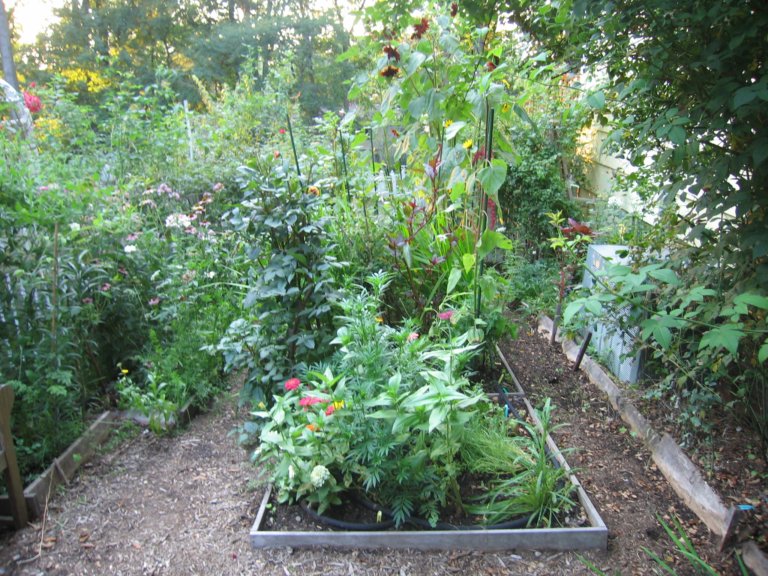
After digging out the beds and creating the walls of the raised beds, we then added significant amounts of composted cow manure and Bumper Crop. These are now some of the richest beds on our property.
This is now one of the favorite parts of our property. In addition to changing this from unused and unattractive to a place we visit every day, it also produces abundant cut flowers for indoor enjoyment from May through October.
Related Post: Making the Most of Your Space for Gardening – A Map of My Gardens
