
Heirloom plants, especially non-culinary herbs and plants of the American prairie, run throughout my garden. This weekend I found some wonderful new additions at Well-Sweep Herb Farm in Port Murray, New Jersey, about an hour away from Chatham. For a while, this has been on my most-wanted-to-visit list of nurseries. Boy, what a treat it was.
~
The setting of the nursery is beautiful. It’s four acres, surrounded by over 100 acres of undeveloped land. The parking lot is a grass field. Sheep graze along the periphery. An informal herb garden meets you as you get out of your car, then there are plants for sale, the gift shop, and a formal herb garden. It was a treat to talk to Cy who started the nursery forty years ago. He knew each plant’s history, how to use it, and cultural information that only comes from years of experience.
~
I was amazed by the breath of the collection. One of my favorite herbs is rue. Well Sweep had at least seven varieties from which to choose. I didn’t even know there was such variation in rue. As for thyme, there are over 100 varieties for sale. If you can’t get to the Herb Farm, plants are described and available in their mail order catalog which is available on their website:
~
“…In 1966, husband and wife, Cyrus and Louise Hyde, purchased an old run-down house and a piece of property. With a background in farming and a passion for gardening, what began as a homestead gradually transformed and grew into a national attraction…Our farm, a family endeavor…is home to one of the largest collections of herbs and perennials in the country…Our butterfly, herb, medicinal, perennial and rock gardens burst forth with breathtaking displays throughout the farm and have been featured in national magazines and books. Our brick-pathed formal herb garden boasts a knot garden, as well as a display of the 37 basils, 75 lavenders, 54 rosemarys, 108 thymes, and 72 scented-leaf geranium varieties that we stock. Whether for pleasure, inspiration, or ideas … come see the possibilities…”
~
On a side note: those native orange rocks that I was recently posting about,Cy has cleared all of them and used them to make large, attractive walls. Next time, I’ll bring my camera.
Category: Nurseries
How to Prune Roses, Part II: Old Rose Pruning Secrets from Mottisfont Abbey and John Scarman
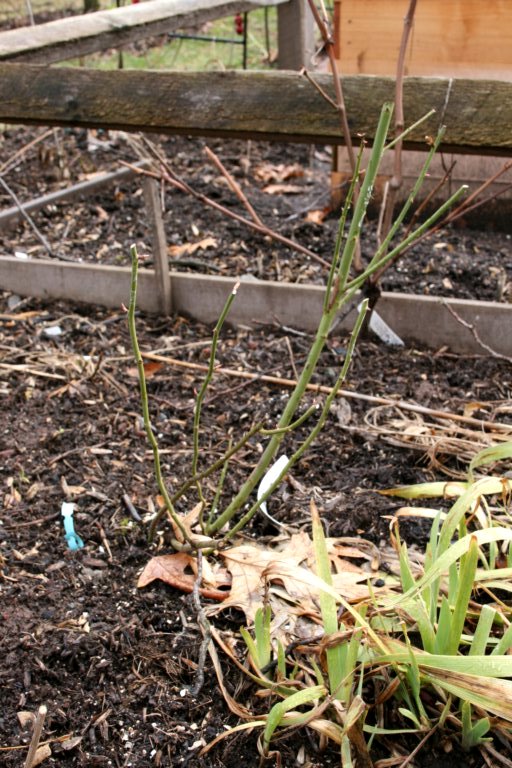 It was fifty-some degrees in Chatham today, so it was a perfect day to go out and continue my rose pruning. Today, I pruned another nineteen of my 150+ roses over two hours, including Ferdinand Pichard, pictured after his pruning (http://heirloomgardener.blogspot.com/2007/11/tbd_492.html, pictured in bloom).
As a follow-up to my prior post, “How to Prune Roses, Part I” (http://heirloomgardener.blogspot.com/2008/02/how-to-prune-roses-part-i-introduction.html), here is some additional, hard-earned advice on rose pruning.
When I first started growing old roses, I followed the traditional pruning instructions to prune once bloomers after their summer flush. This did not work. Each spring, as the roses pushed out new growth and became laden with blossoms, the shrubs would splay such that they obstructed the paths in the garden, toppled over the perennials around them, and often brought each other down. Those that weren’t laying on the ground remained upright only with the support of many bamboo stakes. There had to be a better way.
I found the answer in a book called Gardening With Old Rosesby John Scarman published in 1996. He has vast experience with old roses through his work at Rosemany Verey’s Barnsley House (http://www.barnsleyhouse.com/THEGARDENS.html), with David Austin (http://www.davidaustinroses.com/), and at his own nursery which specializes in old roses (http://www.cottagegardenroses.com/).
Scarman prunes his old roses three times a year. The first pruning is done during the dormant season and the roses are cut to what he calls pruning height. This is a little below the height you want the roses to be during the summer and it is at the height where there are enough strong canes on the outside to provide support to the more flexible inner canes. The second pruning is done just as the buds are showing color. Its aim is to remove non blooming vegetative growth. This showcases the flowers and redirects the rose’s energy to produce more stems. The third pruning happens in late summer where the roses are pruned back to where they flowered and are shaped.
For more information on how to do the first pruning and to see it done, there is an invaluable DVD available from Ashdown Roses (http://www.ashdownroses.com/) of a seminar they held with David Stone from Mottisfont Abbey (http://www.nationaltrust.org.uk/main/w-vh/w-visits/w-findaplace/w-mottisfont/), the garden of Graham Stuart Thomas. He demonstrates the technique to get totally self supporting shrubs with no bamboo supports in sight.
*****
For “How to Prune Roses, Part I: An Introduction” click here:
http://heirloomgardener.blogspot.com/2008/02/how-to-prune-roses-part-i-introduction.html.
For “How to Prune Roses, Part III: Why Prune?” click here:
http://heirloomgardener.blogspot.com/2008/03/how-to-prune-roses-part-iii-why-prune.html.
Gardening with Children: How to Make a Succulents Terrarium
I recently mentioned to my children that I created a terrarium when I was a little girl. Since then, they have been asking me to help them make one of their own. Yesterday, I was ordering some plants for the upcoming season at Annie’s Annuals (http://www.anniesannuals.com/), one of my favorite nurseries, and they had a video on Succulents Terrariums as featured on Martha Stewart (http://www.marthastewart.com/article/succulents-terrariums?lnc=38f9cf380e1dd010VgnVCM1000005b09a00aRCRD&rsc=showmain_tv_the-martha-stewart-show). With this inspiration, we went to our local nursery, the Farm at Green Village (http://www.thefarmatgreenvillage.com/), bought our supplies and made our terrarium.
If you don’t have time to watch the video, here is a simplified step-by-step guide:
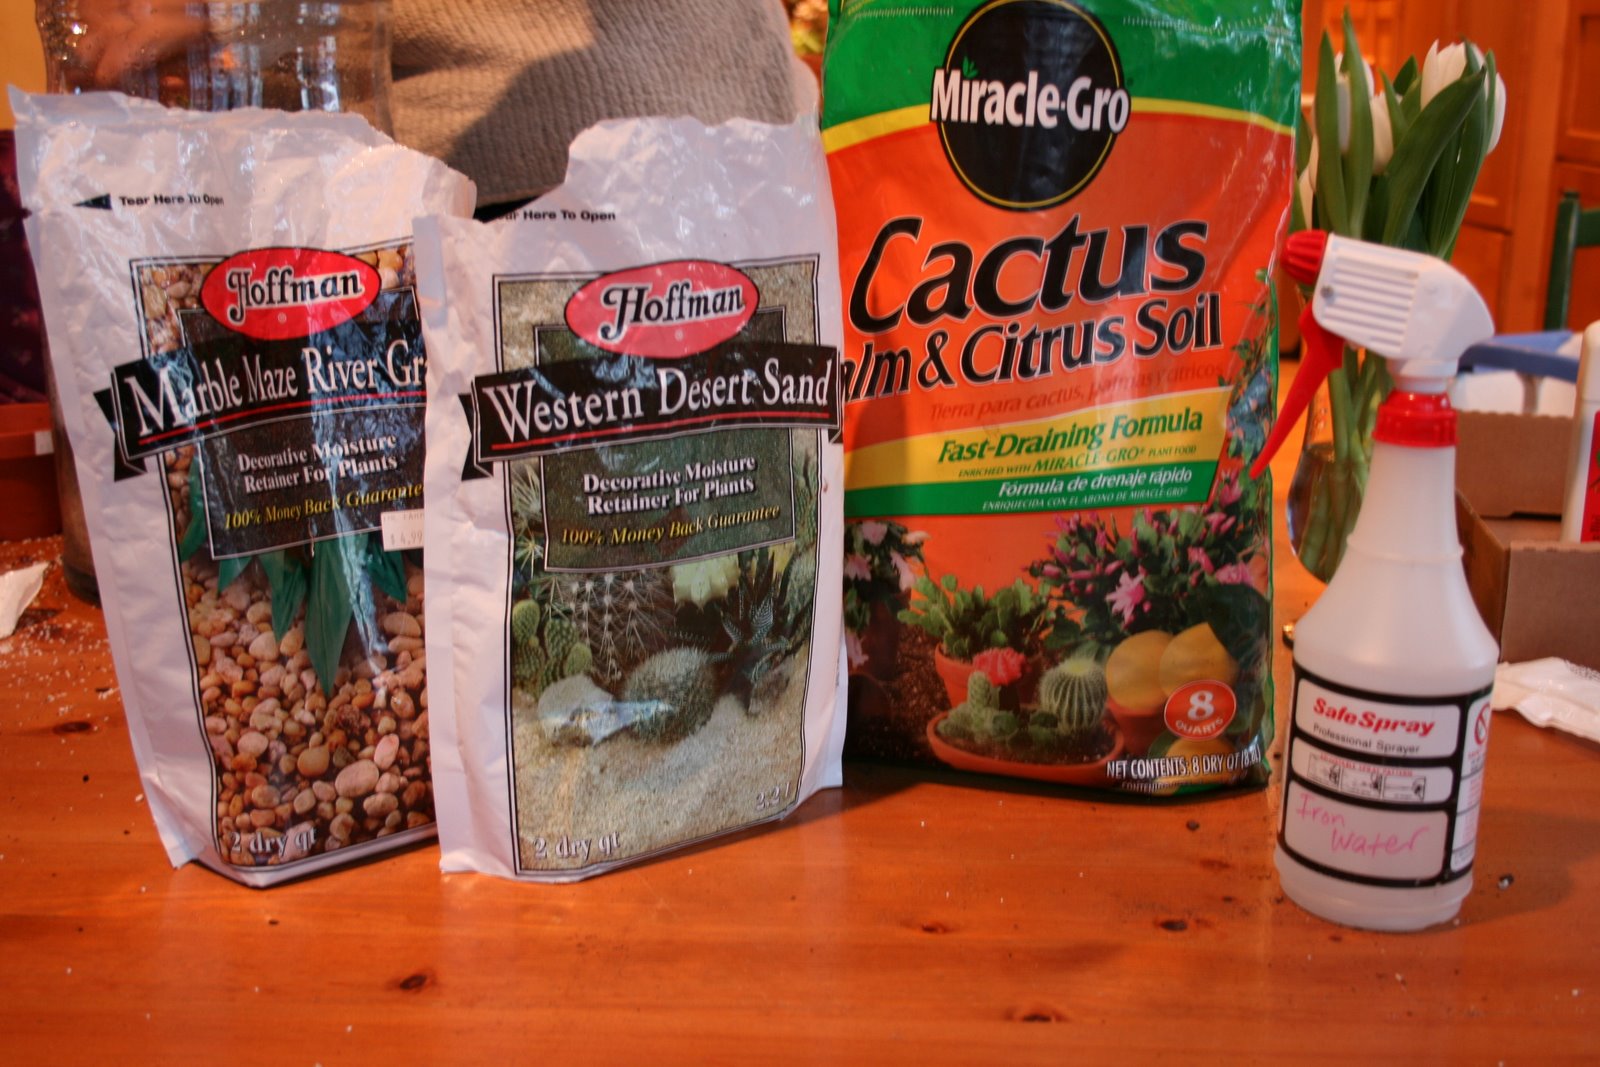 1. Gather together your supplies: a suitable container, succulents, gravel, soil, sand, a small paintbrush, and a spray bottle.
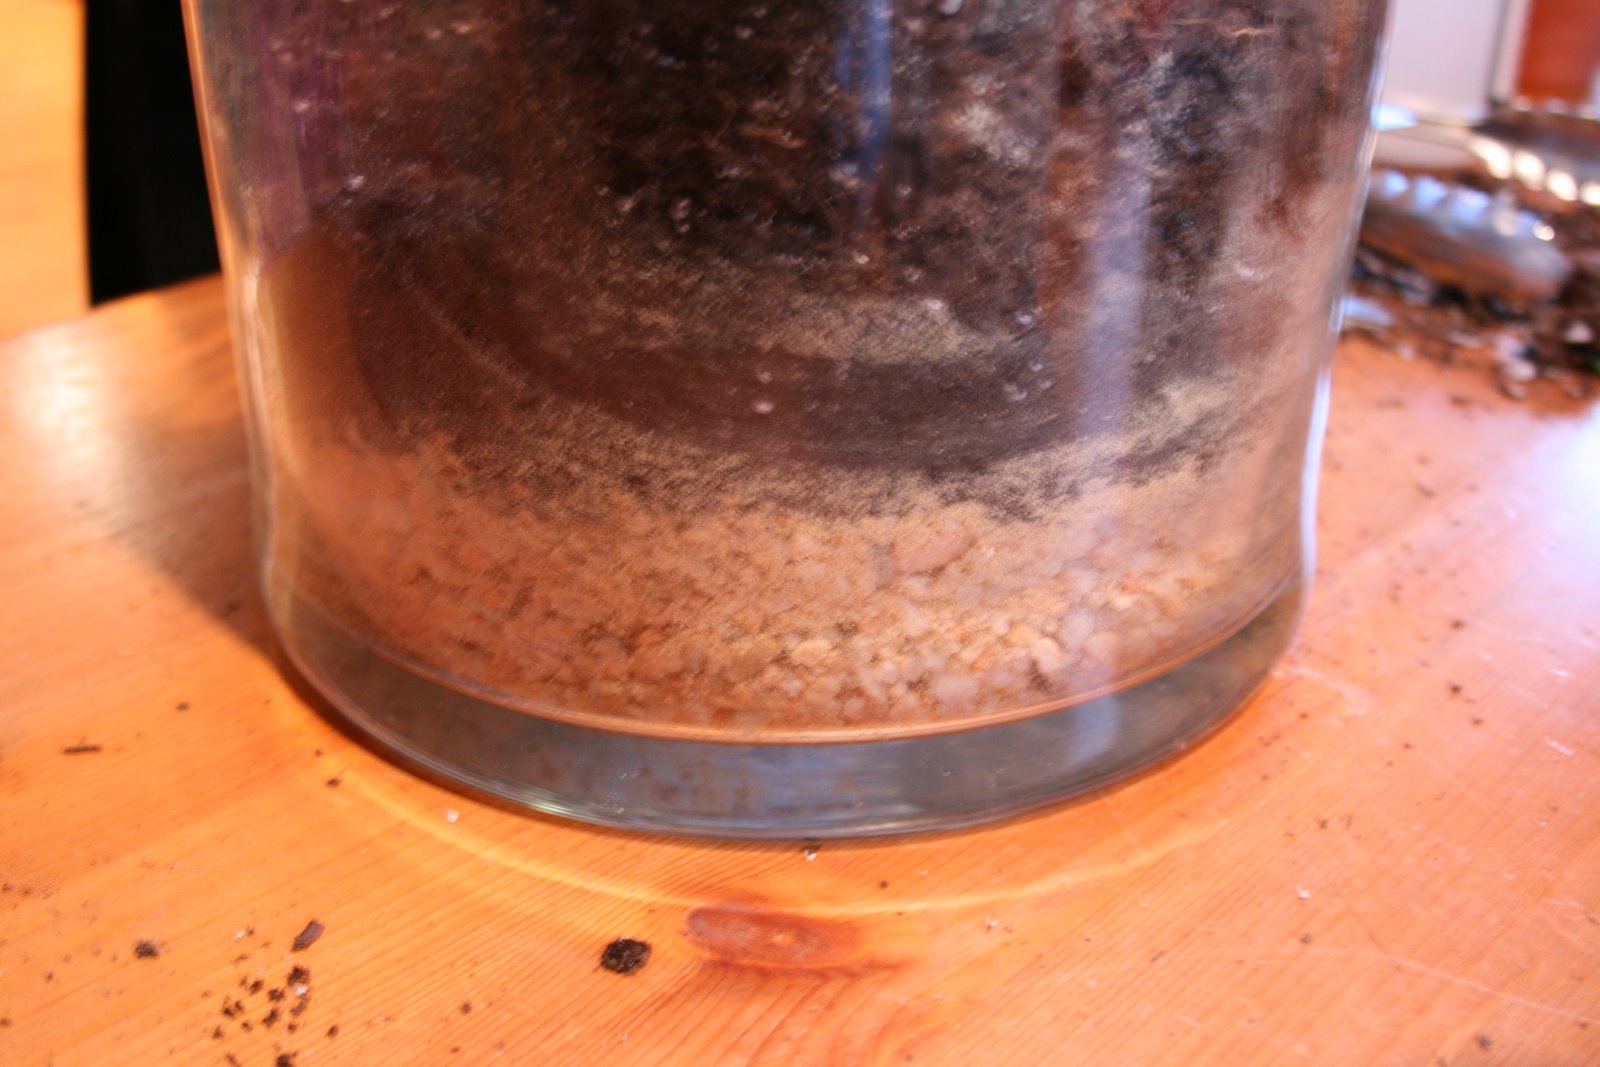 2. Pour the bottom layer of gravel and the middle layer of soil.
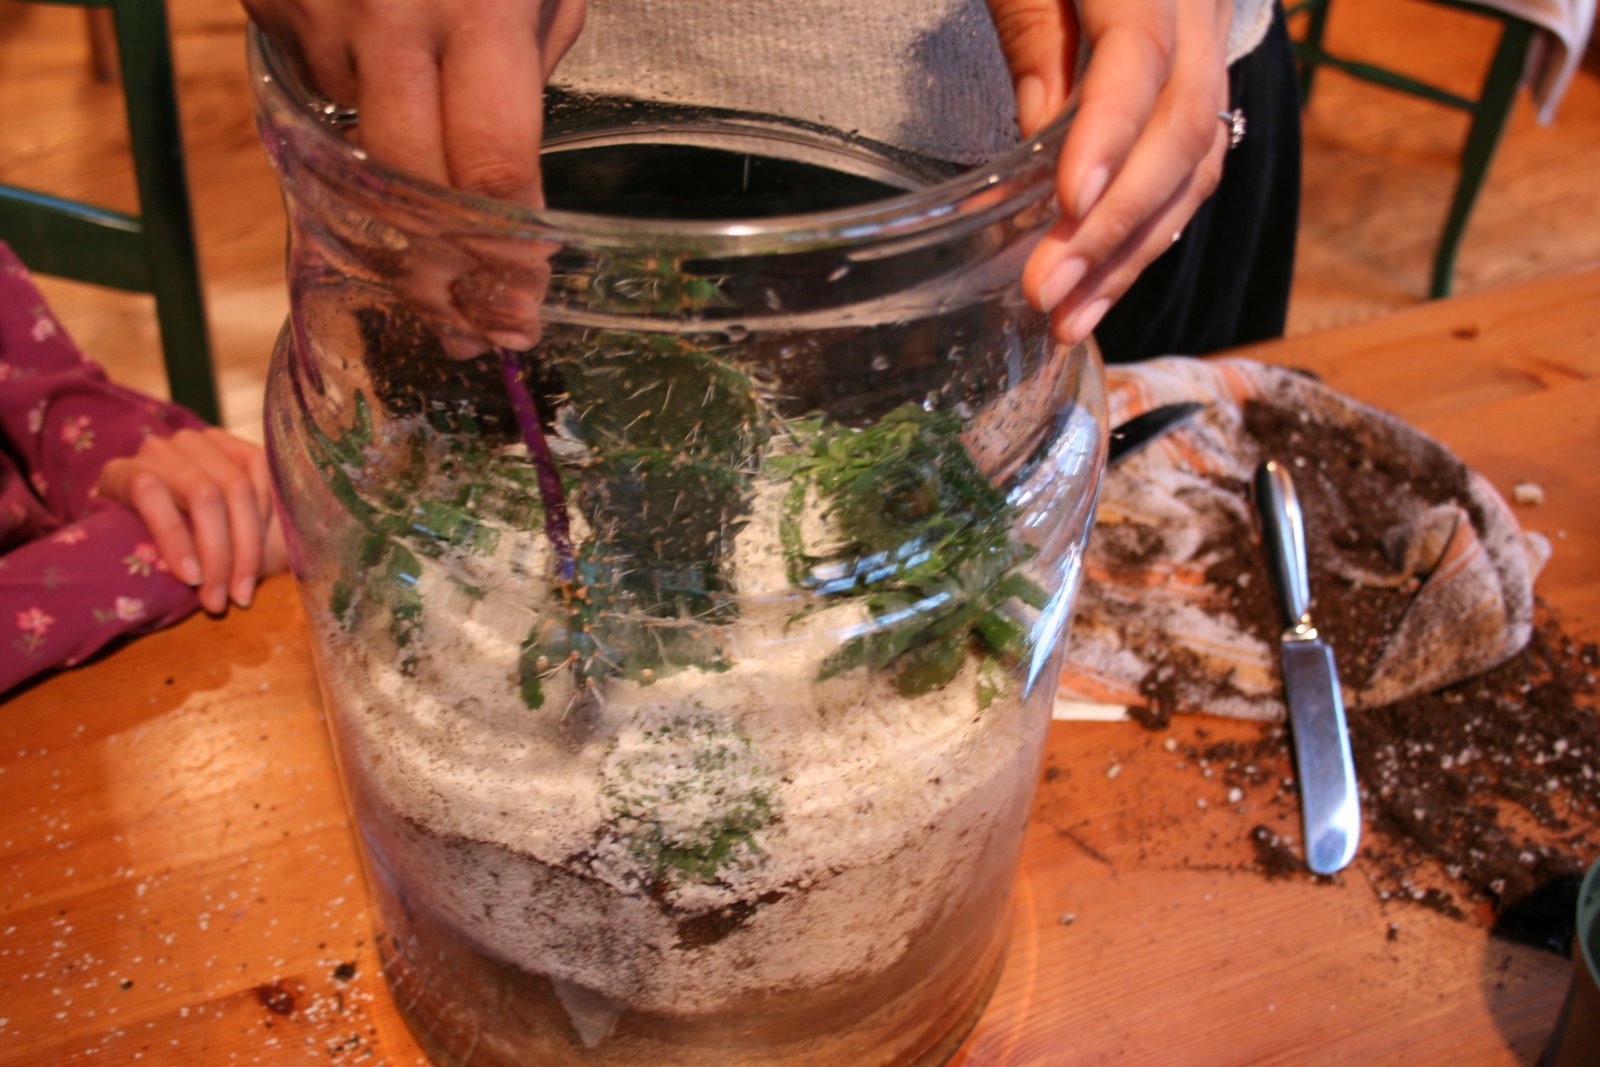
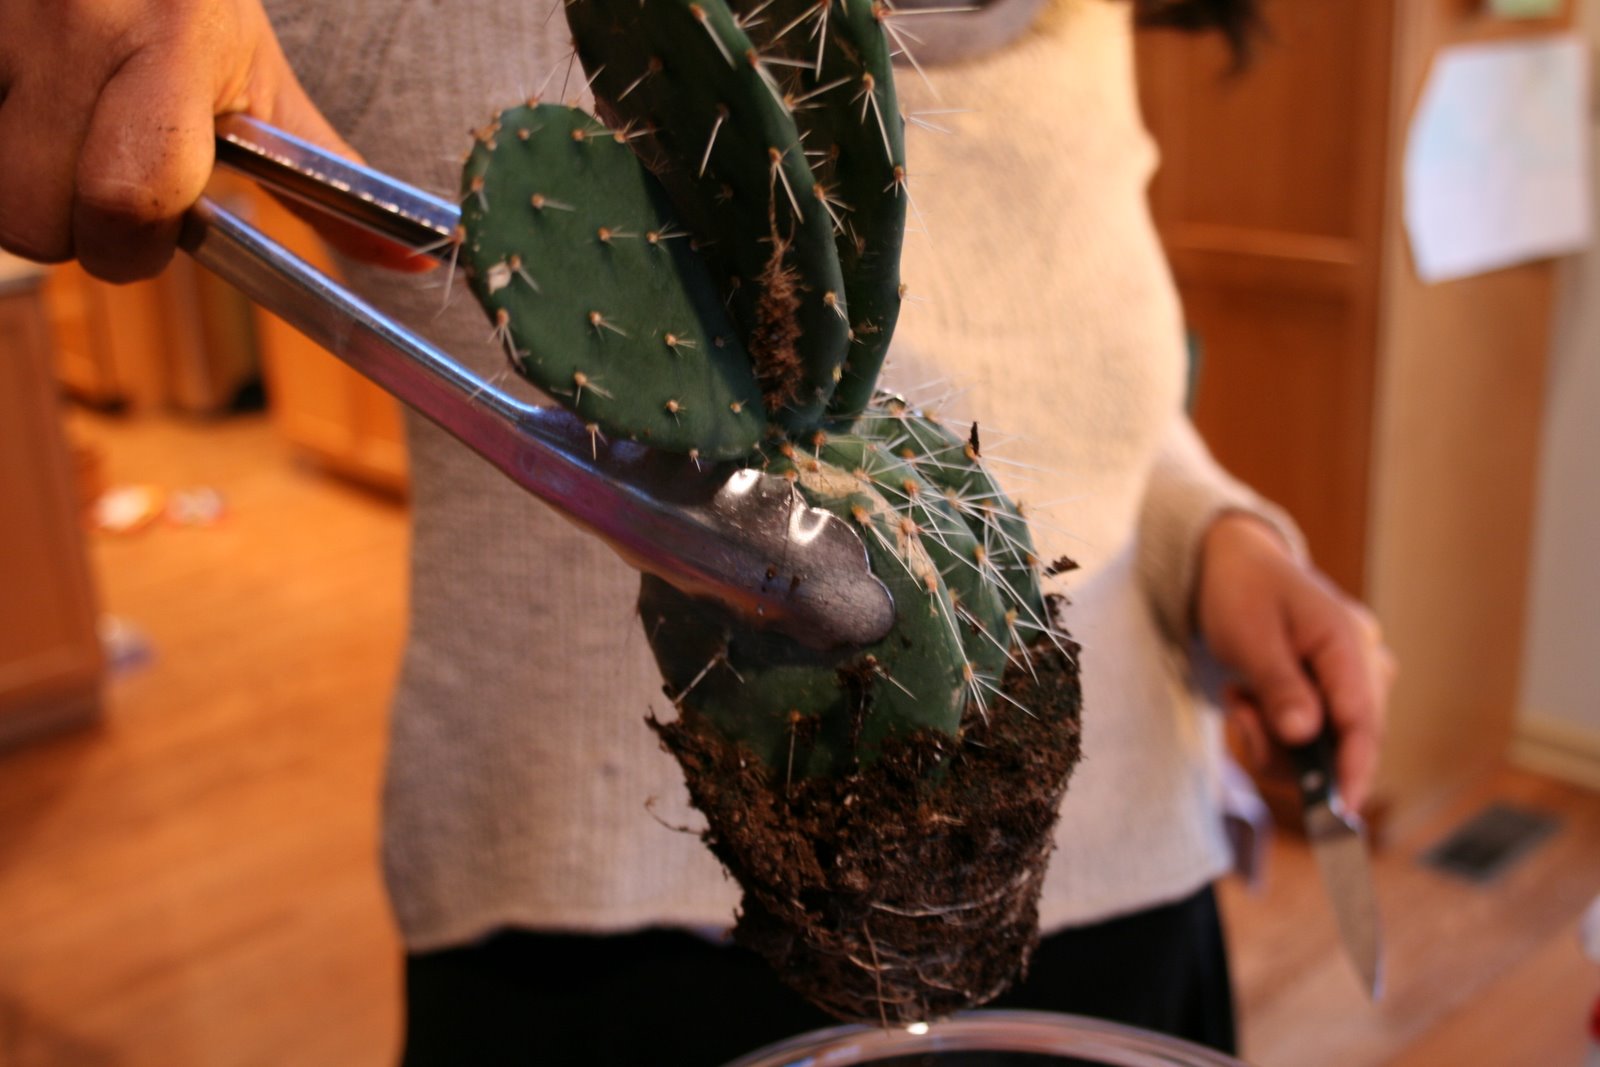 3. Place your succulents on top of the soil.
 4. Add the top layer of sand.
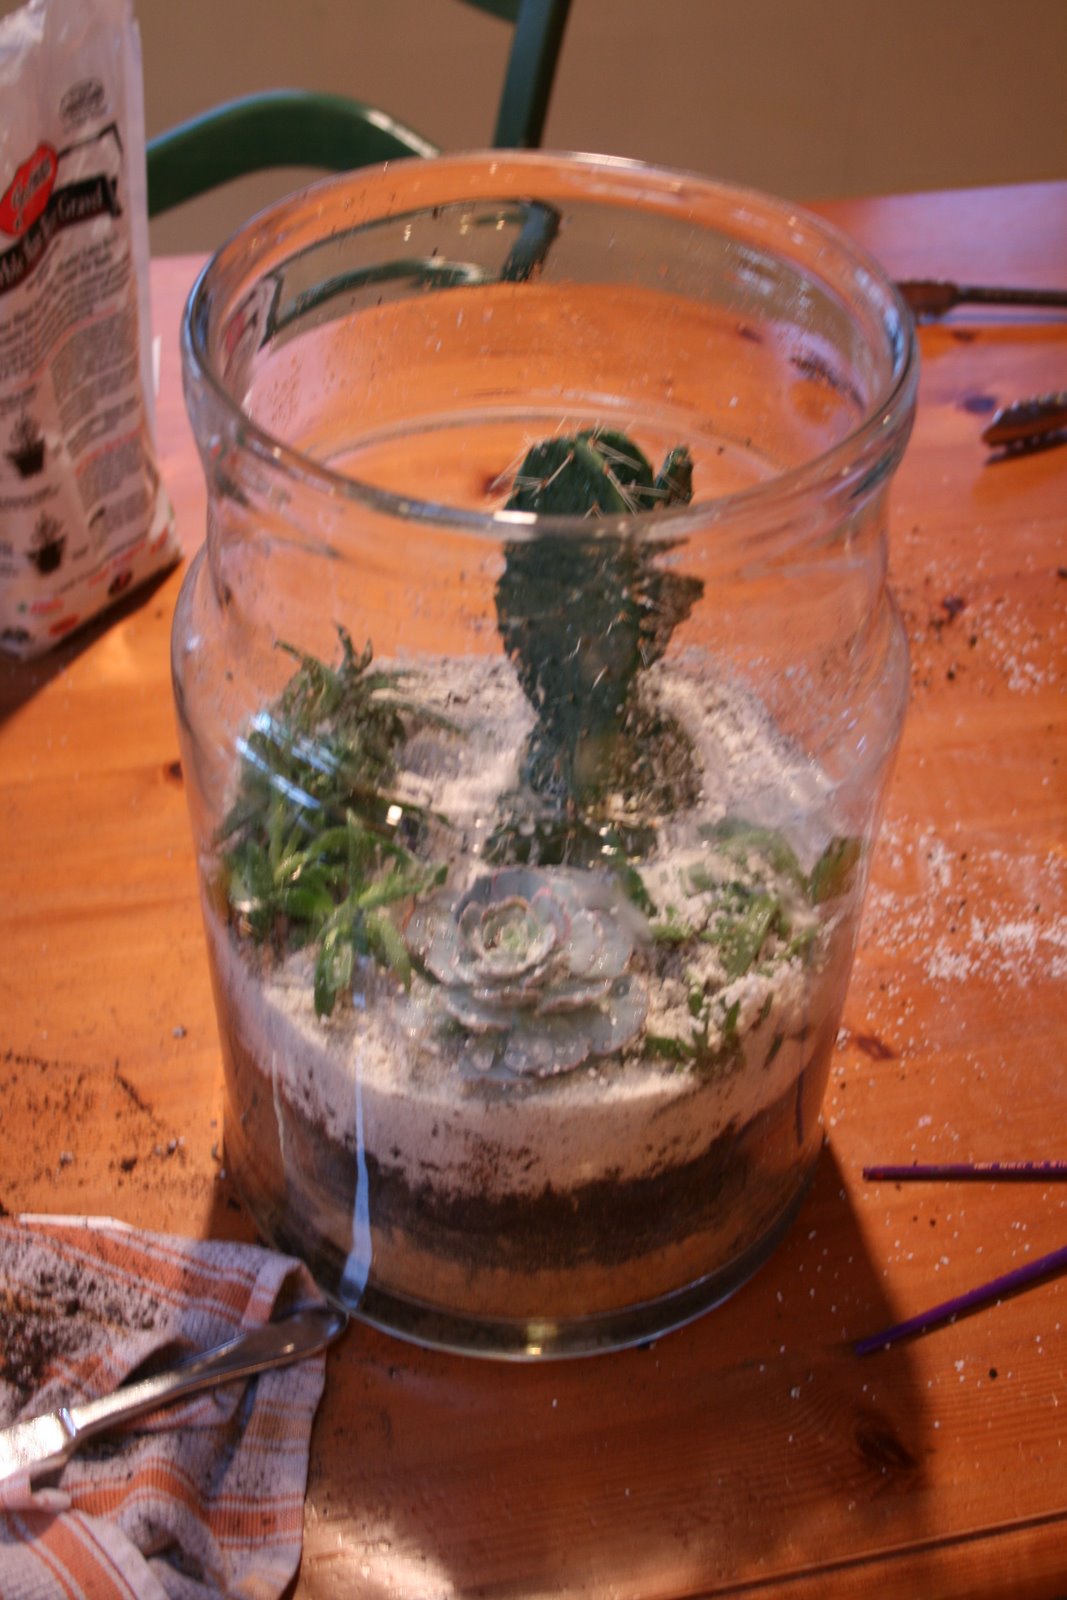
 5. Level and brush the sand off your succulents with the paintbrush.
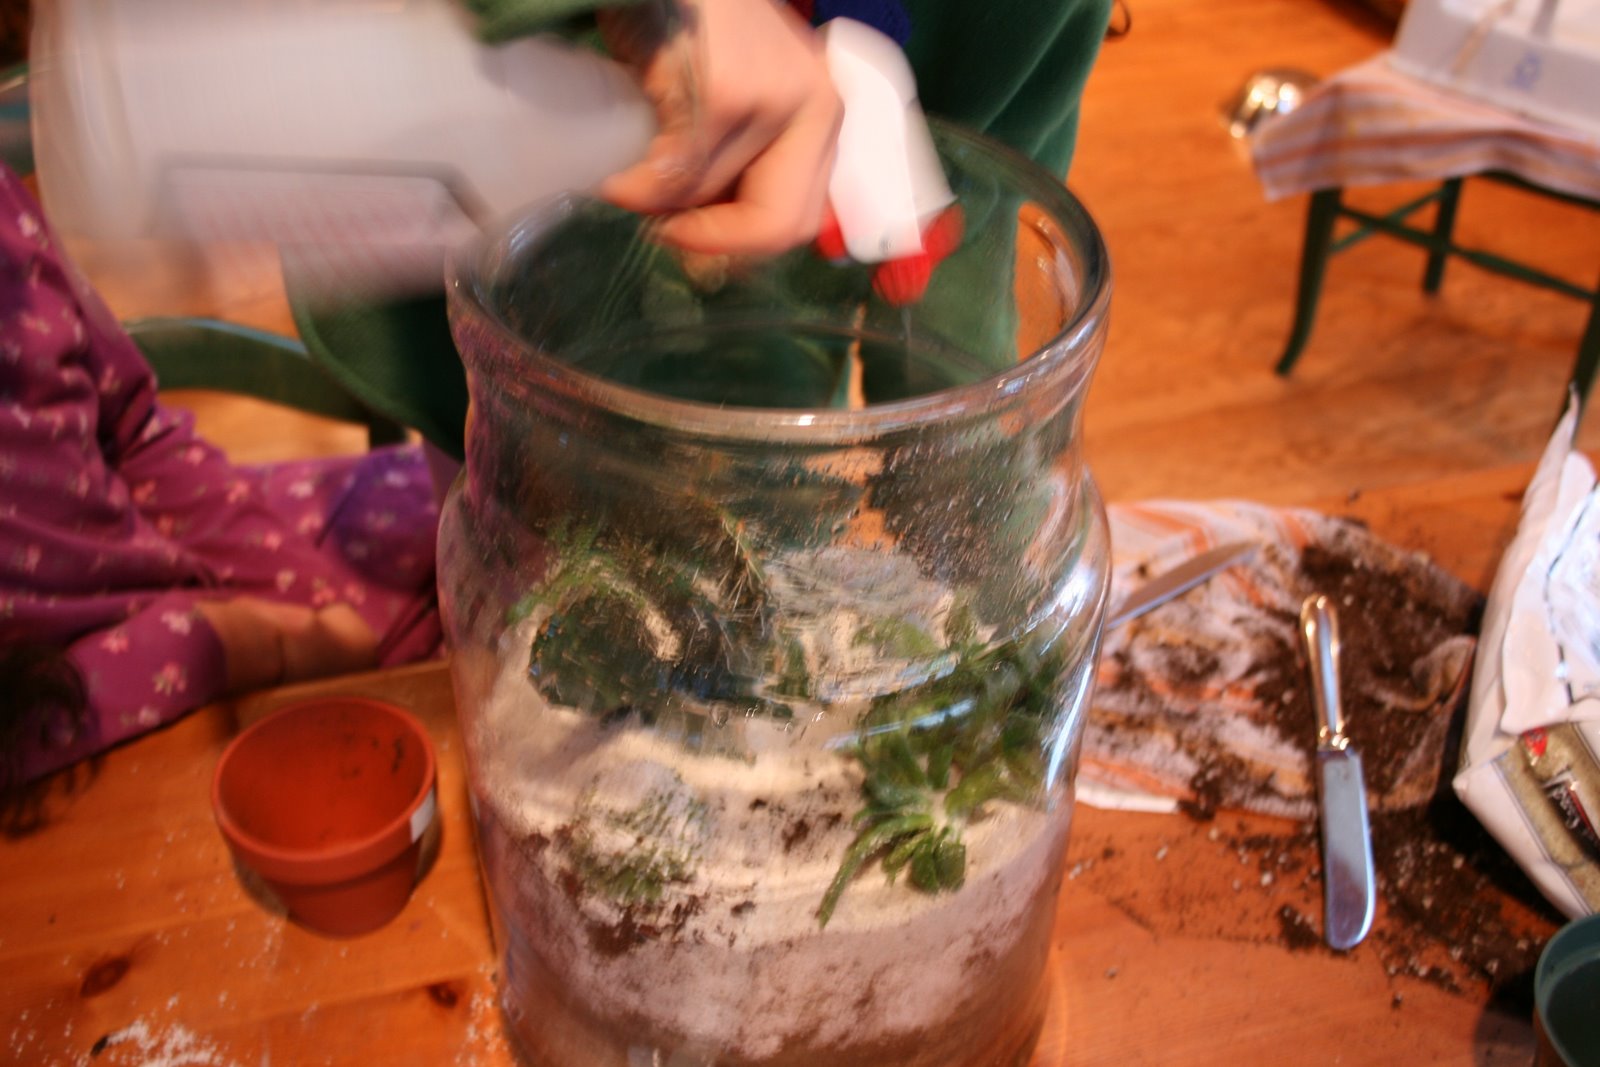 6. Spray the sand off the succulents and walls of the terrarium with the spray bottle.
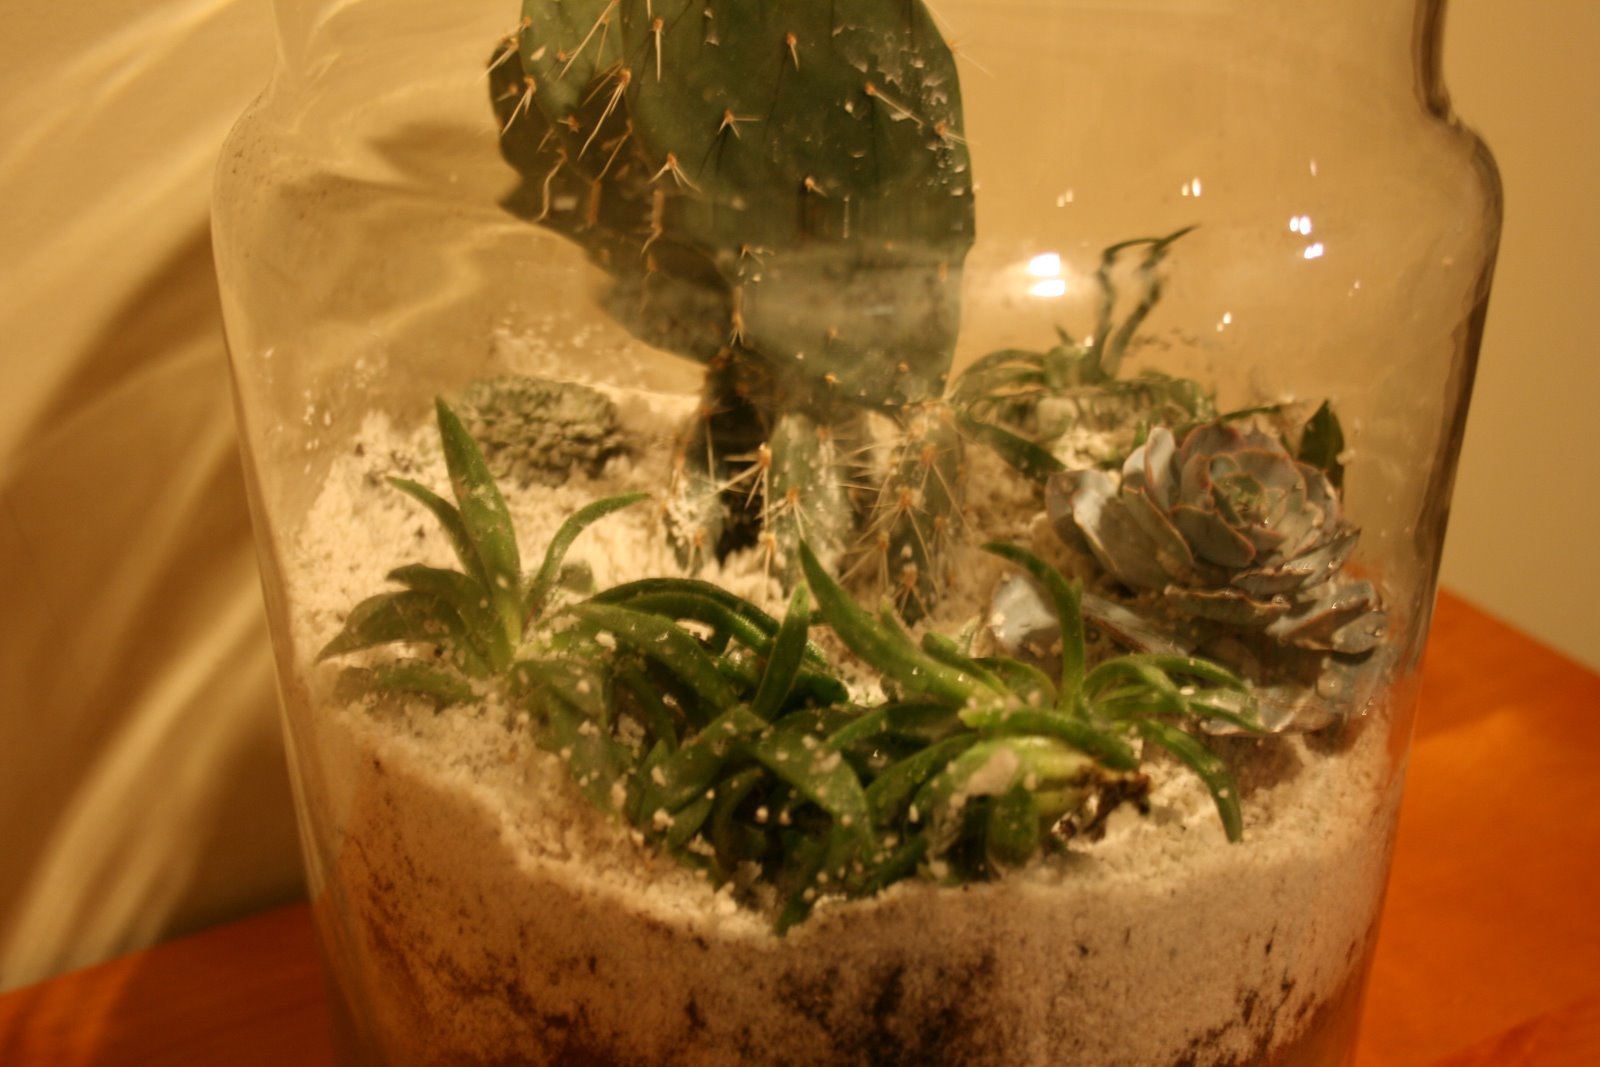 7. Your succulents terrarium is complete.
Living and Gardening Around Chatham, New Jersey
When non-gardening people move, they ask easy-to-answer questions such as, how are the local schools? For gardening people, moving is much more complicated by questions such as, how are the local nurseries?
In brief, Chatham, New Jersey and nearby commuter towns (such as Maplewood, Millburn, Short Hills, Summit, Green Village, Madison, Morristown, New Providence, and Berkley Heights) are great places for gardeners. I recently visited my father in another community and noticed how few nurseries were present. Further, while the homes and the community were attractive, I didn’t drive by any home gardens that made me want to stop my car and take a second look. This made me appreciate all of the great gardening resources that I have at home.
For those who are nearby and/or for those gardeners who are thinking of moving here, here’s the lay of the land:
1. Plant Nurseries Around Chatham, New Jersey
The Farm at Green Village (Green Village)
Great Swamp Greenhouses (Gillette)
J & M Home & Garden (Madison)
2. Gardening Resources Around Chatham, New Jersey
S. Johnson Landscape Management (Chatham)
Garden Cottage – Patio Furniture (Morristown)
The Birdhouse at Madison (Madison)
Dreyer’s Lumber (Chatham)
Savatree Arborists
3. Farmers’ Markets Around Chatham, New Jersey
Chatham Farmers’ Market (Chatham)
Summit Farmers’ Market (Summit)
4. Botanical Gardens Around Chatham, New Jersey
Reeves-Reed Arboretum (Summit)
Willowwood Arboretum (Chester Township)
Presby Memorial Iris Gardens (Montclair)
5. Other Outdoor Spaces Around Chatham, New Jersey
Fosterfields Living Historical Farm (Morristown)
Great Swamp Outdoor Education Center (Chatham)
Noe Pond Club (Chatham)
The Raptor Trust (Gillette)
Morris County Parks Commission (Morris County)
New Jersey Tourism: Gardens (New Jersey)
6. Non-Gardening Information About Chatham, New Jersey
Chatham Borough
Chatham Recreation
Chatham Township
Money Magazine Best Places To Live 2005
NJ Transit – Commuting to Chatham
School District of the Chathams
*****
March 2008 Update: Chatham Township was named the best place to live by New Jersey Monthly
Old House Gardens Nursery & Heirloom Dahlias
My garden planning for next year is in full tilt now. I just received the Old House Gardens email newsletter which I had been waiting for to see what web only dahlias, glads, and cannas will be offered. The dahlia ‘Giraffe’ was first in my shopping cart.
Old House Gardens–“Antique Flower Bulbs for Every Garden – Unique, Endangered, Amazing!”–is a great source for heirloom bulbs: cannas, dahlias, glads, tulips, daffodils, hyacinths, lillies, and a few diverse others. Every shipment is carefully checked and packed. Nothing which is sub prime gets out. The bulbs come with detailed instructions on planting, forcing, and winter care.
For the summer, dahlias are my favorite cut flower and are super easy to grow. One dahlia tuber produces loads of blooms which keep getting better and better as the season winds down and other plants are calling it quits. Cut flowers mix well in arrangements and hold well in water. The heirloom dahlias offered at Old House Gardens are not the super sized dahlias that are difficult to mix with other flowers, but come in a range from small pompoms to larger 5-6 inch diameter flowers.
Dahlias can be started inside in pots before the weather warms up for an early start. But, seeing that dahlias grow so quickly, I usually wait until the weather has warmed up and plant them outdoors when I plant my tomatoes. I always topdress the soil and incorporate a little compost into the planting hole when I plant my tubers. After they start growing, begin watering them and watch them grow.
The one thing to be vigilant about, however, is staking. When planting put a tall stake in next to the tuber. Don’t think it’s too tall because in about six weeks you will otherwise be wishing you had. The hollow stems of dahlias break very easily in a summer storm or strong winds, so be careful to begin tying them in when they are about 18 inches tall.
Once blooming, keep deadheading or cutting for the house. The more you cut, the more they bloom.
In the fall, I will post about storing dahlias for the winter.
