
Category: Propagation and Seeds
Winter Aconite Seedheads: how Winter Aconite self-seeds
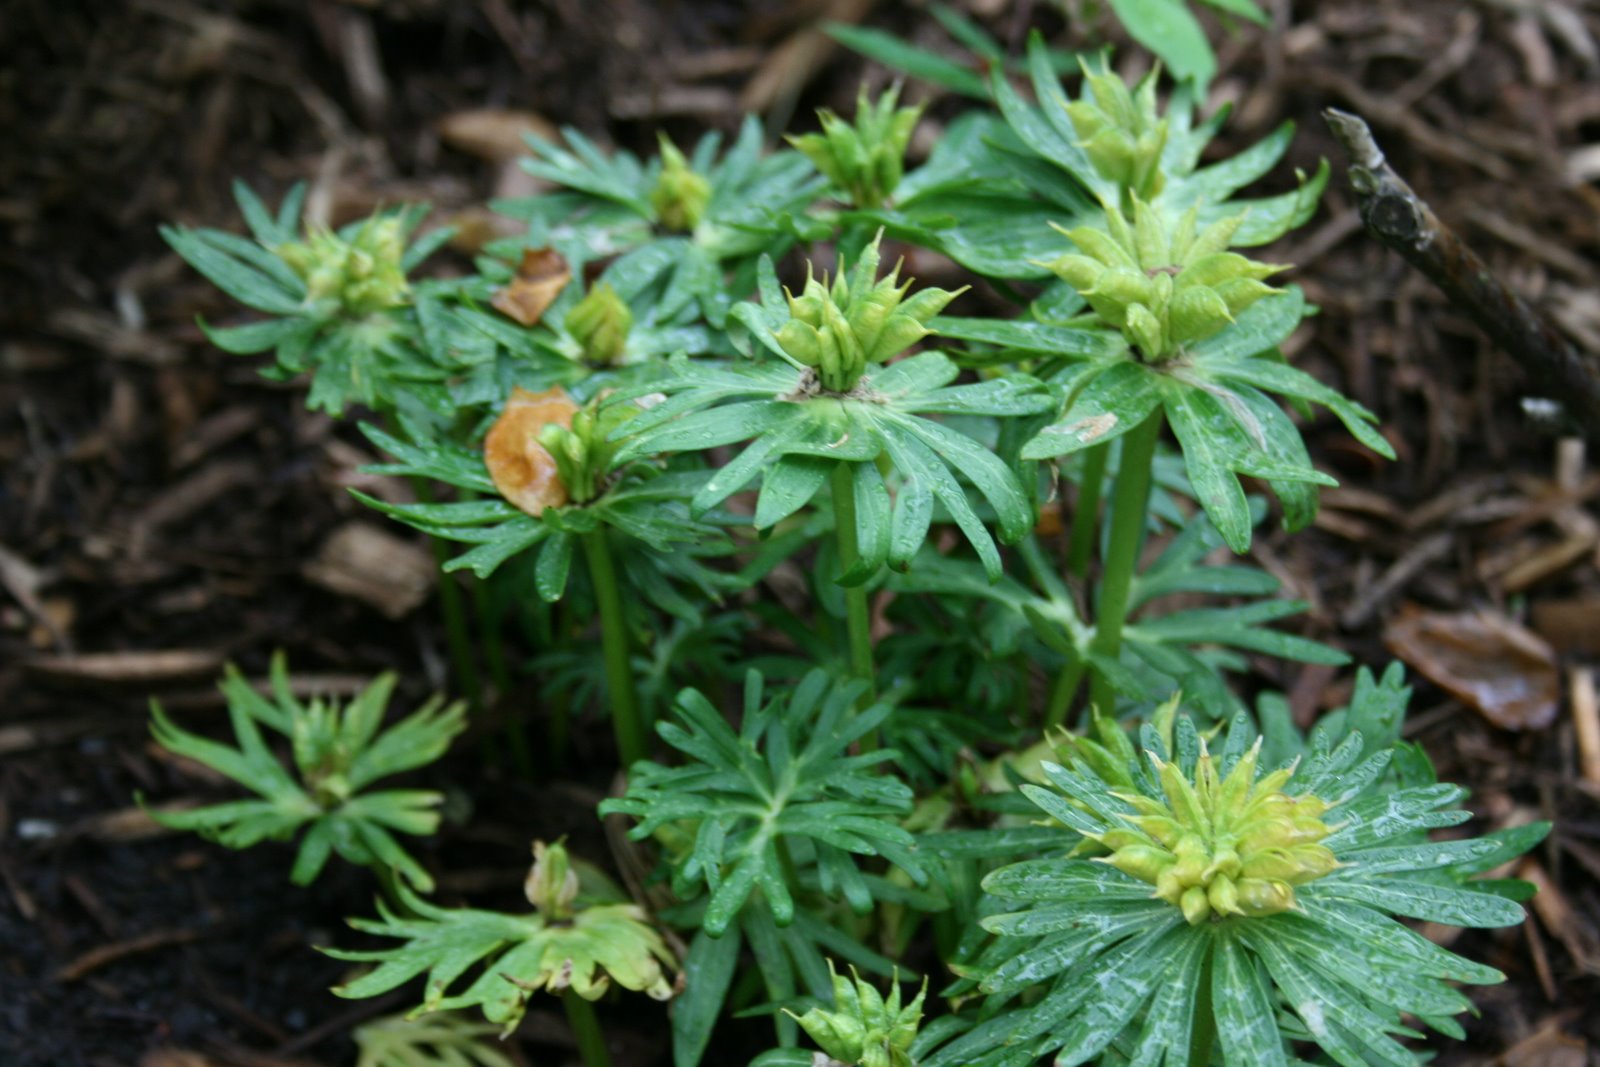 As a follow-up to my several posts from March about winter aconite in bloom and spreading, they have now formed their seedheads (pictured) by which they will self-seed.
CowPots™: Molded Manure – an idea to check out for next spring’s seed starting
How to Make a Planting Square to Uniformly Space Your Seeds
Do you ever wonder how you are supposed to uniformly space your seeds so many inches apart, as described in the planting instructions?
Well, last month, on a visit to the Family Garden at the New York Botanical Garden (NYBG), I noticed that they had these neat planting squares to do just that, which is particularly important to do when your amount of space is limited. With that inspiration and some additional thoughts of what would be helpful to me, I asked my husband to make one. The basic idea was a picture frame with a twelve inch by twelve inch opening with pegs placed at two, three, four, six, eight, nine, and ten inches to facilitate planting seeds two, three, four, or six inches apart. I also requested that it be weather-proof, as it may be left in the garden from time-to-time.
After getting the materials together at a cost of less than ten dollars, my husband was able to build the planting square in less than one hour. Here’s how he did it.
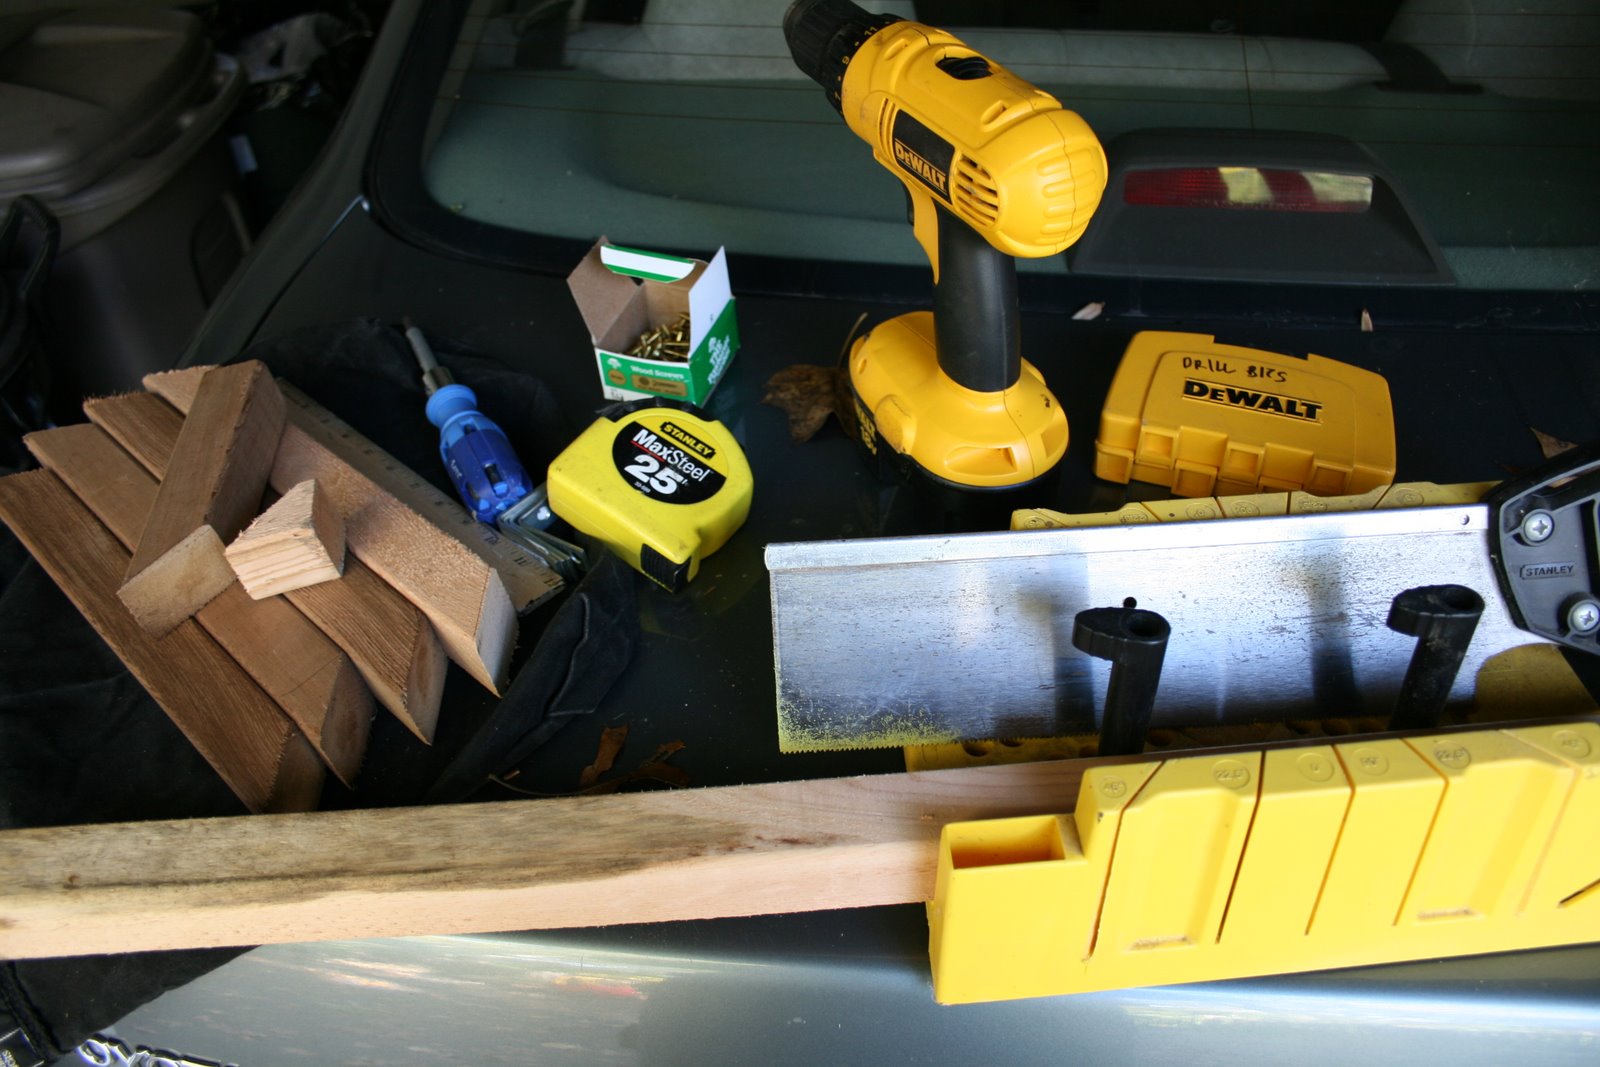 1. Gather your materials. My husband had all of the necessary tools on hand: power drill/screwdriver and bits; miter box and saw; manual screwdriver, tape measure and pencil. He purchased the rest of the materials at the local hardware store, Dreyer’s Lumber: two by two cedar (more weather-proof than pine) balusters for the frame; four brackets for the inside corners; and a box of brass screws for the pegs. I had my own rubber bands for stretching across the pegs.
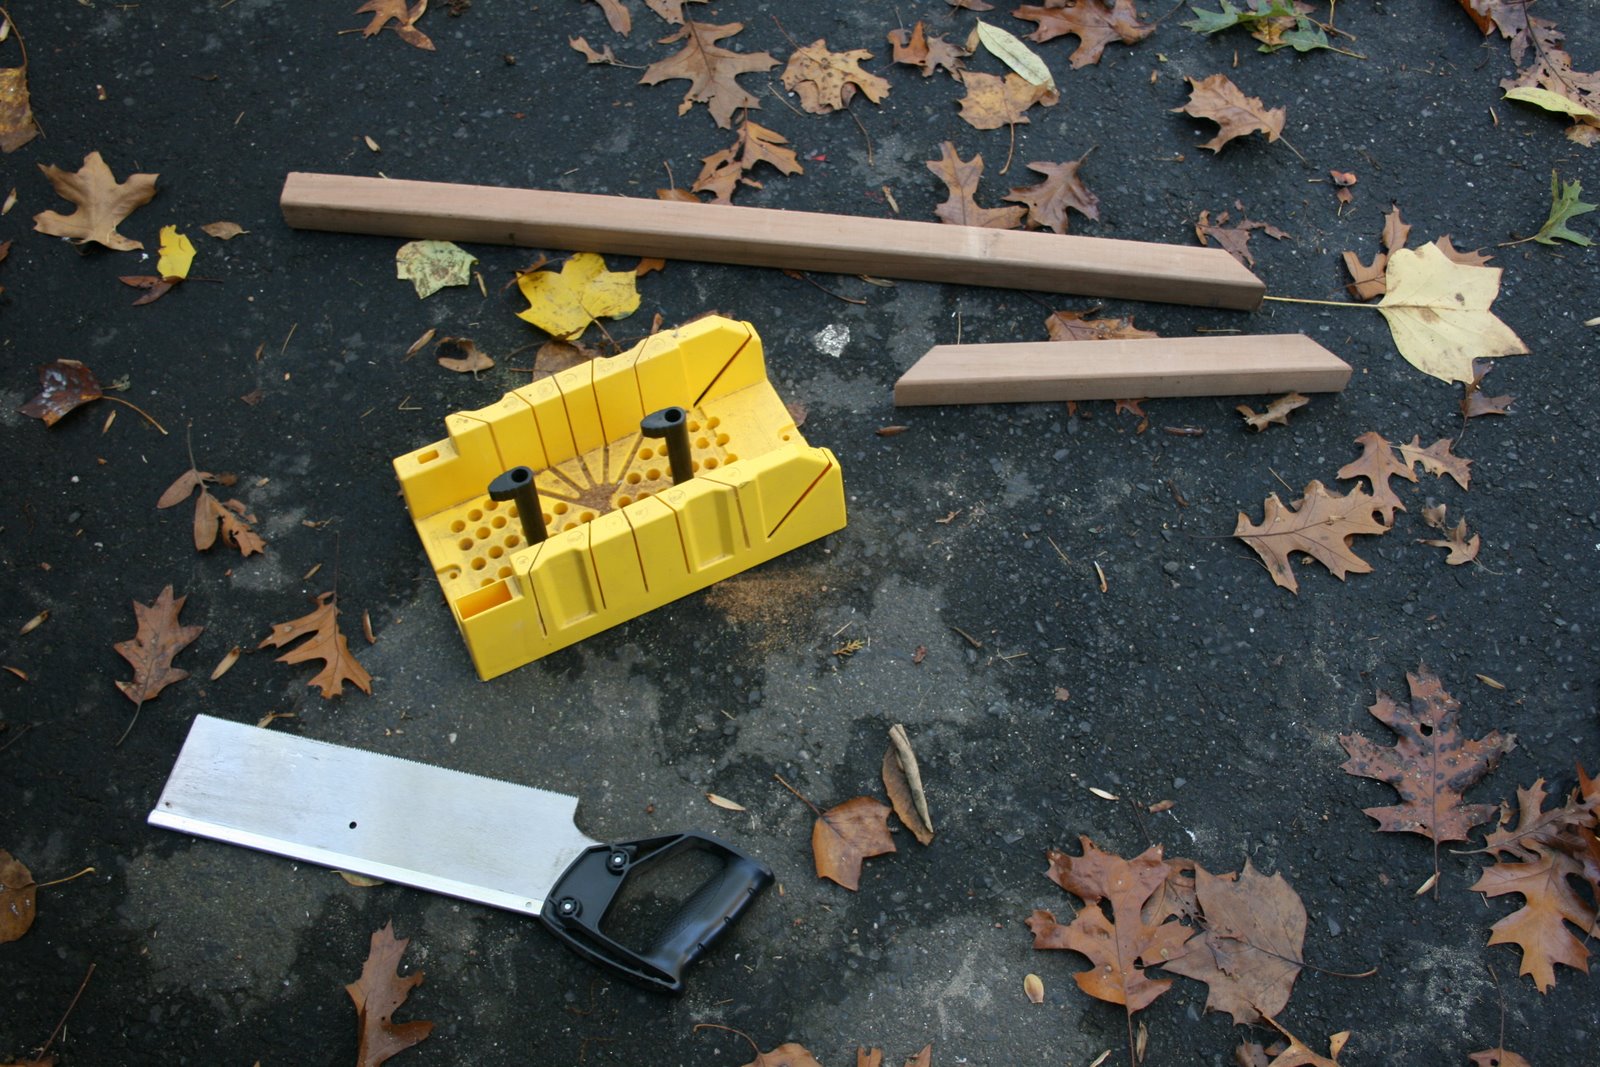 2. Cut the sides of your frame. Using the miter box and saw, he cut the sides of the frame at forty-five degree angles with the inside (not the outside) measuring twelve inches.
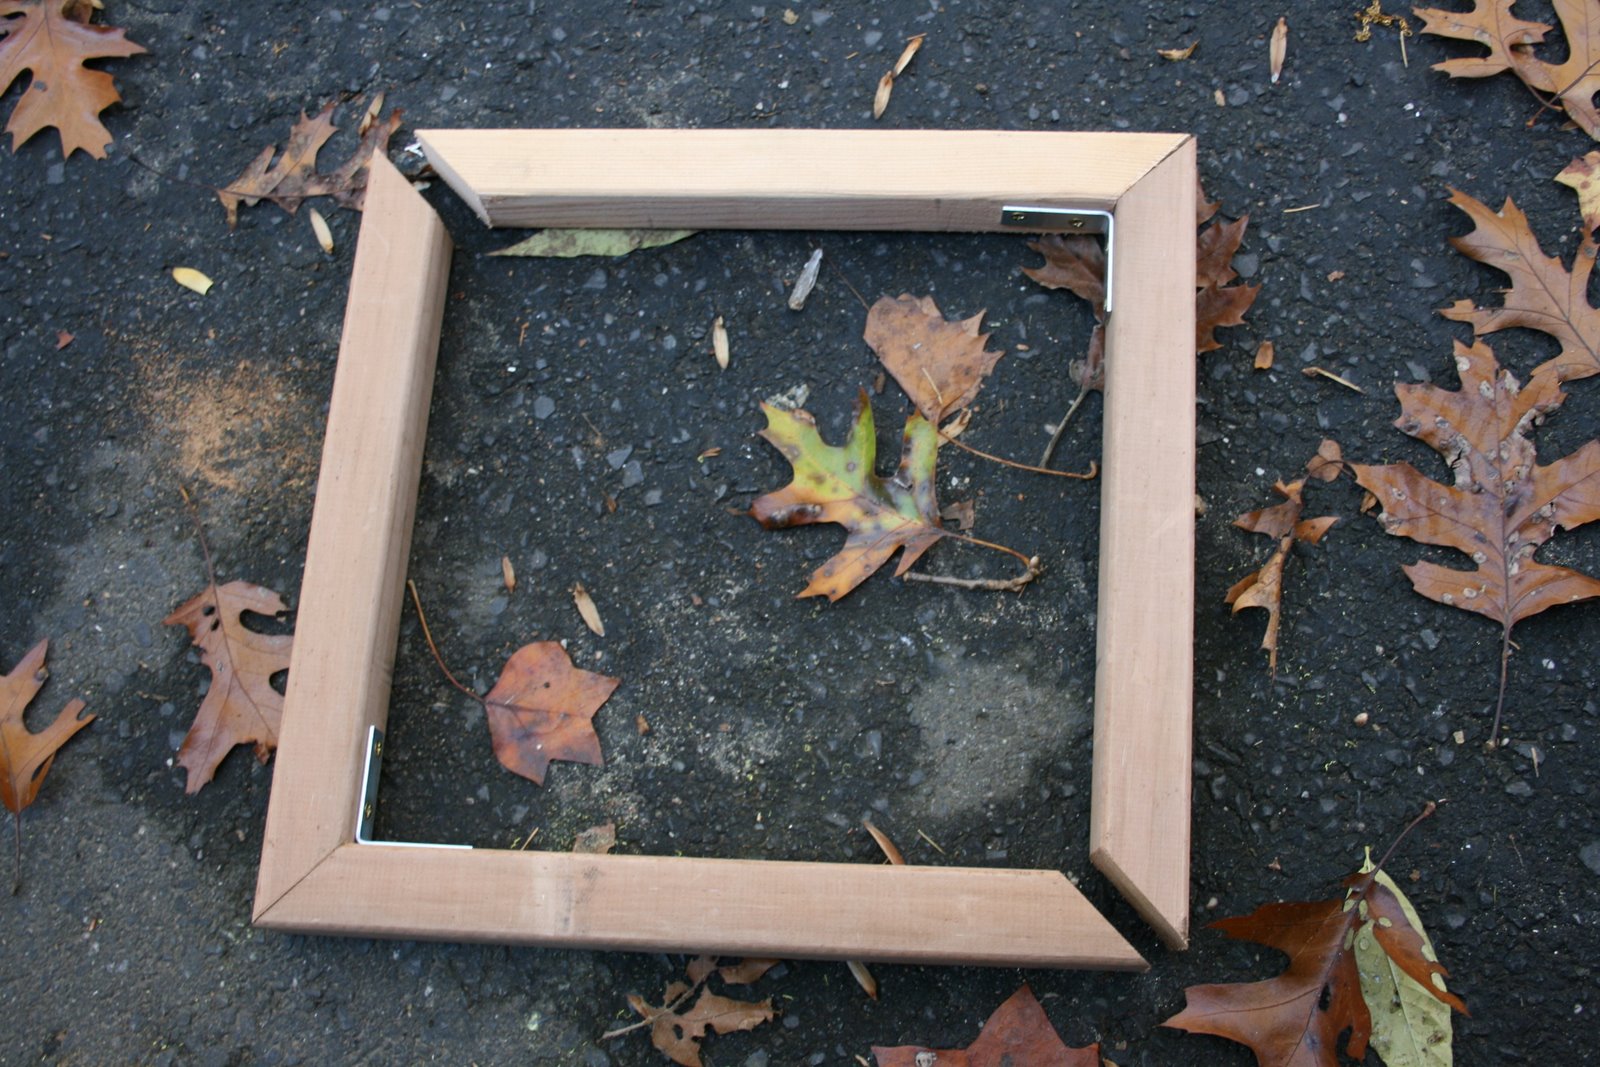 3. Assemble your frame. After pre-drilling the holes for the brackets on the inside of the frame, he attached the brackets to the corners.
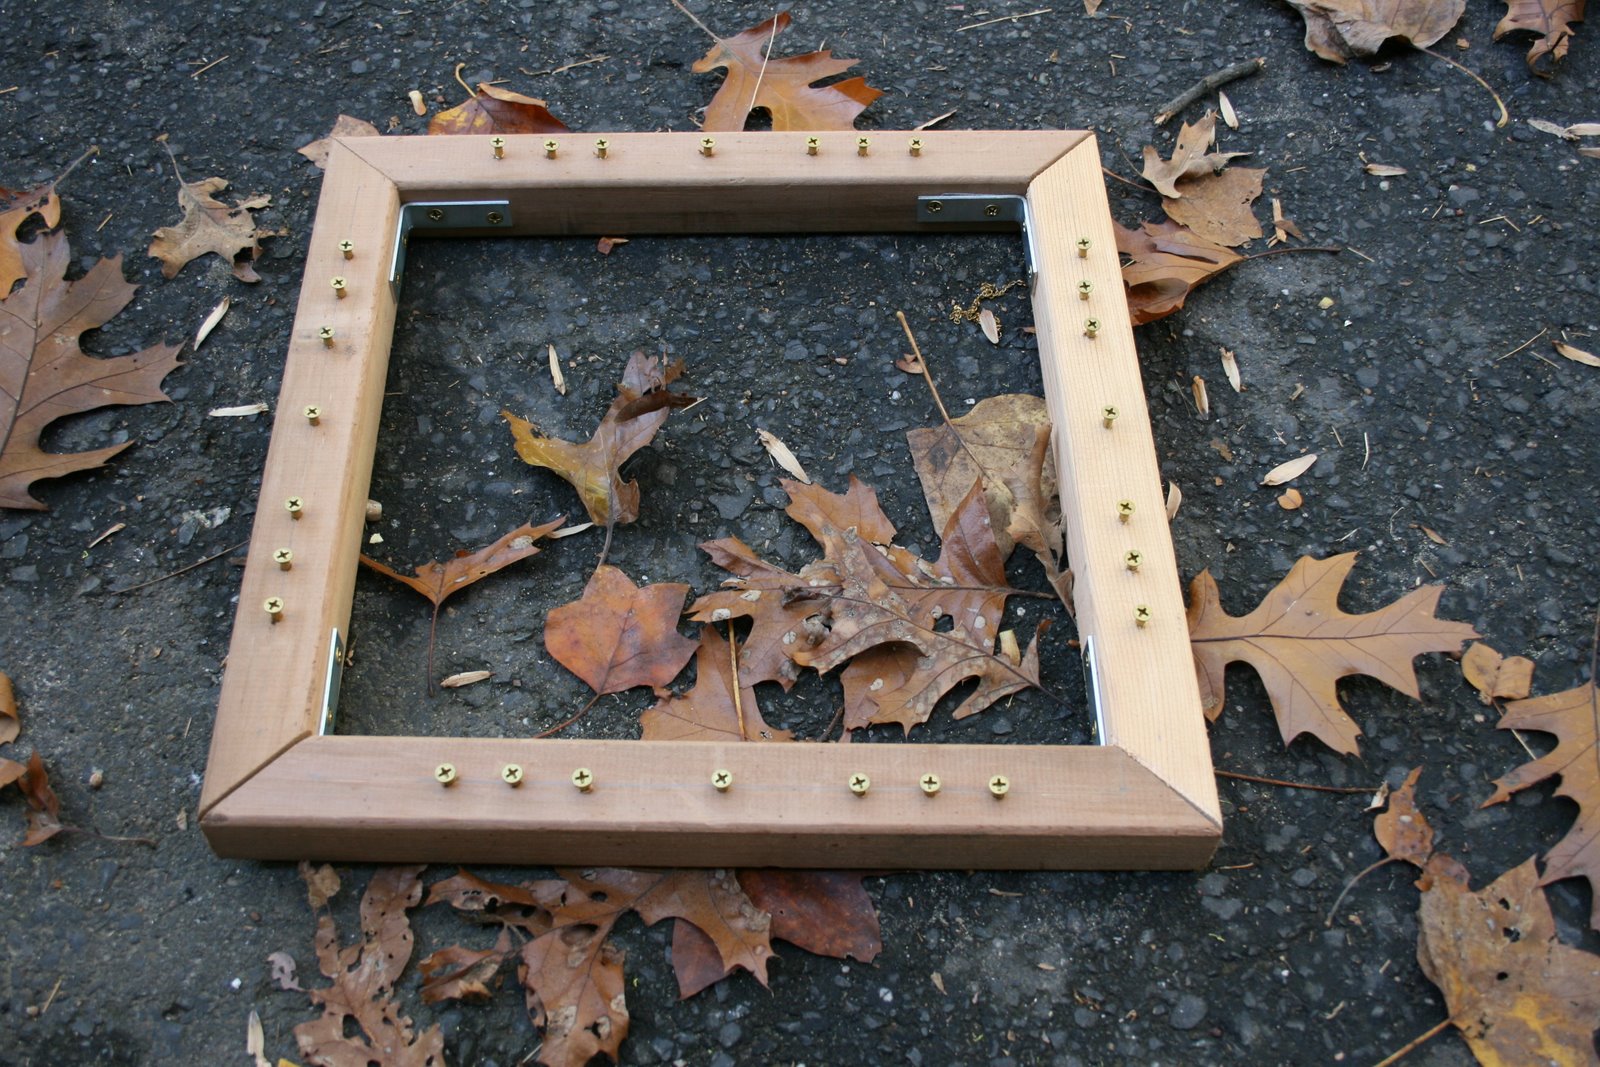 4. Attach your pegs. After pre-drilling the holes for the pegs on the front of the frame, he secured the pegs (screws), leaving enough of the head uniformly above the frame to stretch my rubber bands to the desired spacing.
Spider Flowers (Cleome)
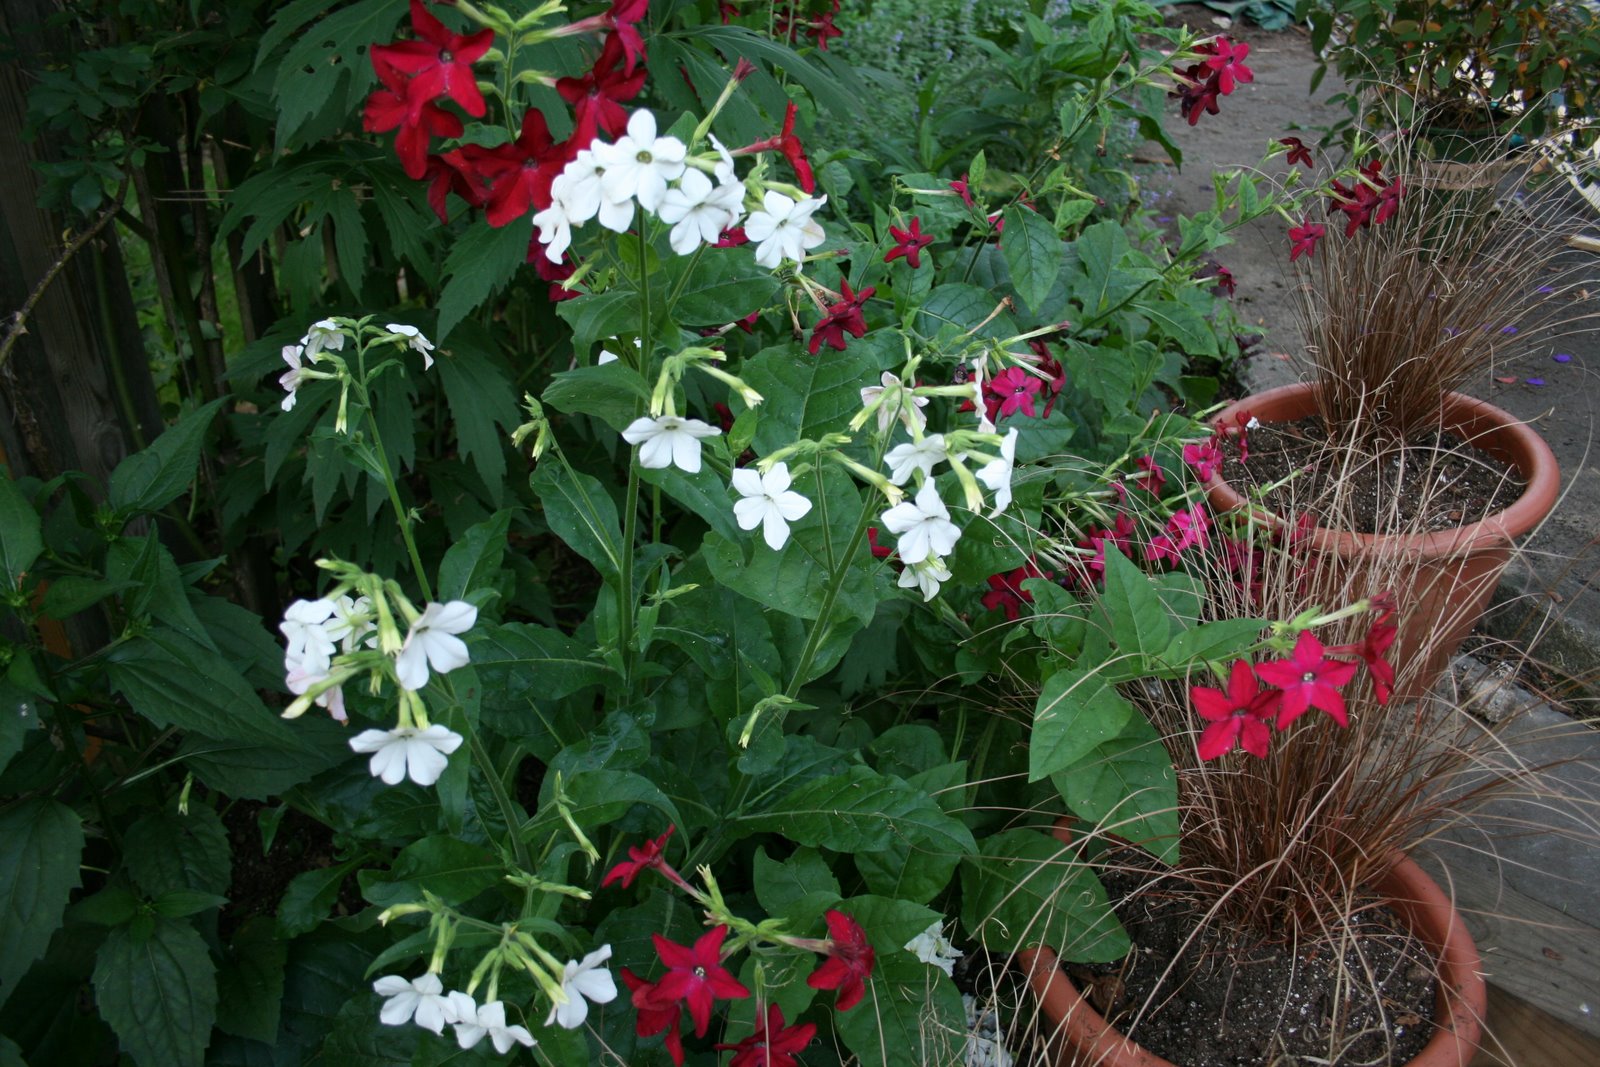
As a follow-up to my earlier post about self-seeders, here are some additional pictures of this season’s spider flowers (cleome) that better capture their beauty and complexity.
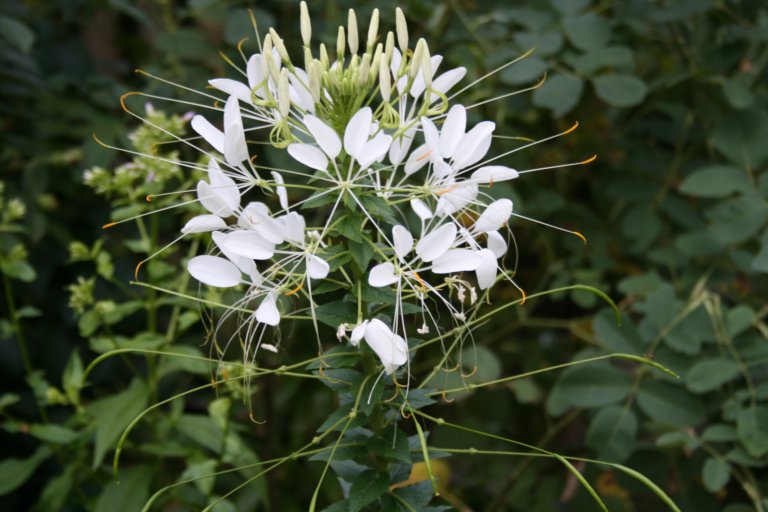 “Spider flowers (cleome) are big and are sometimes hard to plant in the garden without them looking like stiff soldiers. But once spider flowers are allowed to self seed, it transforms them. They look very natural growing through other plants and often to different heights depending on where they are.
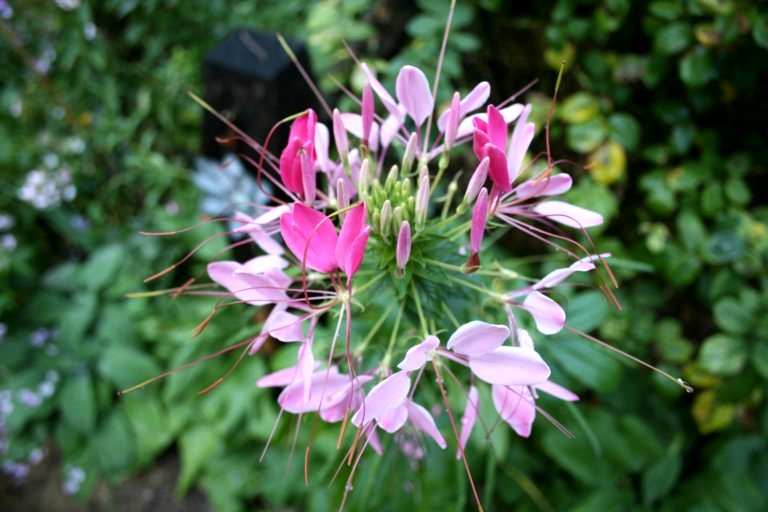 They also have a range of color. In the front of Goldberry Hill, I only allow violet ones. In the Egg Garden, I try to keep more white than pink. In the Children’s Garden, they are mostly pink because my daughter loves pink. Also, as the first plants become leggy, plants from seed which germinated later reach up to cover up the old bare stalks.”
Covered Containers for Propagation: GardenTalk.com’s Bell Boys
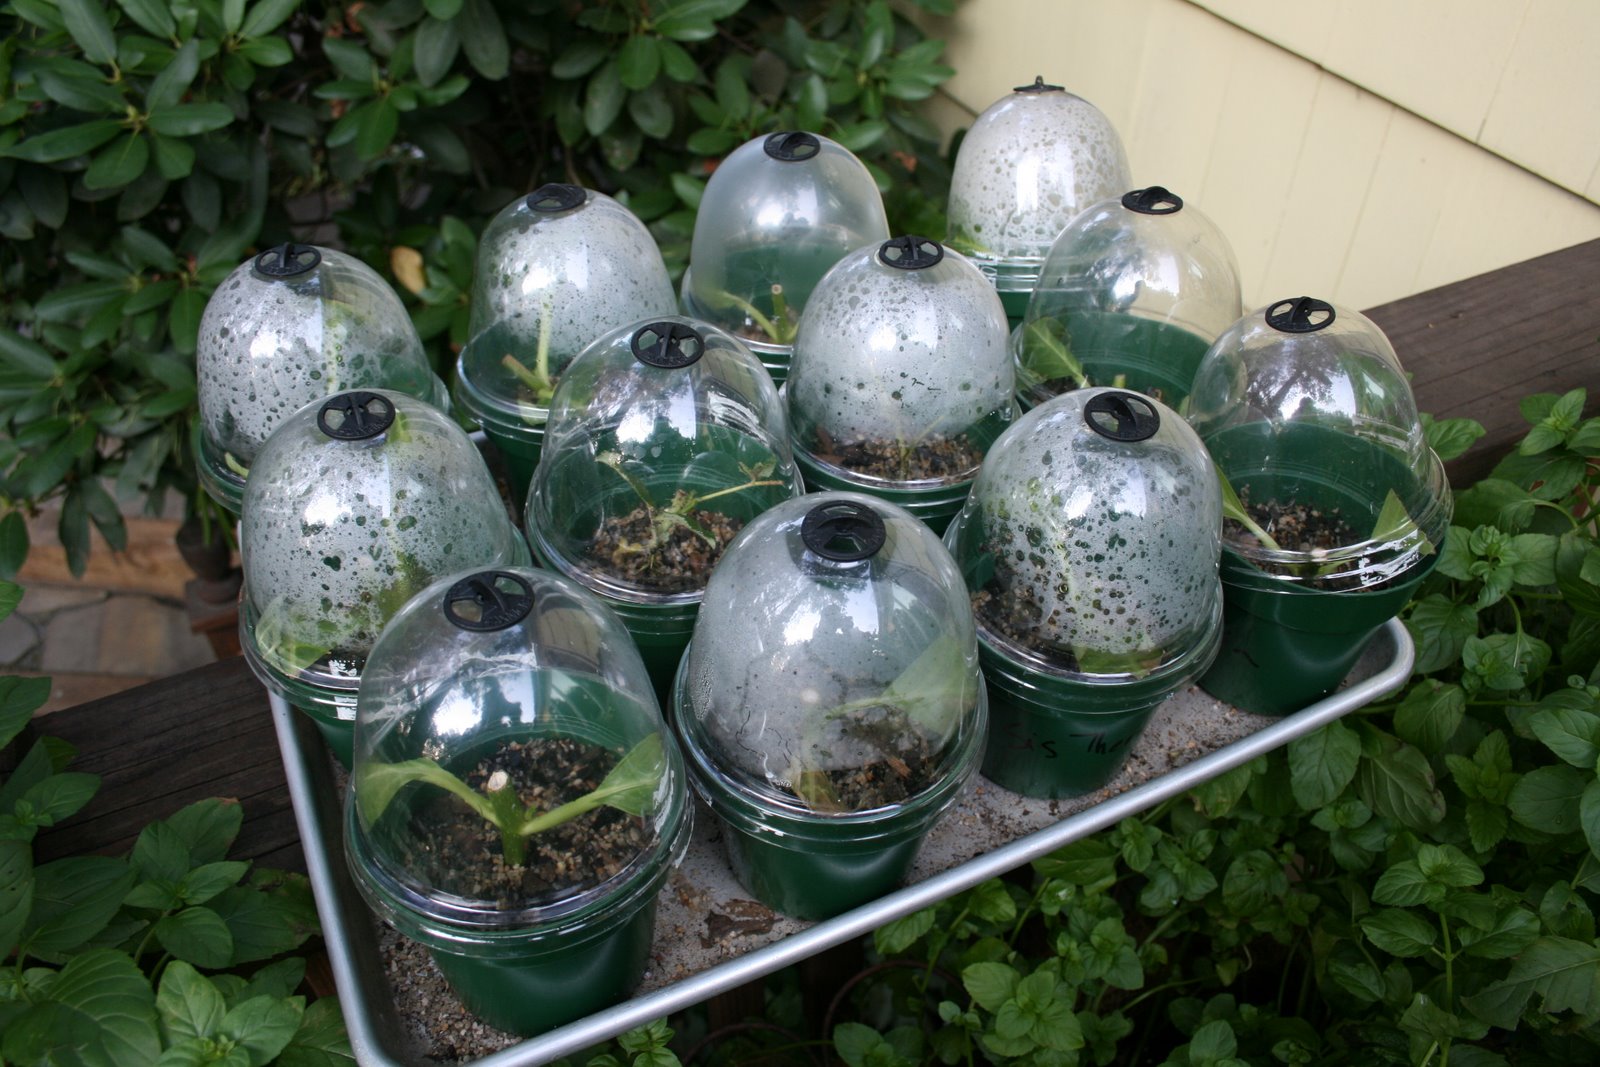 As a follow-up to my post on How to Propagate Hydrangeas, Part I: Taking Cuttings of Sister Theresa, I received several questions about the covered containers that I was using to propagate the cuttings. In response, I am re-posting the pictures of the containers with the information about where I purchased them.
They are from Walt Nicke’s GardenTalk: A Catalog of Fine Tools for Gardeners. You can find them under the section Potting and Propagators under the name Bell Boys. They come in two sizes in packages of six.
You can use them to propagate cuttings of other plants too, not just hydrangeas. In fact, I am also propagating the rose Frau Dagmar Harstropp, in another set of these containers just now.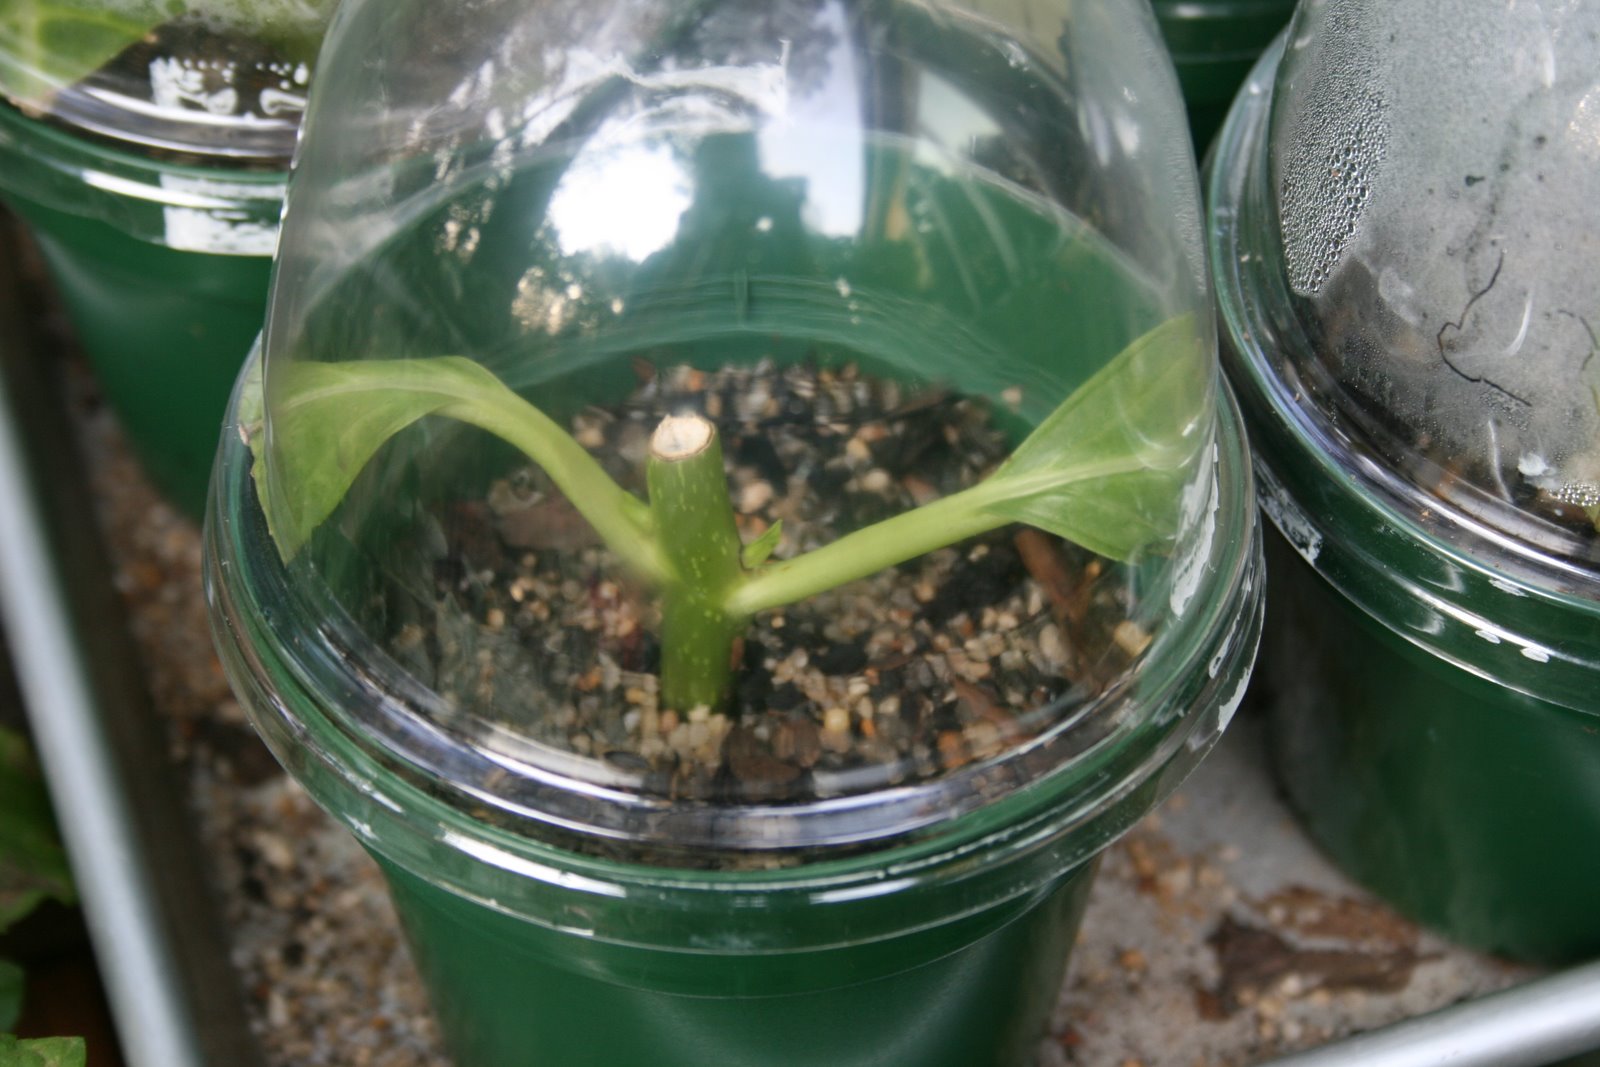
How to Propagate Hydrangea, Part II: Layering Marechal Foch
 In completing my expanded Front Border, I wanted to repeat some of the plants that existed in some of the neighboring beds. This first picture is a large, mature hydrangea, which I think is Marechal Foch, across the driveway on Goldberry Hill.
 As you see in the close up of the mature specimen, the leaves are thick and shiny. The mopheads change a lot over the course of the summer. Two weeks ago, in the the last picture on my Garden Bloggers’ Bloom Day post, the blooms were various shades of pink.
 The third picture is the baby of Marechal Foch in the Front Border which I propagated last year by layering my mother plant.
Layering is one of the easiest ways to increase your number of hydrangea. Simply choose a low growing branch. Place it in contact with the soil by burying it a bit or putting a rock on top of it. Leave the branch alone, yet check every month or so to see if it has begun to form roots in the area touching the ground. Once roots are developed, sever it from the mother plant. The baby hydrangea can be then left in place to grow a bit more or moved to a new location, as I did with this one.
~
How to Propagate Hydrangeas, Part I: Taking Cuttings of Sister Theresa
 I just planted a hedge of southern magnolias. To cover up the space between each, I thought I would plant more of my favorite hydrangea: Sister Theresa. I love this hydrangea for its large pure white mopheads.
 The purity of the white is stunning: it has no of pink or cream. The flowers are quite large and the individual sepals are very big making the blooms more striking. In addition, Sister Theresa performs beautifully in full shade and part shade which makes her a good choice for interplanting in my hedge.
 This week I took cuttings from my Sister Theresa of non-blooming wood. I want about seven new plants, so I took two stems. I cut the stems into three or four parts with very sharp pruners.
 I trimmed the leaves by cutting half or more of the leaf surface away. The easiest way to do that is to fold the leave at its midrib and cut half off. After which, I cut the stem which will be rooting at an angle and dipped it into rooting hormone.
~
Old Farmer’s Almanac: Spring Planting Schedule (April) and Heirloom Seed Sources
 I finally got to planting out my vegetables with the kids this weekend in the Children’s Garden. According to the Old Farmer’s Almanac, I made it just under the wire to plant many of my spring crops. In the early vegetable raised bed, I planted beets, onions, leeks, Swiss chard, carrots, lettuce, sugar snap peas, and broccoli raab.
In zone 6b, beets, broccoli, carrots, lettuce, parsley, onion sets, peas, and turnips need to be done now. The vegetables which can be started now until early to mid April are brussel sprouts, cabbage, cauliflower, collards, kale, leeks, radishes, spinach, and Swiss chard. I have planted a mix of heirloom and modern hybrids. The following are the heirloom varieties I’ve sown:
- Lettuce Mix from Seed Savers Exchange of Amish Deer Tongue, Australian Yellowleaf, Bronze Arrowhead, Forellenschuss, Lolla Rossa , Pablo, Red Velvet, and Reine des Glaces
- Bull’s Blood Beet purchased from Thomas Jefferson’s Monticello; the Monticello online store is a good source of heirloom early American plants and seeds
- Nantes Carrot, also from Seed Savers Exchange; “Seed Savers Exchange is a nonprofit organization that saves and shares the heirloom seeds of our garden heritage, forming a living legacy that can be passed down through generations”
Related posts: How to Build Raised Vegetable Beds; Organically Preparing the Soil for Vegetable Planting; and Old Farmer’s Almanac Gardening 2008 Calendar
Follow-up: Old Farmer’s Almanac Spring Planting Schedule (May)
