
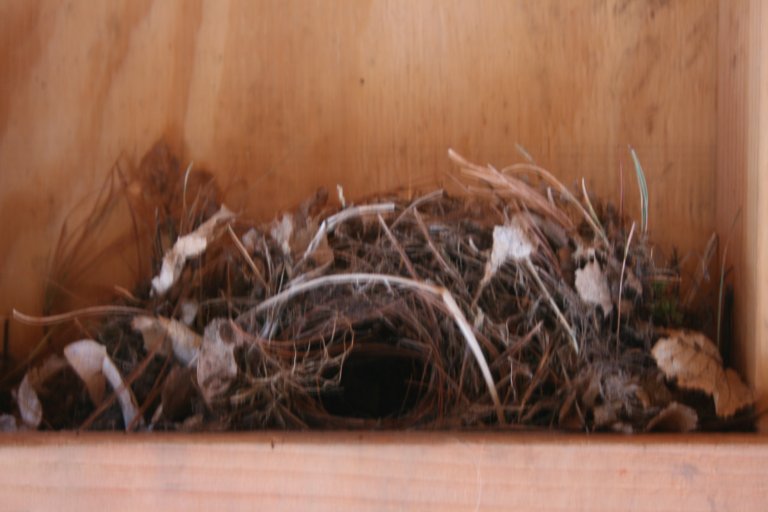
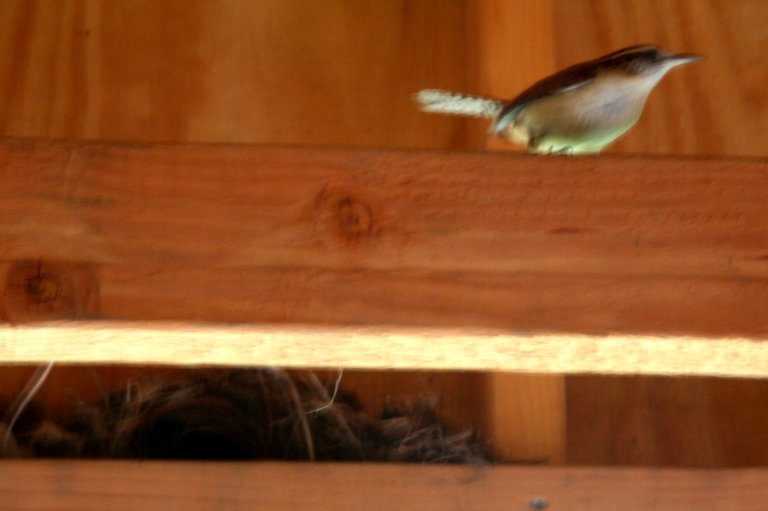
 April 29, 2008: Recently, I noticed some birds flying in and out of the children’s playhouse. Upon closer observation, it appears that a pair of tufted titmouses or titmice have built a nest in the framing of the fort against the wall. Interestingly, the nest is oriented horizontally, not vertically, as I am used to seeing in a tree. My husband took this picture head-on (not top-down) without a flash last weekend, but we haven’t been back in recently to avoid disturbing them.
Old Farmer’s Almanac Spring Planting Schedule (May)
 As I wrote in my prior posts on my April planting schedule and heirloom seed sources and potato planting and asparagus harvesting, I am following the Old Farmer’s Almanac Gardening 2008 Calendar this year. As a a relatively new vegetable gardener (most of my gardening experience is as a flower gardener), the Calendar is an indispensable help in knowing when to plant what.
~
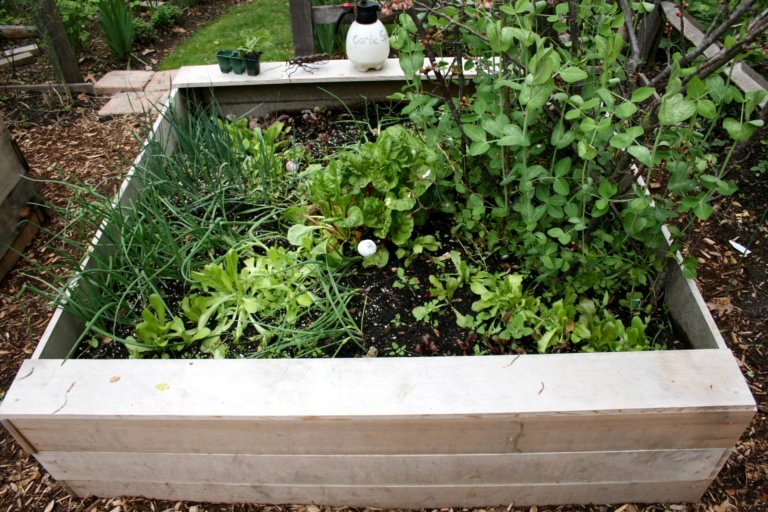
According to the Calender for my area in New Jersey (zone 6b), May is the time to plant the rest of the vegetables I have not yet planted. Here’s a summary of what I’ve done to date:
~
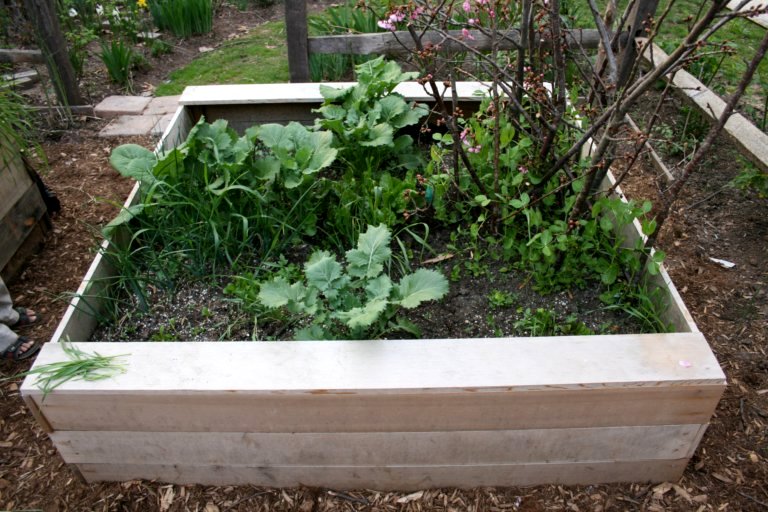
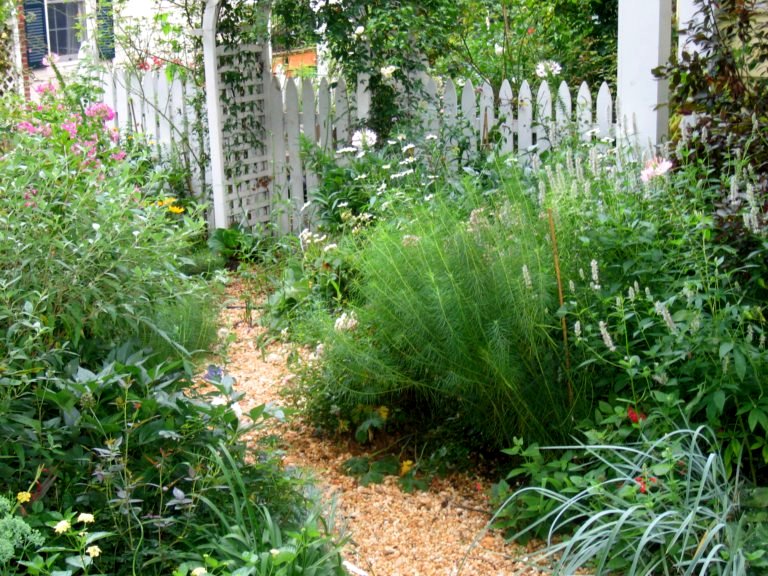
Outside the perimeter of the Children’s Garden:
~
*Asparagus – planted three years ago, the first harvest was two weeks ago, the second harvest was last week, and the third harvest will be in the coming week; I love perennial vegetables
~
*Asparagus – planted three years ago, the first harvest was two weeks ago, the second harvest was last week, and the third harvest will be in the coming week; I love perennial vegetables
~
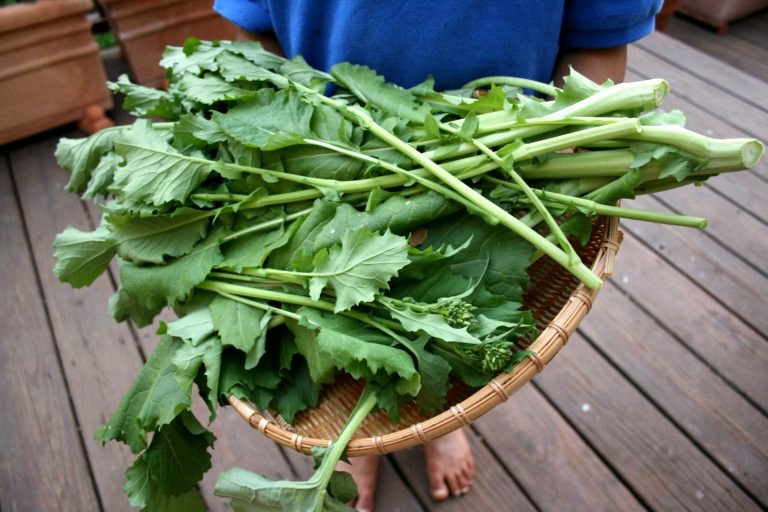 *Brocolli Rabe (pictured) – seedlings planted in early April were harvested last week and were delicious
~
*Lettuce, Swiss Chard, Carrots, Leeks, Beets, Onions, and Sugar Snap Peas – also planted in early April, but not yet ready to harvest
*Lettuce, Swiss Chard, Carrots, Leeks, Beets, Onions, and Sugar Snap Peas – also planted in early April, but not yet ready to harvest
~
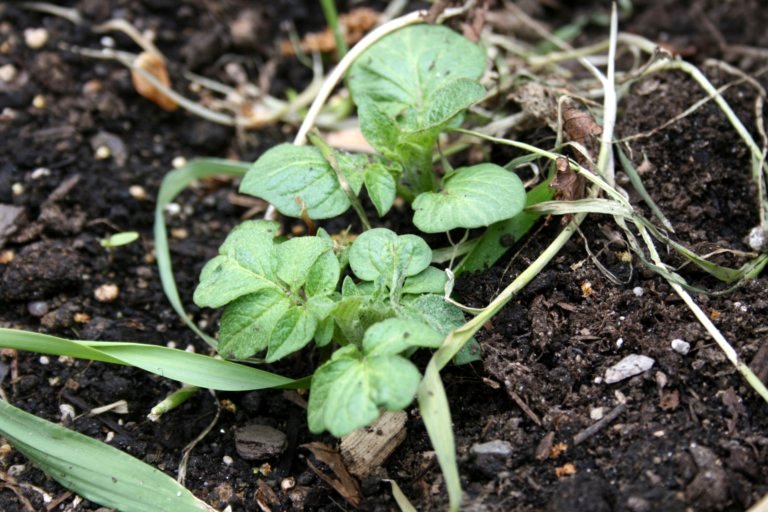 *Potatoes (pictured) – seed potatoes planted two weeks ago have already started to come up–I just bought the salt hay to cover them this week
~
*Tomatoes, Zucchini, Cucumbers, Eggplant, Pumpkins, and Watermelon – some were planted last week, the rest will be planted this week
*Tomatoes, Zucchini, Cucumbers, Eggplant, Pumpkins, and Watermelon – some were planted last week, the rest will be planted this week
~
*Corn – to be planted this week Native American-style with a piece of whole fish for each seedling–this is another great project with the kids, though you have to harvest all of the ears the minute they are ready before the critters get to them
*Corn – to be planted this week Native American-style with a piece of whole fish for each seedling–this is another great project with the kids, though you have to harvest all of the ears the minute they are ready before the critters get to them
What I’ve Learned About Growing Tulips in New Jersey: Protecting from Squirrels and Deer, Planting in Clay Soil, and Creating Colorful Combinations
 One of my favorite spring flowers at this time of year is the tulip. Because of the squirrels, deer, and clay soil in my area of New Jersey, few of my neighbors grow tulips, but it can be done. Here are some lessons that I have learned over the past few years on growing these beautiful flowers in my less than ideal conditions. For me, it has been well worth the effort.
~
1. Protecting Tulips from Squirrels and Deer. In the fall, to protect the bulbs from being eaten or dug up by hungry squirrels, I soak them in deer repellent before planting. In the spring, to protect the tulips from being nibbled by the deer (my friend calls them rodents with antlers), I then regularly spray them with deer repellent as soon as the bulbs begin to emerge.
~
~
2. Growing Newer and Heirloom Tulips in Clay Soil. Because tulips naturally like dry, warm summers, there is a big difference between the newer varieties that have been bred mainly for commercial cutting and the heirloom varieties that were bred to actually be grown in people’s gardens.
~
The newer varieties spoil if I keep them in my moist, clay soil year-round. To over-summer them, I remove the bulbs after the show is over to a less prominent area of the garden so the foliage can continue to make energy for the bulb. Once the leaves have died down naturally, I dig them up and store them in a dry cupboard until it’s time to re-plant them in the fall.
~
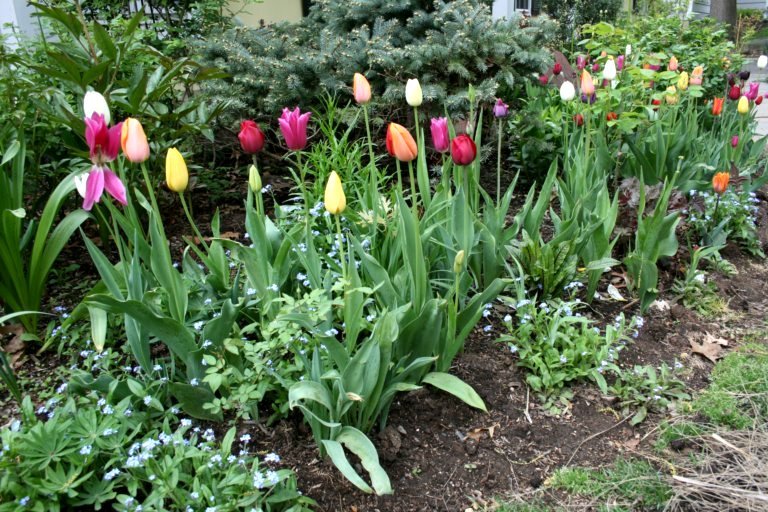
 In contrast, the heirloom varieties are much more tolerant of my less-than-ideal clay soil. I find that about three-quarters of them will survive the summers in the ground. In the areas where I grow them, like the Rose Garden (pictured), I simply plant enough new bulbs each fall to compensate for the expected loss. A mix of orange tulips including General de Wet, Orange Favorite, Princess Irene, Dillenberg are planted with Black Parrot as a dark purple accent.
 ~
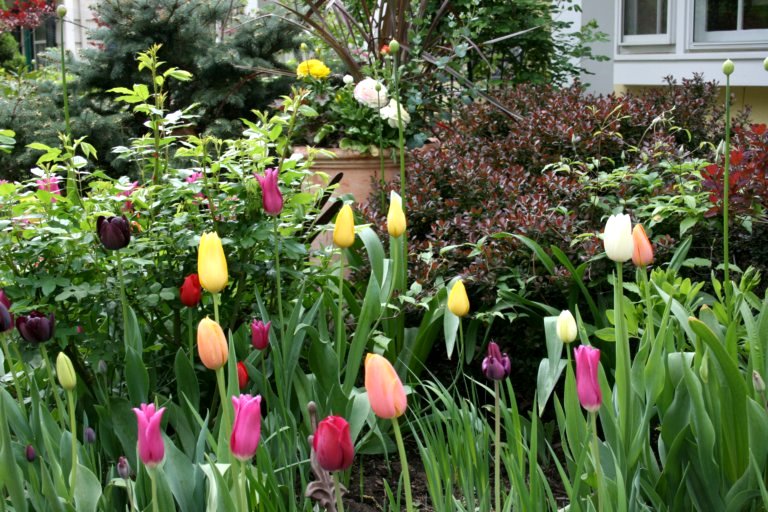
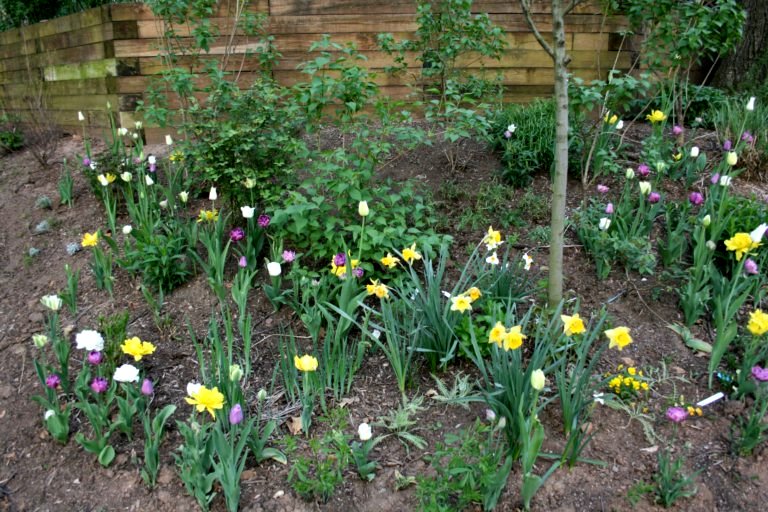
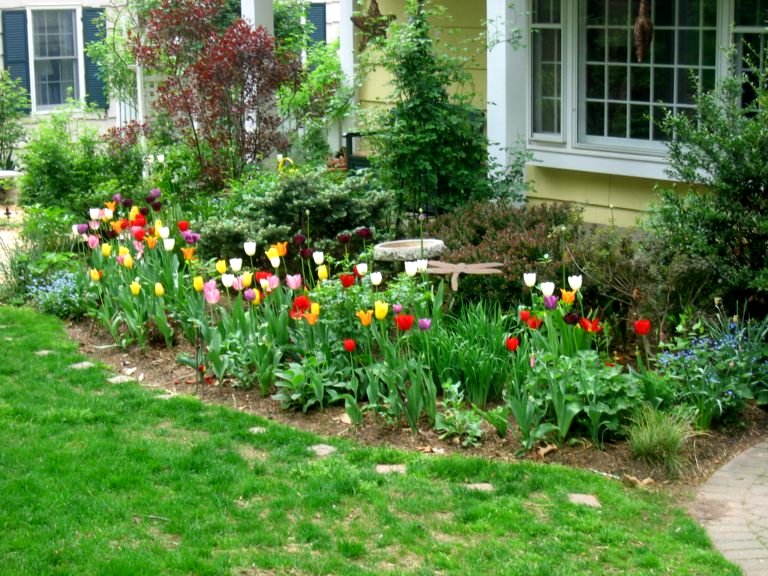
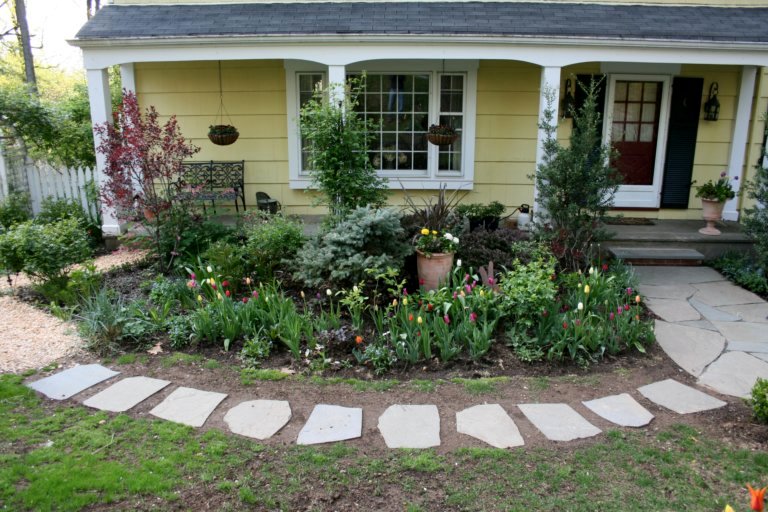
 3. Creating Colorful Combinations of Tulips. Inspired by the Granny Mix offered by Old House Gardens, the last two years I’ve been mixing up my own tulip combinations to remind me of the old mixtures found in cottage gardens or old time front door gardens. I have ten varieties of tulips chosen for a range of color, height, and form which bloom April and May. My own mix is planted in the front of our house (pictured). It consist of the following tulips: Ballerina, Queen of the Night, Couleur Cardinal, Princess Irene, Kingsblood, Mariette Cum Laude, Maureen, Mrs John T. Scheepers, and Dordogne.
~
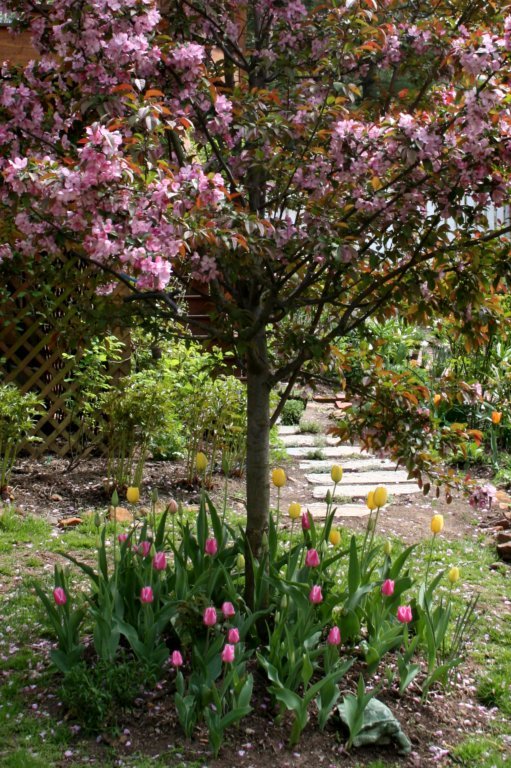
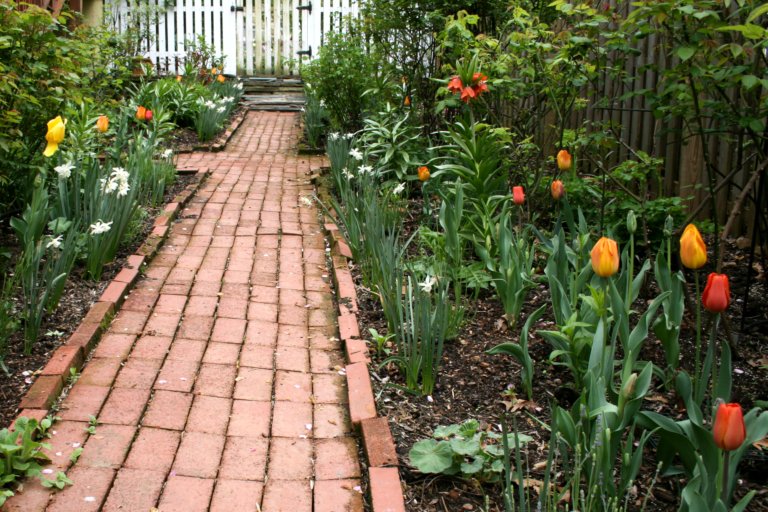
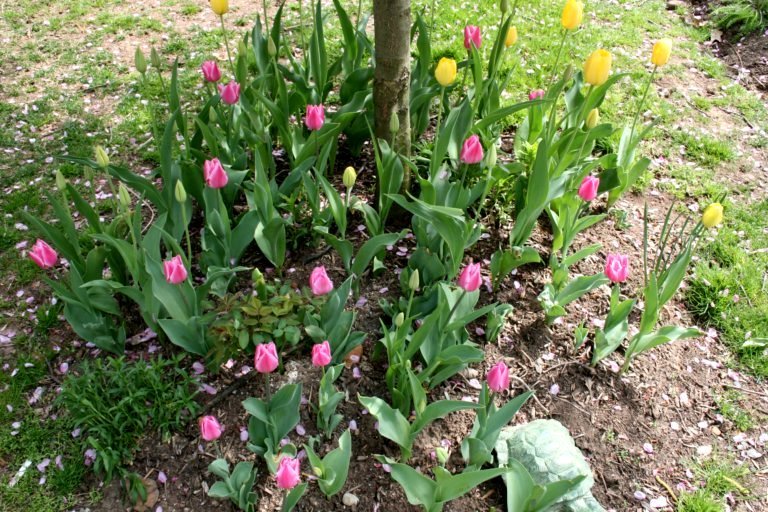 Under a pink flowering crabapple outside the Children’s Garden, I planted Christmas Dream, Big Smile and Menton. I must say that originally, I did not like the apricot color of Menton, but as it matures it is absolutely beautiful, particularly because it picks up tones in the red foliage of the crabapple as the leaves elongate.
 ~
 On Lilac Hill, I planted the String of Pearls combination from White Flower Farm along with Lilac Perfection, Monte Carlo, Blue Diamond, and Violet Beauty. The String of Pearls collection contains Mount Tacoma, Maureen, White Triumphator, Spring Green, and Calgary.
~
Related posts: How to Keep Deer Out of the Backyard
Spring Ephemerals: Virginia Bluebells Are Spreading Through The Garden
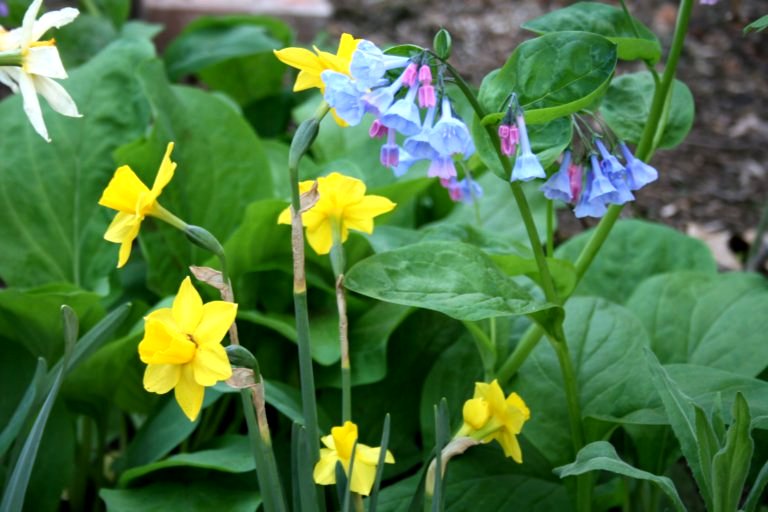
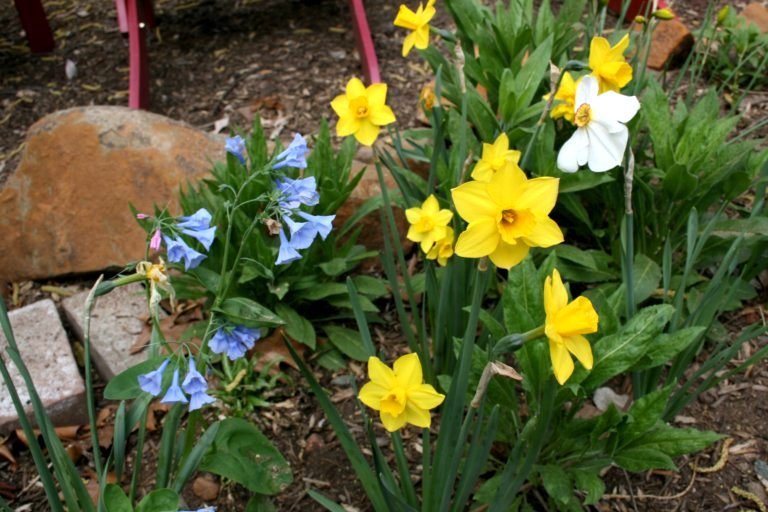
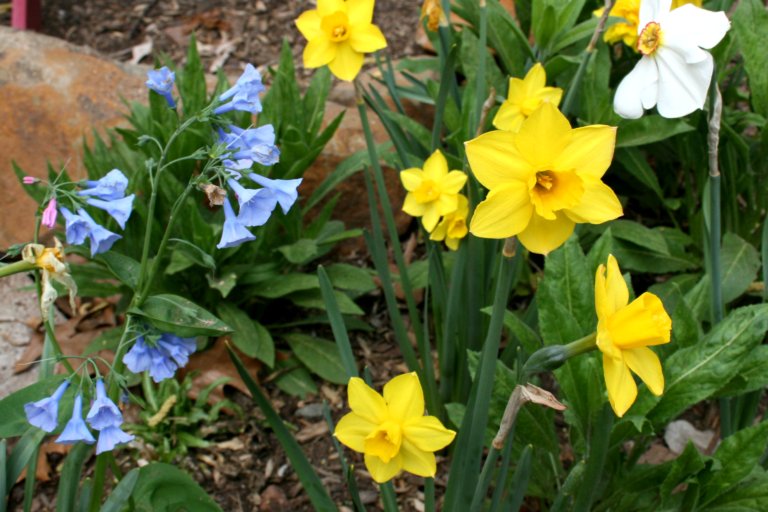 This year, my Virginia Bluebells are the best ever. After three seasons, these spring ephemerals are spreading beautifully through the garden. I have wonderful combinations of them with daffodils (pictured) in the Long Border and great surprises as they have shown up in other areas.
~
I look forward to their number increasing further. The spring ephemerals are so charming for how they appear when the garden is bare and leave in just enough time to make room for summer perennials as they bulk up.
~
In my garden, more bluebells are always welcome. They seem to thrive in areas where the clay soil is on the dry side and in parts where the moisture level is more normal. They have done well in rich and ordinary soil. I have them planted under roses, a tree hydrangea, and in the ‘tree skirts’ that surround my oaks in the back garden.
Advice Wanted: Crown Imperial Fritillaria Coming up Blind
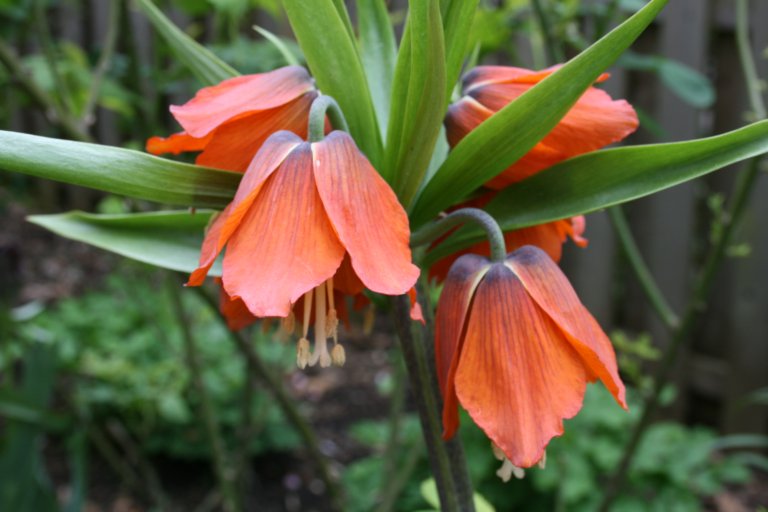
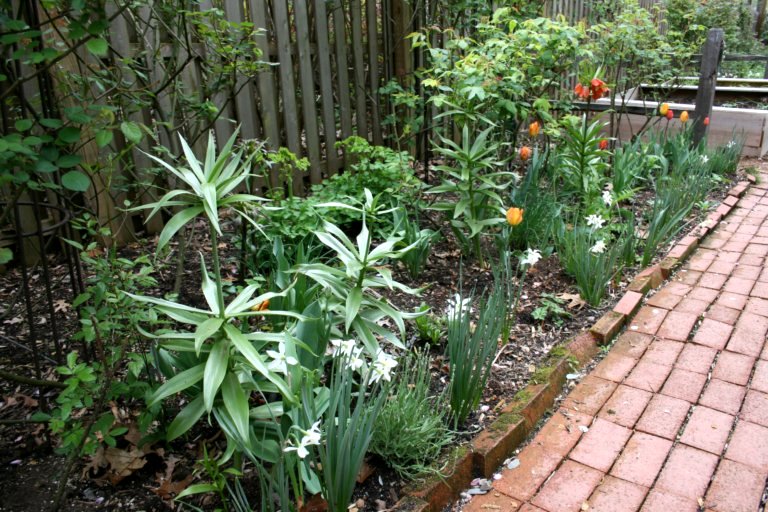 Last year I planted various orange and deep purple tulips and orange fritillaria in the Rose Garden. I love orange tulips and the contrast with the deep purple makes the orange stand out all the more. I thought the orange crown imperial fritillaria would be great with the tulips.
~
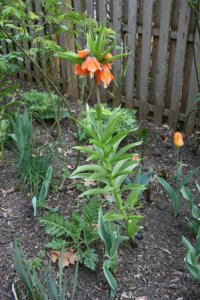 The bulbs all came up beautifully. But THEN, only one fritillaria formed flowers. Why? So far, I have no quick answers. I spoke to a gardener at one of the botanical garden I visit who suggested buying the bulbs from a different supplier. They have hundreds of fritillaria which are all blooming from Brent & Becky’s.
 The bulbs all came up beautifully. But THEN, only one fritillaria formed flowers. Why? So far, I have no quick answers. I spoke to a gardener at one of the botanical garden I visit who suggested buying the bulbs from a different supplier. They have hundreds of fritillaria which are all blooming from Brent & Becky’s.
~
~
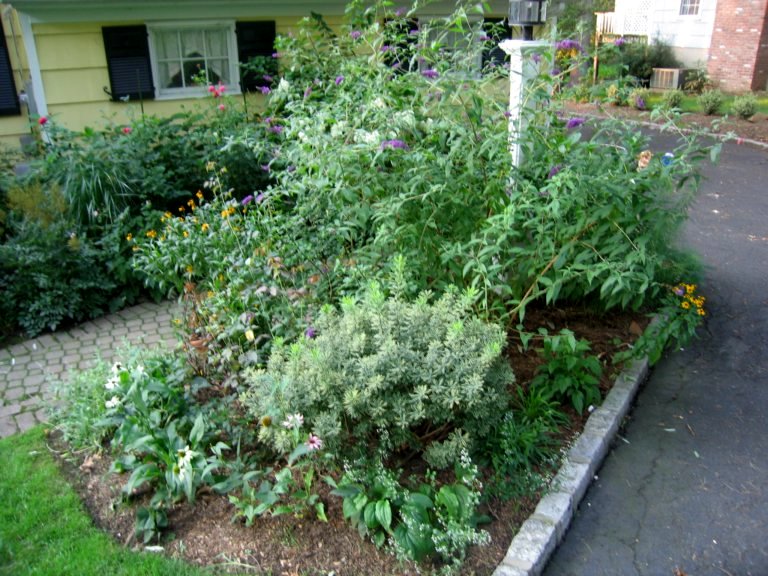
Any other ideas? The one (pictured) is so beautiful, I would love to have more next spring.
Vegetable Gardening with Children: How to Plant Potatoes and First Harvest of the Season – Asparagus
 While my less-than-half-an-acre suburban lot is primarily a flower garden, I do enjoy growing the vegetables and herbs for which I have room. A few years ago, I visited the working organic farm at Old Sturbridge Village in Massachusetts and learned that it would take approximately one acre to feed my entire family of seven for the year.
  Thus, rather than trying to feed my family, the vegetables and herbs primarily provide an opportunity for my children’s participation and education. We get to organically prepare the soil, plant the seeds or seedlings, and then harvest the results.
 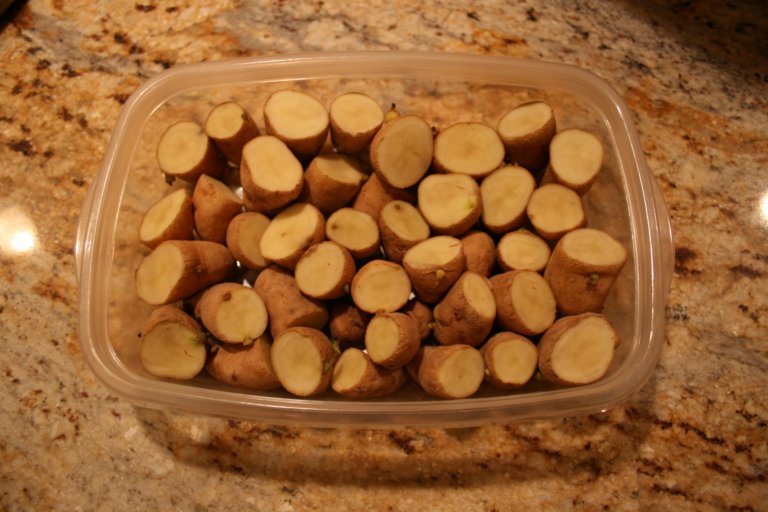 Further, we get to plant heirloom varieties that are otherwise not available. In terms of yield, we produce enough for the occasional amuse-bouche or side dish. To satisfy our need for organic and locally harvested produce, we shop at the local farmers’ markets in Chatham and Summit from June through November.
~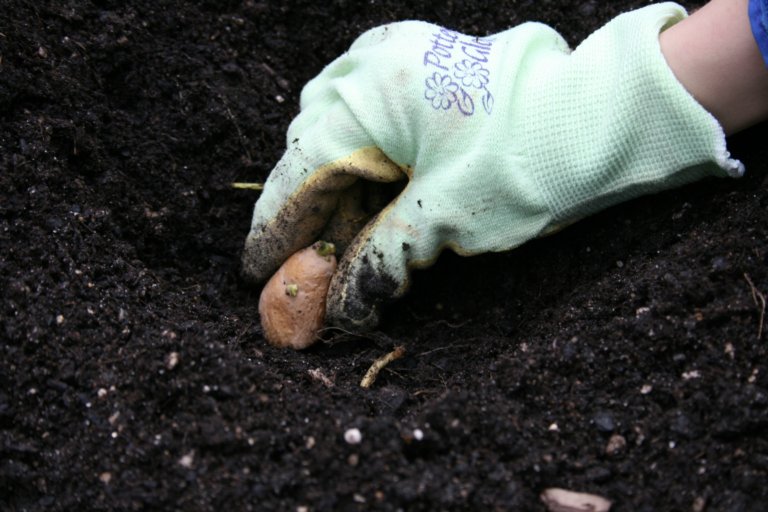 Last week, according to the Old Farmer’s Almanac, it was time to plant our seed potatoes. This is a perfect activity to do with children, or if old enough to handle a sharp knife, something that the children can do by themselves with some adult supervision. First, our son (age eight) prepared our seed potatoes (purchased from Seed Savers Exchange) by cutting them into one inch pieces.
  Second, we cured them cut-side up for three days to prevent them from rotting in the soil. Third, we planted them an inch-or-so in the raised vegetable bed with the eyes up.
~
Three years ago, we planted our first asparagus crowns (purchased from the Cook’s Garden) around the outside of the Children’s Garden. This weekend, we got our first harvest–three big, beautiful stalks of asparagus (pictured). 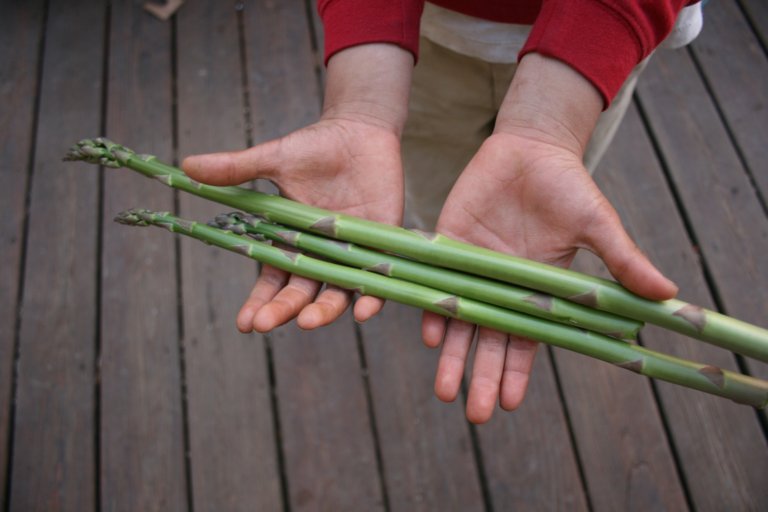 The kids were so excited to cut the asparagus (about one inch above the ground), roast it, and then eat it with dinner. In the coming weeks, we’ll have more to harvest.
~
Related posts: Ten Tips for Planning a Children’s Garden, How to Build Raised Vegetable Beds, Old Farmer’s Almanac Spring Planting Schedule
Garden Bloggers’ Design Workshop: Heirloom Gardener’s Four Year Makeover of Her Front Garden – How to Improve Boring Suburban Landscaping
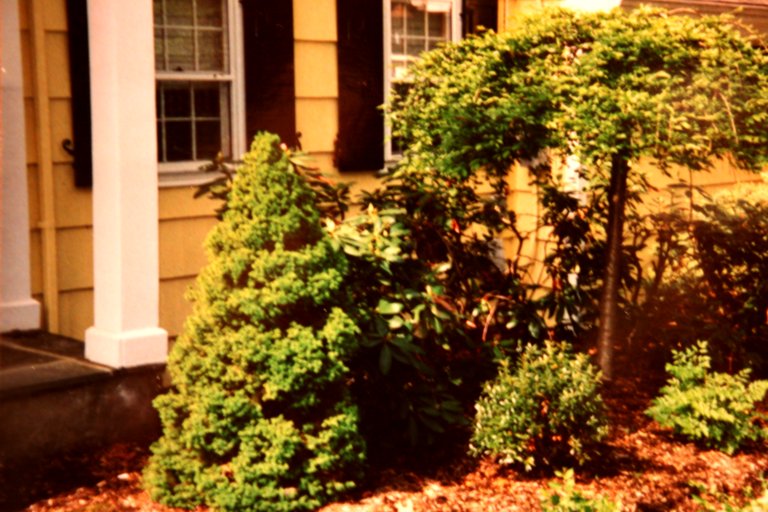
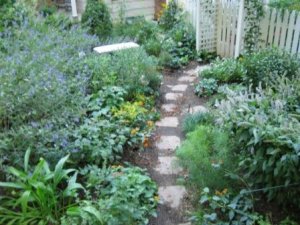
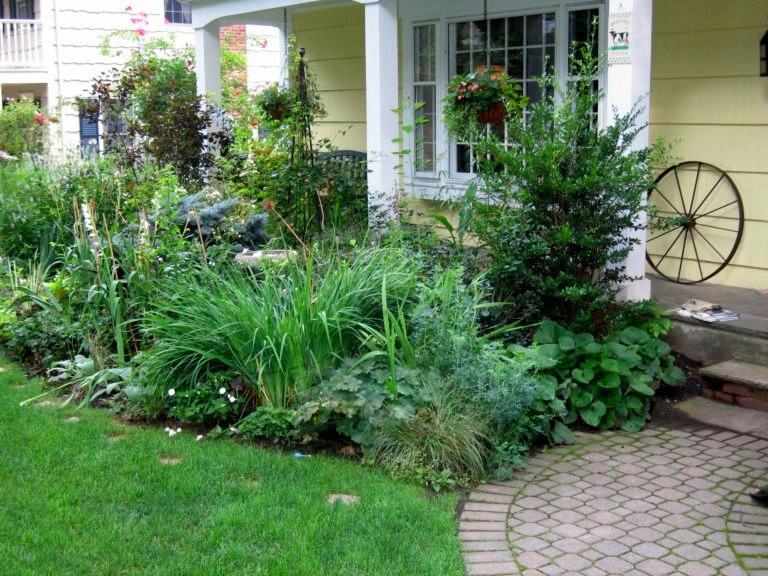
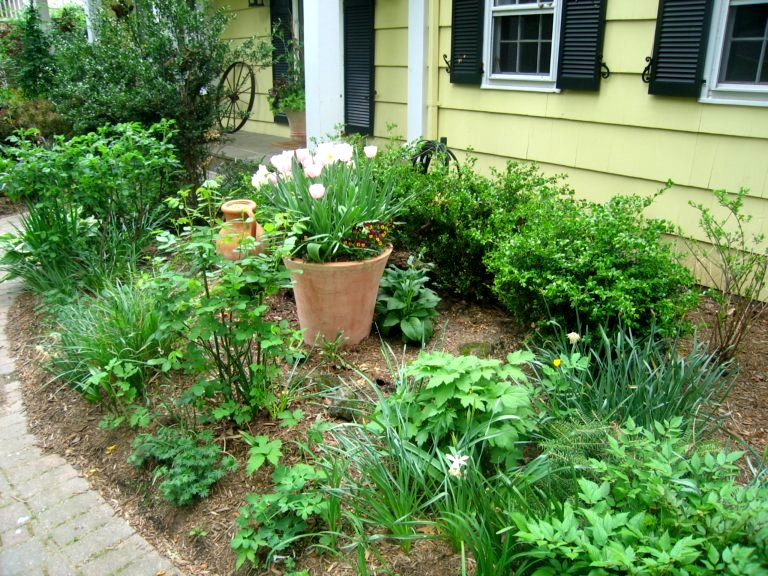
April’s Garden Bloggers‘ Design Workshop on Front Yard Gardens is very timely for me seeing that my spring project was to complete the four year redesign of our front garden, which is made up of the Front Border immediately in front of the house and, standing in front of the house to the immediate left, the Egg Garden.
When we moved into our house, the front garden had the usual foundation plantings: evergreen trees and shrubs with two flowering trees for color. It was dull, static, and uninspiring. The first three pictures show the front border before I began replanting it.


.
.
.
.
.
.
.
.
.
.
.
.
.
To my neighbors’ amazement, I proceeded to take out the whole thing and replant it myself. The first year, I replanted the existing borders and created the Egg Garden. The existing borders had three problems: they did not change with the seasons–summer looked the same as fall and spring, and winter was only slightly different; some of the plants had grown so large that they covered windows and were out of proportion with the house; and the borders needed very little maintenance which meant there was little gardening to be done.
~
I started by removing the large problem plants: the huge rhododendron which was out of proportion with our two-story colonial, the two amorphous evergreen cones flanking the front door, and a weeping cherry which obscured the windows of the library. Then I took away anything that was poorly suited for the site, like the leucothea in full sun, or that did nothing for the border, like a deformed Ceris ‘Forest Pansy.’ Next, I improved the soil by adding four inches of mushroom compost. Finally, I began replanting with small trees, shrubs, perennials, annuals, vines, grasses, and bulbs. I also added a bird feeder.
~
The Egg Garden was created almost entirely from the space that was formerly occupied by the rhododendron and is bordered in the back by the fence and arbor that enclose the Cutting Garden. Small six-by-six stepping stones through the grass connected the front walkway to larger, but not large enough, twelve-by-twelve inch stepping stones through the Egg Garden to the Cutting Garden.


.
.
.
In the second year, I expanded both the Front Border and the Egg Garden, and spent time planting both more densely. I also decided to remove the bird feeder which seemed more appropriate in the backyard. In its place, I installed a tutuer on which I decided to grow the rose Lavender Lass and clematis Blue Bird and Francesca.


.
.
.
.
.
.
.
.
.
.
.
.
.
.
.
In the third year, I added a large pot and a semi circular boxwood hedge in front of the library, to give that area definition and a focal point. In the Egg Garden, I widened the path and replaced the twelve by twelve inch stepping stones with loose gravel. As always, I looked for ways to expand the floral display with more bulbs, clematis, and annuals.
 .
..
.
.
.
.
.
.
.
.
.
.
.
.
.
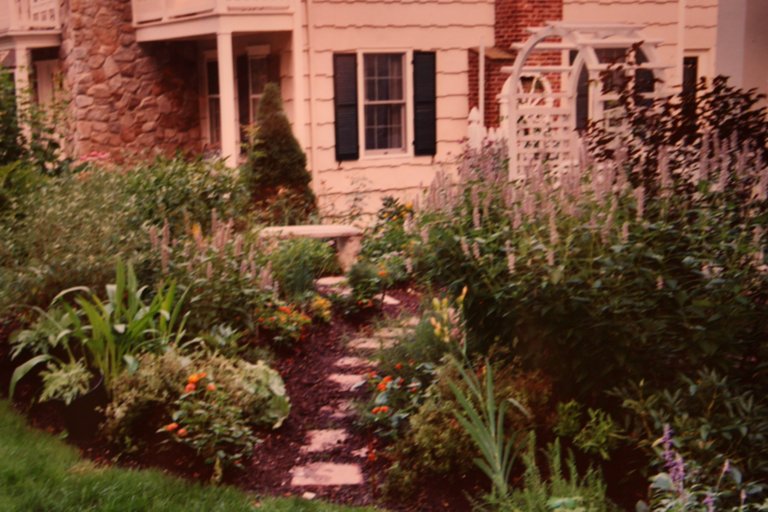
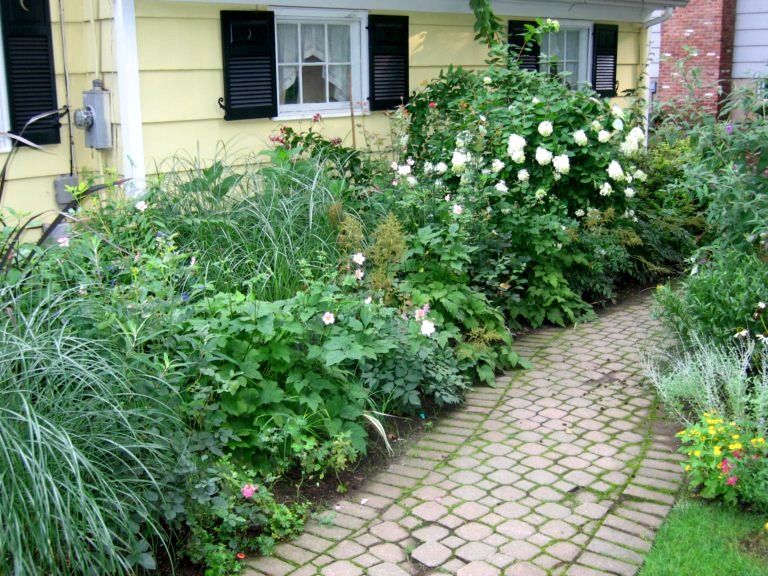
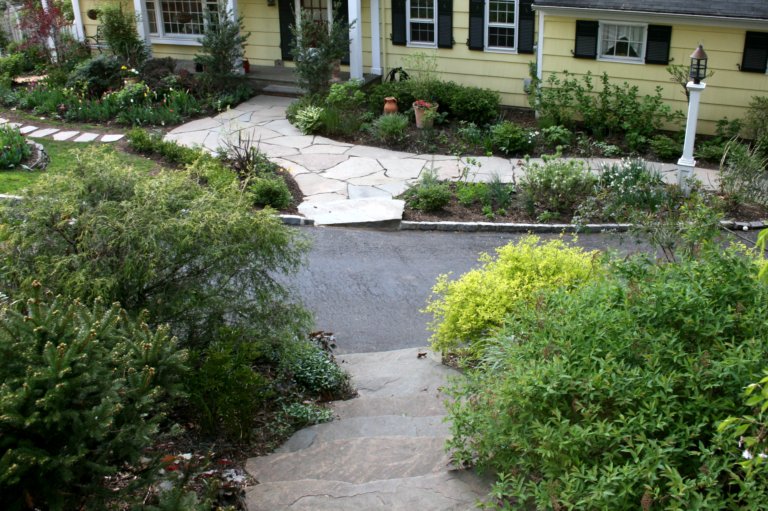
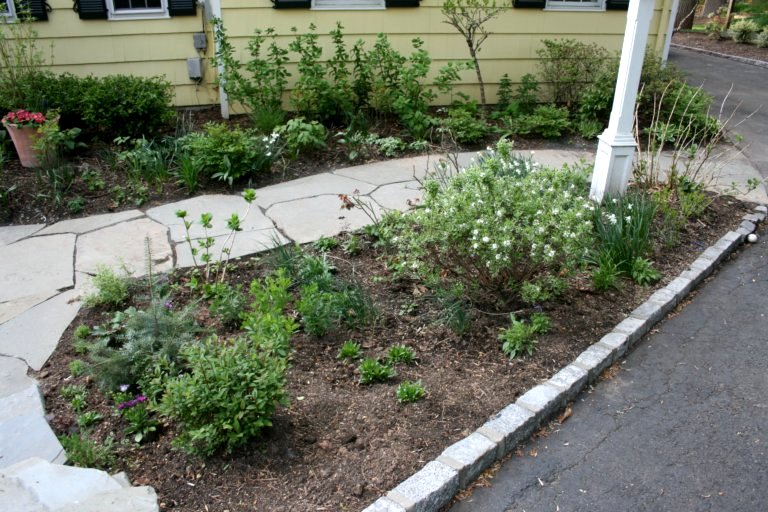
This year, I am completing the final phase of the front border renovation. I replaced the old path of brick pavers with a wider one of irregular blue stone to compliment the other stone work in the garden. I also continue the blue stone stairs on the other side of the driveway. Previously, the steps took you from the mailbox to the driveway through Goldberry Hill. From there, you were expected walk down the driveway and then onto the entrance of the path leading to the front door. No one did this, not even me. One of the cardinal rules of my garden is that there should be paths where people walk.
~
~
Further on, in place of the small six by six inch stepping stones that connected the front path to the Egg Garden, there are now more appropriately sized two by two foot blue stones. Throughout, I chose irregular blue stone pieces to harmonize with the less formal plantings.
~
The borders in the front were also to be expanded to flank each side of the new stairs. I wanted continuity in plantings around the new steps and those already there, so that it would not be obvious that they were installed at two different times. I chose to use the same plants or plant types so that the steps would echo each other.
~
The project is just about complete now. I will have to see how the plants grow in before I add more to the new plantings. In the fall, I will plant more spring blooming bulbs.
~
The project is just about complete now. I will have to see how the plants grow in before I add more to the new plantings. In the fall, I will plant more spring blooming bulbs.

Advice Wanted: How to Keep Rabbits Out of the Garden
I need some help and advice from my fellow gardeners. I have always had the occasional rabbit in the garden, but nothing too damaging. This year, I have a rabbit infestation and he or she is eating everything in sight. I wasn’t sure who the culprit was, but then I saw the rabbit shamelessly eating my new plants in broad daylight. From what I’ve read, it seems that the options are guns (not practical in the suburbs), fences, traps (my husband’s weekend assignment), dogs/cats (not an option right now), and repellents (I am currently spraying both commercial and home-made repellents). Some gardeners on GardenWeb also suggested spreading human hair, sprinkling pepper, and planting plants they do not like, such as nepeta (catmint). Does anyone have insight into which of these or additional suggestions will work?
Update April 25, 2008: May Dreams Gardens has a lot of experience with rabbits and suggests sprinkling cayenne pepper on the plants that need protection.
Update May 10, 2008: Thank you all for the suggestions–some of them are working. First, I sprinkled the cayenne pepper on the most susceptible plants and the rabbits are staying away from them. Second, I captured my first rabbit in a rabbit trap baited with one of their favorite foods–clover.
Related posts: Keeping Groundhogs Out of the Garden, Keeping Deer Out of the Garden
Thyme for Herbs: 10 Blogs That Have Raised The Bar On Garden Blogging
I was surprised and honored to be recognized by Jane Marie at Thyme of Herbs in her list of “10 Blogs That Have Raised The Bar On Garden Blogging.” Janie Marie, thank you for your support and recognition!
Related post: Heirloom Gardener Featured on the Star-Ledger’s NJ.com
