Garden Planning: A Map of My Gardens

Over the past seven years, I have tried to make the most of every available space in which to garden on our property. In response to some reader requests about how I fit so many different gardens on less than half an acre and for my own garden planning, I asked my husband to draw a map of our property highlighting the various gardens.

The entire space is 100 feet wide and 200 feet deep. The front of our home faces southeast towards the street. The street is the highest point on our property and from there slopes downward. The map is drawn roughly to scale, each square representing five feet.

In the front, gardens welcome visitors as they walk down to our home: Goldberry Hill, the Front Border, and the Egg Garden.

On the side, gardens occupy previously unused space: the Cutting Garden and the Rose Garden.

In the back, gardens border a large open lawn where the children play (clockwise from the Rose Garden): the Children’s Garden, the Triangle Garden, the Long Border, the Walled Garden (includes the sandbox and is bordered by the fort), the Winter Border (this year’s major garden installation), the Bird Garden, and Lilac Hill. The custom deer fence completely encloses all of these gardens and the Rose Garden.

Related Posts: How to Keep a Garden Journal and Creating Space for a Garden – the Cutting Garden

Old Farmer’s Almanac: Spring Planting Schedule (April) and Heirloom Seed Sources

I finally got to planting out my vegetables with the kids this weekend in the Children’s Garden. According to the Old Farmer’s Almanac, I made it just under the wire to plant many of my spring crops. In the early vegetable raised bed, I planted beets, onions, leeks, Swiss chard, carrots, lettuce, sugar snap peas, and broccoli raab.

In zone 6b, beets, broccoli, carrots, lettuce, parsley, onion sets, peas, and turnips need to be done now. The vegetables which can be started now until early to mid April are brussel sprouts, cabbage, cauliflower, collards, kale, leeks, radishes, spinach, and Swiss chard. I have planted a mix of heirloom and modern hybrids. The following are the heirloom varieties I’ve sown:

  • Lettuce Mix from Seed Savers Exchange of Amish Deer Tongue, Australian Yellowleaf, Bronze Arrowhead, Forellenschuss, Lolla Rossa , Pablo, Red Velvet, and Reine des Glaces
  • Bull’s Blood Beet purchased from Thomas Jefferson’s Monticello; the Monticello online store is a good source of heirloom early American plants and seeds
  • Nantes Carrot, also from Seed Savers Exchange; “Seed Savers Exchange is a nonprofit organization that saves and shares the heirloom seeds of our garden heritage, forming a living legacy that can be passed down through generations”

Related posts: How to Build Raised Vegetable Beds; Organically Preparing the Soil for Vegetable Planting; and Old Farmer’s Almanac Gardening 2008 Calendar

Follow-up: Old Farmer’s Almanac Spring Planting Schedule (May)

Hydrangeas: Why and How to Prune

Since my prior post about pruning a pee gee hydrangea, I have received numerous follow-up questions on why and how to prune other types of hydrangea. Most of the hydrangea in the garden are either mopheads or lace caps (pictured). These belong to the group Hydrangea macrophylla. Most macrophylla bloom on wood or stems more than a year old.

In late spring these can be pruned to remove dead wood. Since it is very difficult for me to distinguish between the dead and living wood in dormant hydrangeas, I wait until late April when the stems have begun to leaf out. Then I cut the dead wood at the base of the plant as far down as I can reach. This will allow plenty of new room for new shoots to emerge.
If your hydrangea macrophylla (pictured on Goldberry Hill) is getting too big and you want to reduce its size, prune it in mid summer after it has bloomed. You can either cut back the stems or just take out some of the longest wood at the base of the shrub. By waiting until July, you will have blooms and give the shrub time to prepare new growth to flower the following year. You do not have to do this type of pruning unless you need the space. Naturally hydrangeas develop a nice rounded shape.

Although I grow many heirloom hydrangea cultivars, I also love the new ones that have come out which bloom on old and new wood. Endless Summer and Blushing Bride are two such hydrangea. These are particularly useful in areas where hydrangea are marginally hardy. If your hydrangea gets killed to the ground during the winter, new stems can grow in the spring which will flower the same year. This also allows you to cut them to the ground or cut them back in early spring if you want to keep them smaller. Anabelle hydrangea are treated the same way.

Garden Bloggers’ Design Workshop – Container Plantings: Variety, Soil, and Care

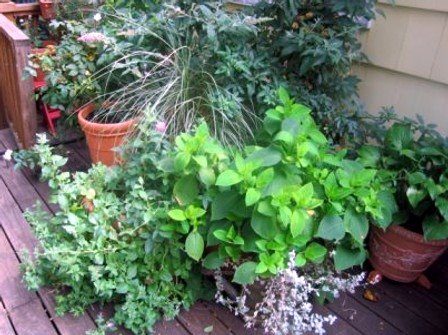
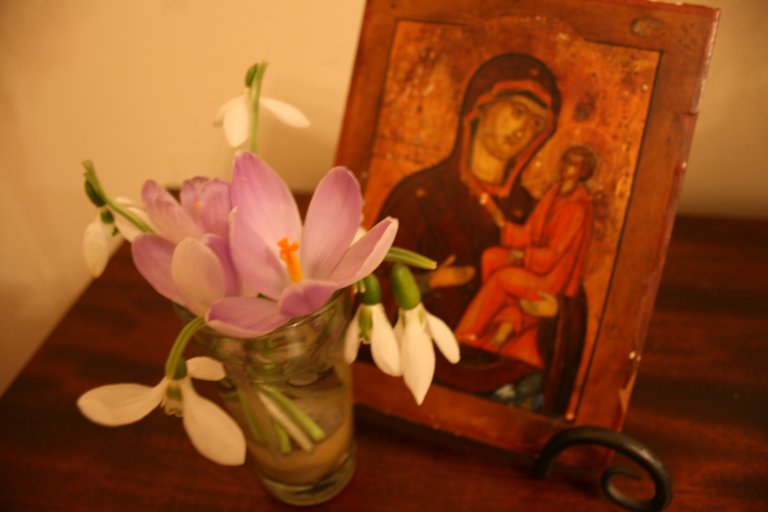
When I first moved to my current garden, I gardened strictly in containers for the first two years. I covered my 800 square foot deck with everything imaginable, leaving barely enough space for eating and sitting. During that time, I learned a lot about container gardening from both failures and successes. The three most important lessons I learned are: anything can grow in a container; the potting soil matters a great deal; and containers must be cared for and freshened up throughout the year.

Anything Can Grow In A Container
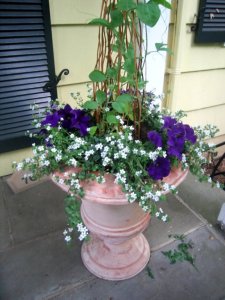
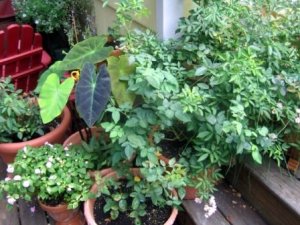
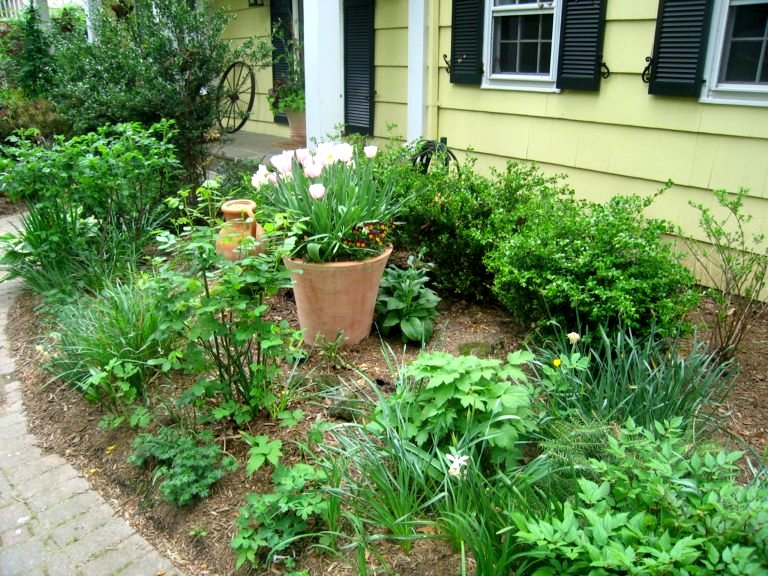
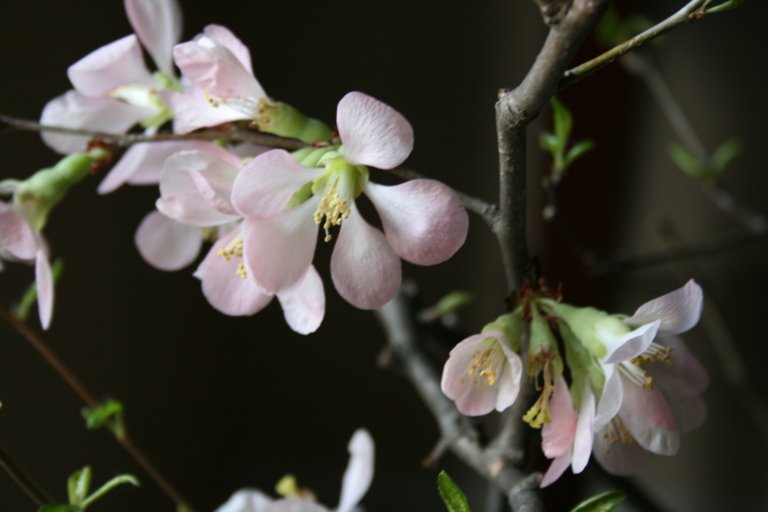
Anything that grows in the ground can grow in a pot. Containers are not just about annuals. More can be added to the garden by varying the contents of your containers. For example, two years ago I planted a culinary herb garden near our Children’s Garden. I found that it was too far from the house to duck out while cooking for a quick snip at an herb or two. So, last year I relocated the herb garden into pots on the deck. I have one huge pot with dill, chives, and basil; one with rosemary, tarragon, and various kinds of thyme; and a few smaller ones with different varieties of basil. I usually grow any new roses I want to try in pots: everything from the small Clotidle Soupert to the rampant climber Cecile Brunner. Evergreens, shrubs, grasses, vines, even trees can be grown in pot. I have had a lilac growing for five years now in a pot on the deck and each year the blooms get better and better.

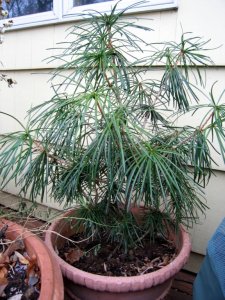
When growing shrubs and trees in pots for the long term, I’ve learned to treat them as really large bonsai plants. Each year, I renew their soil by removing some and adding organic amendments and manure. Also, every few years I trim off the outer most roots of the plants on one side to allow more root development without the danger of the plant becoming root bound. With this treatment, my lilac is still growing in its original planting pot.

The Potting Soil Matters a Great Deal
As regards the potting medium, consider again what will be growing in the pot. For tropical plants that like a lot of moisture like elephant ears, I use a heavy potting soil with lots of organic matter added to it that will hold moisture well. This year I am mixing the organic Gardeners’ Gold potting soil with dehydrated cow manure. For my roses, that mixture would kill them because the water would sit too long close to their roots. So for roses, I could take the same Gardeners’ Gold, but to it add perlite and cow manure so that the proportions are 1:1:1. This yields a rich, well draining soil. For a plant which likes leaner soil, take out the cow manure and use a less organic potting soil as a base.

Containers Need Year-Round Care
Once the container is planted, the care for that container does not stop there. Since containers are their one ecosystem, I must be very attentive to watering, particularly during heat waves, and fertilizing. Usually, I water every morning and sometimes again later if the weather has been particularly brutal. I also fertilize once a week with fish emulsion, sea weed emulsion, or a liquid complete fertilizer.

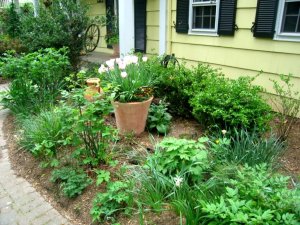
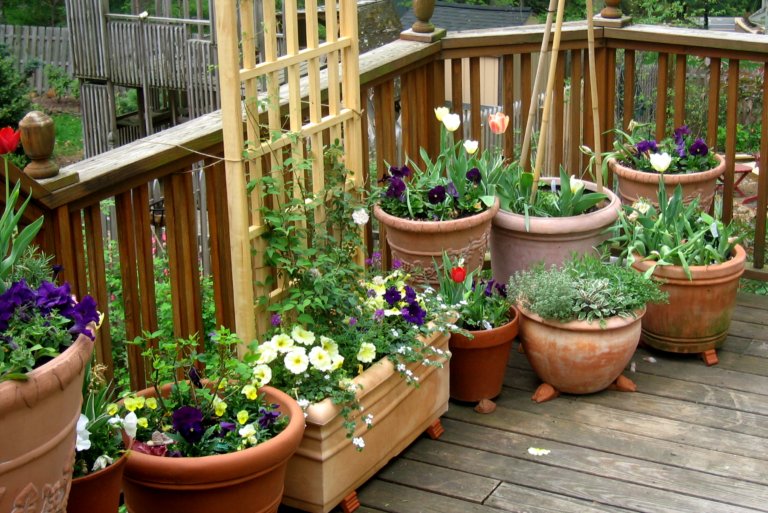
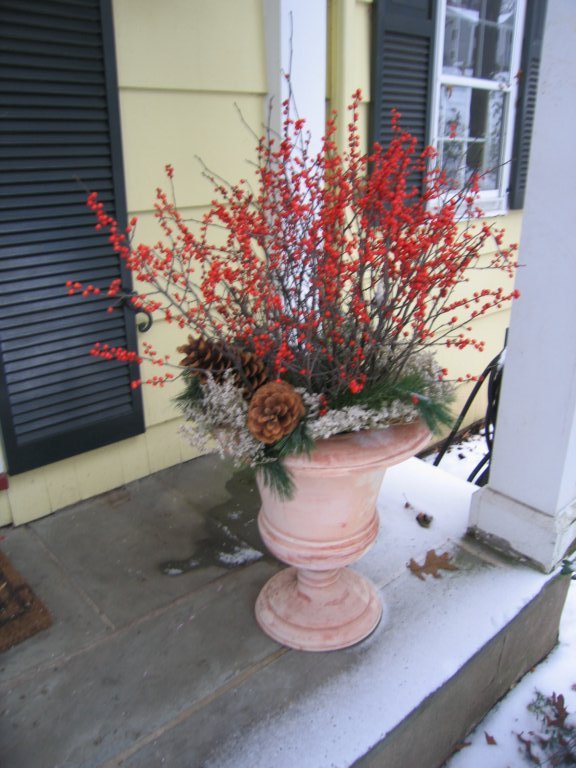
In the border, I often use containers which I can change with each season. The pot that sets in the front of our library began in the spring with a melange of daffodils, tulips, and muscari ringed with pansies. In June, I replaced the planting with red hot pokers, caladium, and a very tall phormium. Then in autumn, everything except the red hot poker came out. I add then a three foot tall yellow twig dogwood, pansies, and a few medium sized gourds. 
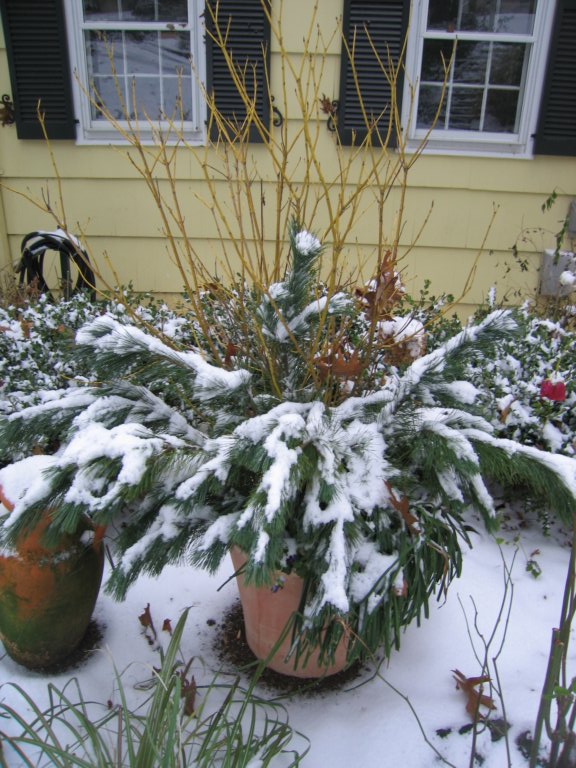
After Thanksgiving, I removed the gourds and replaced them with white pine boughs and trimmed back the leaves of the red hot poker for neatness. For this spring, I left the dogwood and the red hot poker. I have added pink primroses and pansies. The constant changing of the containers offers something new for each season and gives me more opportunity to experiment.
~
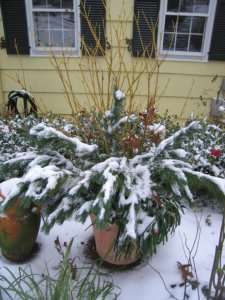
Before the frost, I also move my non-hardy containers that I want to over-winter either into the garage (roses, fig tree) or into the house (elephant ears).
~
*****

Containers add so much to my garden and plant knowledge. It is a great way to experiment with different plants and combinations without the commitment of planting in the ground. Also, seeing how a plant thrives in a pot with a specific planting medium helps me understand under what conditions it will thrive in the ground.
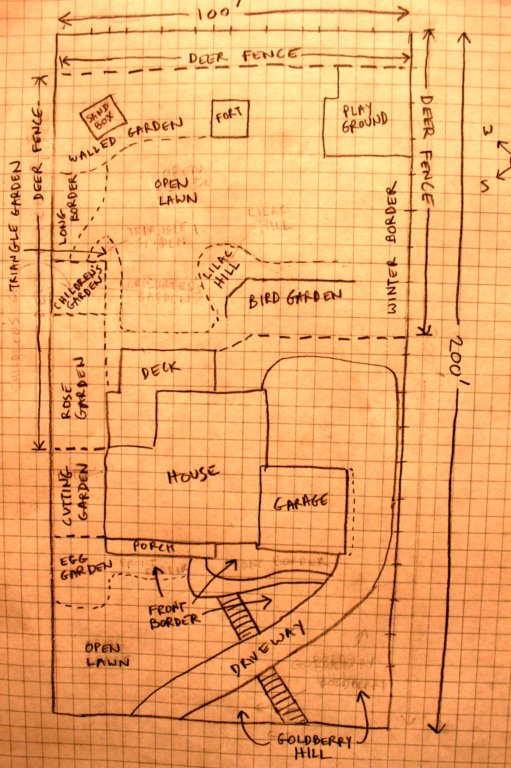
~

This post is a part of Gardening Gone Wild’s Garden Bloggers’ Design Workshop – Container Plantings: (http://www.gardeninggonewild.com/?p=940).
~

Garden Bloggers’ Bloom Day – March 2008: Early Spring Bulbs for New Jersey (Zone 6b)

May Dreams Gardens (http://maydreamsgardens.blogspot.com/) has a great monthly event where garden bloggers’ post pictures of what is blooming in their garden on the fifteenth of each month. For the past several months, I’ve been meaning to take pictures and post them on my blog to participate, but the day comes and goes and…

Well, March fifteenth came and went, and you can check out other bloggers’ posts here: http://maydreamsgardens.blogspot.com/2008/03/bloom-day-list-and-new-bloom.html. It’s wonderful to see what’s blooming in other bloggers’ gardens, particularly those in warmer gardening zones. Maybe on April fifteenth, I’ll post my pictures on time.

In northern New Jersey (zone 6b), it’s still pretty cold, but the early spring bulbs are out: snowdrops, winter aconite, and crocuses.

Snowdrops: Next year–Inspired by Wisley (http://www.rhs.org.uk/WhatsOn/Gardens/wisley/) in the UK–I want to plant thousands around my property. As I wrote in a prior post, “These small flowers are so cute and the first real sign that spring is coming. Given their size, you really can’t plant too many of them–think hundreds. Since I like to plant a lot, I buy my snowdrops wholesale from Van Engelen (http://www.vanengelen.com/index.html). Once they come up, I cut small bunches for vases.”

Winter Aconite: As I wrote in a prior post, “It took me a couple of years for me to get these established. I was most successful with bulbs from Old House Gardens (http://www.oldhousegardens.com/). I think the difference was that these bulbs dry out very easily and Old House Gardens coats the bulbs in a horticultural wax to prevent this. If you know someone with an established clump, it’s best to beg a few in the green and replant them immediately in your garden.”

Crocuses: Pictured is crocus tommasinianus, a smaller and early blooming crocus. The squirrels and chipmunks in my neighborhood love to eat crocus bulbs, but seem to leave these ones alone. The larger crocuses will bloom in several weeks. Like my snowdrops, I also buy these bulbs from from Van Engelen (http://www.vanengelen.com/index.html).

Gardening with Children: Replacing the Playground Mulch with Cedar Mulch

Last year, we put down a fresh layer of playground mulch in our children’s play area (pictured). However, the playground mulch was made of pine and this was not a good thing.

Because the play area is at the bottom of the hill, rain washed down to the play area and the playground mulch became moist. By the end of the season, the playground had become a mushroom patch and the children refused to play there.

So last week, we skipped the pine playground mulch and put down thirty large bags of high quality cedar mulch. For the kids’ sake, we hope the cedar mulch keeps away the mushrooms.

Gardening Blogs and Groundhog Control: Garden Desk and Veggie Gardening Tips

In my ongoing research on how to fight my the battle with my next door neighbor’s groundhog, I came across two blogs from experienced organic vegetable gardeners: Garden Desk (http://www.gardendesk.com/) and Veggie Gardening Tips (http://www.veggiegardeningtips.com/).

You can read two of their entertaining and informative groundhog posts here:

Garden Desk tries a scarecrow – http://www.gardendesk.com/2007_08_01_archive.html

Veggie Gardening Tips talks with his groundhog (before trapping him/her) – http://www.veggiegardeningtips.com/conversations-with-a-woodchuck/#comment-55557

*****

Follow-up: Doug over at Doug’s Green Garden (http://blog.douggreensgarden.com/) just gave me another “organic” suggestion (no guns, poisons or traps) that we’ll have to try –
http://www.beginner-gardening.com/groundhogs.html

Forced Branches: Follow-up Pictures of Quince, Ceris (Redbud), and Pussy Willow

As a follow-up to my recent post on forced branches, here are some additional pictures of quince, ceris (redbud), and pussy willow that I took this morning.

For the original post on forced branches, click here:
http://heirloomgardener.blogspot.com/2008/02/forced-branches-quince-crabapple-willow.html

For a prior post on forcing forsythia and bulbs, click here:
http://heirloomgardener.blogspot.com/2006/02/forcing-forsythia-and-bulbs-of-all.html