Raised Vegetable Beds: Organically Preparing the Soil for Planting

As a follow-up to my prior post about how to build raised vegetable beds, we are now organically preparing them for spring planting.

In the picture, the bed in the back is in the “before” stage and the bed in the front is in the “after” stage.

In the “before” stage, you can see that the box which was previously filled with compostable garden waste has settled about 6-12 inches over the winter. Some of the settling is due to the breaking down of the garden waste. The cover crop of winter rye was sown very late, in November I think. Over the winter it grew to about 6 inches tall.

In order to prepare the box for planting, I turned over the winter rye, then added bumper crop and top soil to re-fill up the box. Under this covering, the winter rye will decompose adding more organic material to improve the soil for growing vegetables.

Our vegetable plot is rather small for our family, but we hope through growing crops closely together that we will get some meals from the garden and a great learning experience for our children.

Maintaining a Pebble Path and Keeping the Groundhog Out of the Cutting Garden

It was a wonderful day in the garden. The weather was warmish in the sun and there was very little wind. My husband and I worked today on the path in the Egg Garden that leads to the Cutting Garden. First, we added more pebbles–ten fifty pound bags or river stones–which is an annual necessity to maintain a good looking pebble path. Then, we replaced the temporary groundhog deterrent I had put down last year at the gate.

In the Cutting Garden, I grow some of the groundhog’s favorite foods: Queen Anne’s lace, purple cone flower, and phlox. Knowing this, when I created the Cutting Garden, I dug around the border of the fence about two feet deep to install a chicken wire barrier which the groundhog couldn’t get through. You can see some of this chicken wire sticking up out of the earth in the picture above.

However, one spot was left without the barrier: the area where the gate goes into the garden. It took a few years, but the groundhog, who lives next door, discovered last year that he could dig under the gate. Looking for some immediate protection, I simply pegged a piece of chicken wire on the ground under the gate extending one foot on each side. I suppose he found enough food elsewhere that he didn’t take the effort to dig underneath this barrier, but it had two problems: it was not attractive and it easily caught on the gate or your foot as you passed through.

Our project today was to replace the temporary chicken wire with three rows of six by six inch terracotta blocks that we were using for stepping stones in other places in the garden. While digging the space for the new barrier, I discovered more terracotta blocks and chicken wire that I must have buried in an earlier attempt. We placed the new blocks level with the fence (almost touching) over all the existing material for extra protection.

I don’t know why it took me so long to do this. Everything looks a lot neater now and I will no longer have to worry about tripping as I leave and enter the garden.
~
For a picture of the groundhog barrier around my vegetables, click here:
http://heirloomgardener.blogspot.com/2007/12/raised-vegetable-beds.html
~
For a prior post on the path to the Cutting Garden, click here:
http://heirloomgardener.blogspot.com/2008/01/egg-garden-path-makeover-replacing.html
~
For a prior post on keeping deer out of the backyard, click here:
http://heirloomgardener.blogspot.com/2007/12/keeping-deer-out-of-backyard-deer-fence.html

Gardening with Children: How to Build a Sandbox

A tried and true way to make your garden inviting for children is to place a sandbox in it. After the 100+ year old oak tree crushed our last sandbox, my husband built a bigger and better one. Here’s how he did it:

1. Select a location. You need a flat or a relatively flat location. We have relatively few flat locations on our property, so we placed the sandbox in the Walled Garden. With the oak and tulip trees gone, our sandbox is now in full sun, though we preferred the part sun/part shade. We are growing some new trees around the sandbox which should provide shade in 25+ years.

2. Determine the size. When it comes to sandboxes, our kids seem to think that bigger is better. Our sandbox is eight feet by eight feet, which is big enough for all of our kids and their friends to dig and build to their hearts’ content.

3. Gather together your materials and tools. Here’s what we used:

  • 6 two by eight foot boards (we’ve seen instructions using two by fours or two by sixes, but these are too shallow) cut to your desired length
  • one box of deck screws
  • one roll of landscaping fabric
  • 40+ fifty pound bags of play sand
  • cordless drill
  • staple gun

4. Construct the sandbox. Using your cordless power drill and deck screws, construct the walls of your sandbox. The walls should be parallel so that the ends are eight feet long and the sides are eight feet four inches. Attach the seats on the top at each end.

5. Line the sandbox. In order to prevent anything growing up from the ground into your sandbox as well as to allow water to drain out out of it, lay landscaping fabric on the bottom of your sandbox and using your staple gun, staple it into the inside walls.

6. Fill the sandbox. Okay, here’s where the heavy lifting comes in. You need play sand–a lot of play sand. Initially, we put in 40+ fifty pound bags of play sand. If you have active kids, be prepared to replenish the sand once or twice a year.

*****

Note: if you have active cats on your property, you may want to think about adding a sandbox cover.

Related posts: How to Build a Playhouse (Fort), Ten Tips for Planning a Children’s Garden

How to Prune Roses, Part III: Why Prune?

Every free moment I get now, I’m out pruning roses. This month I am working on my portlands, hybrid perpetuals, hybrid musk, and polyanthas. While I was outside pruning today, my oldest son–my most observant and handy child in the garden–asked me, “Why do you prune them?” What a great question. If we think about why we’re pruning, it will help us to get the most out of the job.
~
Pruning for Size
~
First, I prune to control the size of my roses. One of the criticisms against old roses is that they take up too much space compared to modern ones. Yet, you can grow them as smaller shrubs. The Reeves-Reed Arboretum (http://www.reeves-reedarboretum.org/) in Summit, New Jersey has a great collection of old roses in a small space. I observed that they prune these roses by half each year which keep them to a size of about 3 feet by 3 feet, instead of the usual 5 by 6. In my garden, I grow Russell’s Cottage (http://heirloomgardener.blogspot.com/2007/12/seven-sisters-rose.html, pictured above). It is reported to grow to between 6 to 12 feet high with equal girth. By pruning, I have kept it to about 4 feet tall and 3 feet wide.
~
The key to old shrub roses is accepting that these roses are really tough. They have survived this long because they can regenerate themselves and resist disease. It took awhile, but now I am no longer afraid of cutting them way back. By doing so, I get to enjoy a greater variety of roses in a small space.
~
Pruning for Blooms
~
Second, I prune my repeat bloomers to stimulate growth and better, more continual blooming. The early spring pruning gets rid of thin, unproductive wood in the roses which drain energy away from flower production. The rule of thumb is that you should cut out any growth less than the diameter of a pencil. I also find it helpful to ask myself if the branch could support a rose blossom. If not, then prune it out. Lastly, remember that the stems as they come off the prior branch get smaller and smaller. If there is doubt about rather to keep something or not, ask yourself if the branch which comes off of it is too small to be productive. Very rarely will you regret pruning out questionable wood.
~
Without needing to sustain the wood you remove, the rose can give more energy to blooming. Oftentimes, if a repeat blooming rose goes a season where the blooming seems less prolific, cutting it back by half will remedy the situation. I find that portlands, in particular, need a firm pruning hand every three to four years. As they get larger, the frequency of their flushes decreases. With lots of young wood, shrubs like Rose de Rescht (http://heirloomgardener.blogspot.com/2007/11/rose-de-rescht.html, pictured above) and Jacques Cartier (a.k.a. Marchesa Boccella, pictured below), will bloom almost continuously from June to October.
~
While removing the unproductive wood, all dead and damaged wood should also be removed. This wood can harbor disease and will take energy away from the shrub. Finally, you can cut away branches that are congesting the center of your shrub. It is good to lighten it up so that air may easily pass through.
~

*****

~
With these two main ideas in mind, my pruning is directed and it’s easier to know what cuts to make: I prune to keep the rose in its allotted space and to direct more of the plant’s energy to make big, beautiful blooms that keep on coming.
~
For “How to Prune Roses, Part I: An Introduction” click here: http://heirloomgardener.blogspot.com/2008/02/how-to-prune-roses-part-i-introduction.html.
~
For “How to Prune Roses, Part II: Old Rose Pruning Secrets” click here:
http://heirloomgardener.blogspot.com/2008/03/how-to-prune-roses-part-ii-old-rose.html.

An Invaluable Tool: How to Keep a Garden Journal

Now is a great time to begin a garden journal if you have not already. I find the garden journal is an invaluable tool to help me keep track of my garden and plan for the future. I started keeping a garden journal about six years ago. Before then, I would keep notes at random on successes, failures, and sources of inspiration. These I would easily misplace and forget about. Keeping a regular journal is easy once you get in the habit of it.

Choosing the Notebook

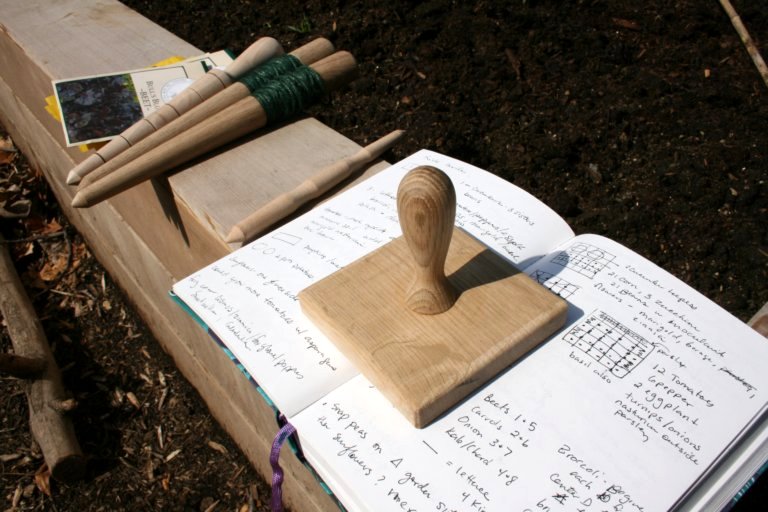
Choosing the notebook is an important step because the journal has to suit the way you want to use it. Here are some suggestions:

1. I like the blank books with unlined pages. The unlined pages allow me to draw pictures, make notes, create list, and mock up future design ideas.

2. If you are prone to leaving your book out in the rain, I have found waterproof garden notebooks online at Acorn Naturalists (http://www.acornnaturalists.com/).

3. As I always take my notebook with me into the garden, I choose a cover which will not show dirt easily. Frequently, it is right next to me as I’m plant bulbs or annuals, so I can quickly write down what I’m planting and where.

4. As you will probably want to take your journal with you to visit parks, gardens, and nurseries, the size of your journal should easily fit into the pocket, backpack, or bag you’re most likely to carry. However, it should also be large enough to keep a year’s worth of notes.

5. I avoid spiral bound journals. My first year I had a spiral bound journal which by September was in shambles.

Recording Bloom Times

I begin each January with a new journal. That way if I want to compare how spring looked and felt two years ago, I simply pull out the journal for 2006. At the back of my journal, I keep a list of what is blooming in my garden and in local gardens in my area. This way if I have a lull in the garden or if one part to season seems lackluster as it relates to color, I can look back to see what plants could fill in the gap. I wanted to plant my long border to peak in late August and September. By looking at my bloom record, I was able to choose plants which would peak then. Instead of relying on books and plant tags, I knew when a particular plant bloomed in my immediate locale.

Garden Planning

The journal also helps me keep track of what I plant and where. When writing about a plant, I underline the plant name so that later I can quickly locate notes on a particular plant at a glance. I note where I bought the plant or from whom I received the plant. If I see a plant needs division, I make a note of it for next spring. I sometimes find that plants will grow very differently in my soil which I record for future reference. The things to record are many: pest problems, times of pruning, fertilizer routines, weather, drought, vegetable yields, cultural notes, future improvements, advice from other gardeners, and great nurseries. If you love poetry or observing nature, this is a great place to put your poems and reflections.

In conclusion, keeping a garden journal is one of many enjoyable aspects of gardening. Once you get in the habit of it, you will love it.
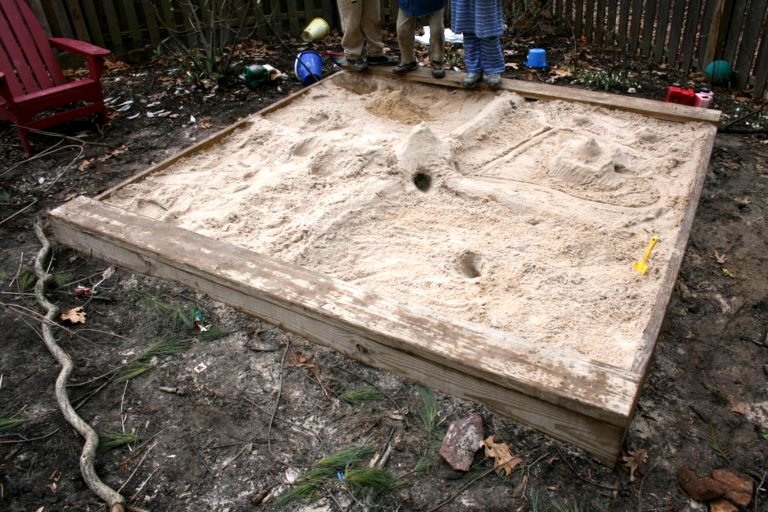
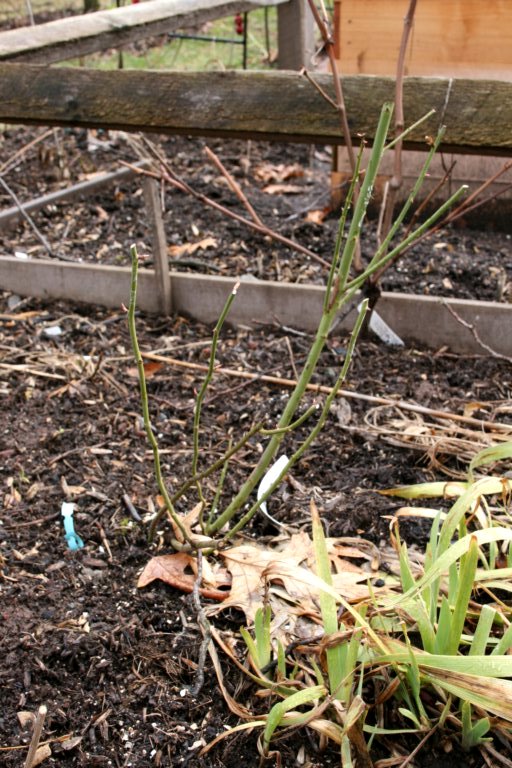
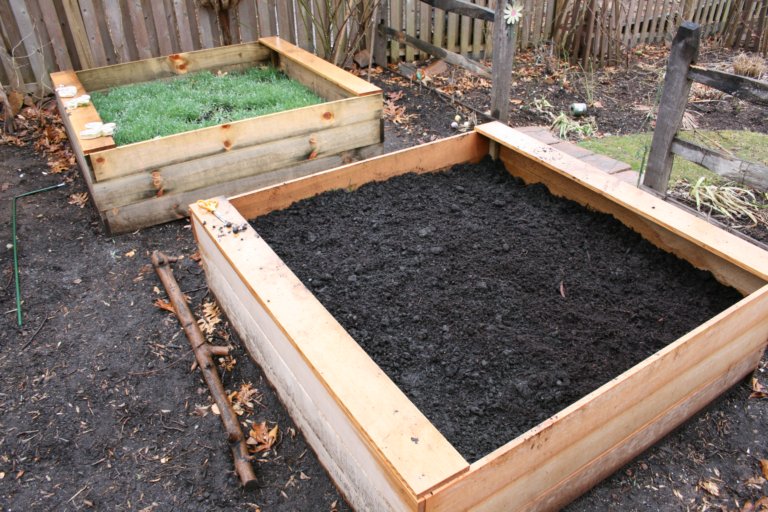
Organic Rose Gardening: Dormant Oil Application for Pest Prevention

Dormant oil application to my roses is the most important pest prevention task for me as an organic rose gardener. The dormant oil is horticultural oil diluted in water. Horticultural oil is available at most nurseries. As a dormant spray, the horticultural oil is less diluted than it is when its used after plants have leafed out.

The importance of the horticultural oil for the organic rose gardener is that it suffocates many pest and their eggs before they become active as the weather warms up. It’s good as a control for aphids, spider mites, scale, sawfly, and thrips.

The dormant oil should be applied all over the canes of the roses. The easiest time to do it is after pruning because all the unnecessary wood has been removed; but, if you will not complete your rose pruning until the leaves have already begun to emerge, do it now.

The only brand that I know of is Bonide All Seasons Horticultural & Dormant Spray Oil (see photo below).

http://rcm.amazon.com/e/cm?t=heirlgarde-20&o=1&p=8&l=as1&asins=B000BX4RNW&fc1=000000&IS2=1&lt1=_blank&lc1=0000FF&bc1=000000&bg1=FFFFFF&f=ifr

For related posts on Rose Pruning, see:

http://heirloomgardener.blogspot.com/2008/02/how-to-prune-roses-part-i-introduction.html

http://heirloomgardener.blogspot.com/2008/03/how-to-prune-roses-part-ii-old-rose.html

How to Prune Roses, Part II: Old Rose Pruning Secrets from Mottisfont Abbey and John Scarman

It was fifty-some degrees in Chatham today, so it was a perfect day to go out and continue my rose pruning. Today, I pruned another nineteen of my 150+ roses over two hours, including Ferdinand Pichard, pictured after his pruning (http://heirloomgardener.blogspot.com/2007/11/tbd_492.html, pictured in bloom).

As a follow-up to my prior post, “How to Prune Roses, Part I” (http://heirloomgardener.blogspot.com/2008/02/how-to-prune-roses-part-i-introduction.html), here is some additional, hard-earned advice on rose pruning.

When I first started growing old roses, I followed the traditional pruning instructions to prune once bloomers after their summer flush. This did not work. Each spring, as the roses pushed out new growth and became laden with blossoms, the shrubs would splay such that they obstructed the paths in the garden, toppled over the perennials around them, and often brought each other down. Those that weren’t laying on the ground remained upright only with the support of many bamboo stakes. There had to be a better way.

I found the answer in a book called Gardening With Old Rosesby John Scarman published in 1996. He has vast experience with old roses through his work at Rosemany Verey’s Barnsley House (http://www.barnsleyhouse.com/THEGARDENS.html), with David Austin (http://www.davidaustinroses.com/), and at his own nursery which specializes in old roses (http://www.cottagegardenroses.com/).

Scarman prunes his old roses three times a year. The first pruning is done during the dormant season and the roses are cut to what he calls pruning height. This is a little below the height you want the roses to be during the summer and it is at the height where there are enough strong canes on the outside to provide support to the more flexible inner canes. The second pruning is done just as the buds are showing color. Its aim is to remove non blooming vegetative growth. This showcases the flowers and redirects the rose’s energy to produce more stems. The third pruning happens in late summer where the roses are pruned back to where they flowered and are shaped.

For more information on how to do the first pruning and to see it done, there is an invaluable DVD available from Ashdown Roses (http://www.ashdownroses.com/) of a seminar they held with David Stone from Mottisfont Abbey (http://www.nationaltrust.org.uk/main/w-vh/w-visits/w-findaplace/w-mottisfont/), the garden of Graham Stuart Thomas. He demonstrates the technique to get totally self supporting shrubs with no bamboo supports in sight.

*****

For “How to Prune Roses, Part I: An Introduction” click here:
http://heirloomgardener.blogspot.com/2008/02/how-to-prune-roses-part-i-introduction.html.
For “How to Prune Roses, Part III: Why Prune?” click here:
http://heirloomgardener.blogspot.com/2008/03/how-to-prune-roses-part-iii-why-prune.html.

Heirloom Gardener Featured on The Star Ledger’s NJ.com


Everyday, The Star-Ledger’s NJ.com features a Blog of the Day on a broad spectrum of topics. I was flattered to find out that Heirloom Gardener is today’s Blog of the Day.

Kelly Heyboard writes: “Heirloom Gardener is a blog by an avid gardener in Chatham…Her picture-filled blog is full of practical advise on everything from pruning roses to finding a good nursery in Morris County.” For the full article, click here: http://blog.nj.com/jerseyblogs/2008/03/blog_of_the_day_heirloom_garde.html. Thank you Kelly!

The Star-Ledger’s writers also maintain their own gardening blog here: http://www.nj.com/homegarden/garden/. Recent posts include articles on the current Philadelphia Flower Show and keeping a gardening journal.

For a prior post about living and gardening around Chatham, New Jersey, click here:
http://heirloomgardener.blogspot.com/search/label/Chatham

How to Make the Perfect Soil Mix for Seed Sowing

With spring just around the corner, sowing seeds offers me further hope that I will soon be in the garden. One of the most important factors in the success of my seed sowing is the quality of the soil that I use.

With seeds, it’s a tricky balance you need to strike: when the soil is too heavy, seeds which take a long time to germinate are at risk of rotting and the seedlings succumb to more fungal disease; and when the soil is too light, the seeds dry out too quickly. I have tried various store bought seed starting mixes, but often even they are too heavy, so to provide proper drainage and aeration, I now mix my own.

If I am only sowing a few seeds, I will use a doctored cactus mix. I buy soil labeled cactus mix and lighten it by adding perlite at a ratio of 2 parts cactus mix to 1 part perlite. If I have many seeds to start, I will make my own starting mix of equal parts coarse sand, perlite, and peat moss.

Once the soil is prepared, I gently fill my containers, firmly tamp them down, sow my seeds, add more sand to cover on top, mist my containers, and I’m done.

Related posts: Raised Vegetable Beds – Organically Preparing the Soil for Planting; and How to Build Raised Vegetable Beds